kdx450 Restoration in Oz

Discussion specific to the various air-cooled KDX models sold in the USA
KDX Geoff
Supporting Member I
Supporting Member I
Posts: 156
Joined: 11:29 pm May 26 2013
Country:

Re: kdx450 Restoration in Oz

Post by KDX Geoff »

Jason wrote:Looks terrific!!

Is that wheel fully built? The spoke nipples don't seem to be pulled down??
Thanks Jason.

These are the spokes and nipples that came out of this wheel. The spokes are tensioned but l did pull a nipple out and check the seating/alignment. The rim is a Sun rim and is thicker than the standard rim so the nipples dont protrude through the rim as far.

Cheers

Geoff
KDX Geoff
Supporting Member I
Supporting Member I
Posts: 156
Joined: 11:29 pm May 26 2013
Country:

kdx450 Restoration in Oz

Post by KDX Geoff »

Back brake refurbished

Image
Image

New rear sprocket and tyres on the way. I'm not far off getting this bike back on the ground !
User avatar
KDXGarage
KDXRider.net
KDXRider.net
Posts: 14652
Joined: 06:45 am Nov 01 2004
Country: United States of America
Location: AL, USA
Has thanked: 4 times
Been thanked: 8 times
Contact:

Re: kdx450 Restoration in Oz

Post by KDXGarage »

You must have a lot of free time. :grin:

That looks great.
Thank you for participating on kdxrider.net. :bravo:
To post pictures from a device: viewtopic.php?f=88&t=24128
KDX Geoff
Supporting Member I
Supporting Member I
Posts: 156
Joined: 11:29 pm May 26 2013
Country:

kdx450 Restoration in Oz

Post by KDX Geoff »

Thanks Jason :-)


For the first time since Feb the bike is almost ready to stand on its own 2 wheels.

Image

l still need to plate a few used spokes for the front wheel, finish painting sanding painting the pipe, mount the rear guard (which means I'll have to actually drill holes in my brand new Stilmotor guard) and sort out the ignition with the kdx250 wiring. I'll grab a front wheel off another bike, l cant wait to sit on it ! :cool:
KDX Geoff
Supporting Member I
Supporting Member I
Posts: 156
Joined: 11:29 pm May 26 2013
Country:

kdx450 Restoration in Oz

Post by KDX Geoff »

Disconnected the rear suspension so l could check the rear wheel alignment in the guard (fender) prior to drilling, lm sure everybody does this.....

Image

The guard (fender) sits low enough so l can still use the rear frame loop as a grab handle.

I'm using a 175 shock and spring atm and it feels nice and plush and not to firm or soft. See what its like when l can ride.
Last edited by KDX Geoff on 10:10 pm Nov 28 2014, edited 1 time in total.
User avatar
KDXGarage
KDXRider.net
KDXRider.net
Posts: 14652
Joined: 06:45 am Nov 01 2004
Country: United States of America
Location: AL, USA
Has thanked: 4 times
Been thanked: 8 times
Contact:

Re: kdx450 Restoration in Oz

Post by KDXGarage »

Which guard are you referring to?
Thank you for participating on kdxrider.net. :bravo:
To post pictures from a device: viewtopic.php?f=88&t=24128
KDX Geoff
Supporting Member I
Supporting Member I
Posts: 156
Joined: 11:29 pm May 26 2013
Country:

kdx450 Restoration in Oz

Post by KDX Geoff »

:grin:
Jason wrote:Which guard are you referring to?
Fender ? :grin:
KDX Geoff
Supporting Member I
Supporting Member I
Posts: 156
Joined: 11:29 pm May 26 2013
Country:

kdx450 Restoration in Oz

Post by KDX Geoff »

Well, this is getting very real.

Back on the ground and the rear feels good and that saggy arse is gone too but the front is too soft. The previous US owner had long spacers in the fork which l shortened because the springs were in spec for length. lm going to use a set of 250 springs in the front as they're longer and l dont need to have air pressure in the 250 l ride forks.

Image

lm currently zincing spokes for the original front wheel so the disc on the front will go.
User avatar
KDXGarage
KDXRider.net
KDXRider.net
Posts: 14652
Joined: 06:45 am Nov 01 2004
Country: United States of America
Location: AL, USA
Has thanked: 4 times
Been thanked: 8 times
Contact:

Re: kdx450 Restoration in Oz

Post by KDXGarage »

Fender it is. :grin:

Goodbye disc.

On the fork springs, have you looked at KLR650 springs?

Race Tech may make some springs that will work.
Thank you for participating on kdxrider.net. :bravo:
To post pictures from a device: viewtopic.php?f=88&t=24128
KDX Geoff
Supporting Member I
Supporting Member I
Posts: 156
Joined: 11:29 pm May 26 2013
Country:

kdx450 Restoration in Oz

Post by KDX Geoff »

Just using parts in the shed. I've fitted a 80mm preload spacer on top the standard spring as l want to run nil air pressure and put an extra 20mm of oil to go to 130mm from the top.


Front brake cable before a bit of love.
Image

Image

Image


l have NOS spokes and old spokes that Ive restored in this wheel. All the nipples are used that have been restored also.
Image

Image

Image
User avatar
KDXGarage
KDXRider.net
KDXRider.net
Posts: 14652
Joined: 06:45 am Nov 01 2004
Country: United States of America
Location: AL, USA
Has thanked: 4 times
Been thanked: 8 times
Contact:

Re: kdx450 Restoration in Oz

Post by KDXGarage »

The awesomeness continues.

Pretty cool to see some USA made rims.
Thank you for participating on kdxrider.net. :bravo:
To post pictures from a device: viewtopic.php?f=88&t=24128
User avatar
Sullyfam
Gold Member
Gold Member
Posts: 459
Joined: 12:19 am Dec 10 2013
Country:
Location: Fort Worth, tx

Re: kdx450 Restoration in Oz

Post by Sullyfam »

The precision is surgical and the results artful. Masterpiece in the making. Can't wait for the next update. Thanks for sharing!


Sent from my iPhone using Tapatalk
User avatar
JoKDX220r
Gold Member
Gold Member
Posts: 201
Joined: 04:04 pm Oct 03 2008
Country:

kdx450 Restoration in Oz

Post by JoKDX220r »

KDX Geoff, your restoration is awsome, thanks for all the tips you show in this thread, one question : what did you use to clean cable and boots ?
Thanks
KDX Geoff
Supporting Member I
Supporting Member I
Posts: 156
Joined: 11:29 pm May 26 2013
Country:

kdx450 Restoration in Oz

Post by KDX Geoff »

Thank you blokes :-)
JoKDX220r wrote: one question : what did you use to clean cable and boots ?

Thanks
Do you mean the cable end at the brake ?


Here's a trap for young players....

In the US you have a odometer and trip meter.

Image

In Australia, our kdx's have speedo's to comply with our design rules for road rego. That's what lm putting on my bike so it looks like the other kdx's l have.

Image

And after fitting the recoed original front brake cable to the bike l find it fouls up on the speedo and wont let the forks fully extend because your front brake cable is a tad shorter than ours, just enough to foul on the speedo. l have a spare 175 cable to reco and fit to eliminate that problem.

There's not much in it, but enough to make a difference.

Image
KDX Geoff
Supporting Member I
Supporting Member I
Posts: 156
Joined: 11:29 pm May 26 2013
Country:

kdx450 Restoration in Oz

Post by KDX Geoff »

If you want to improve he appearance of your bike you can't beat replicating OEM zinc plating. DIY means that l can plate whatever piece l want at a time to suit. Its not particularly difficult or expensive and you can plate to whatever standard you want.

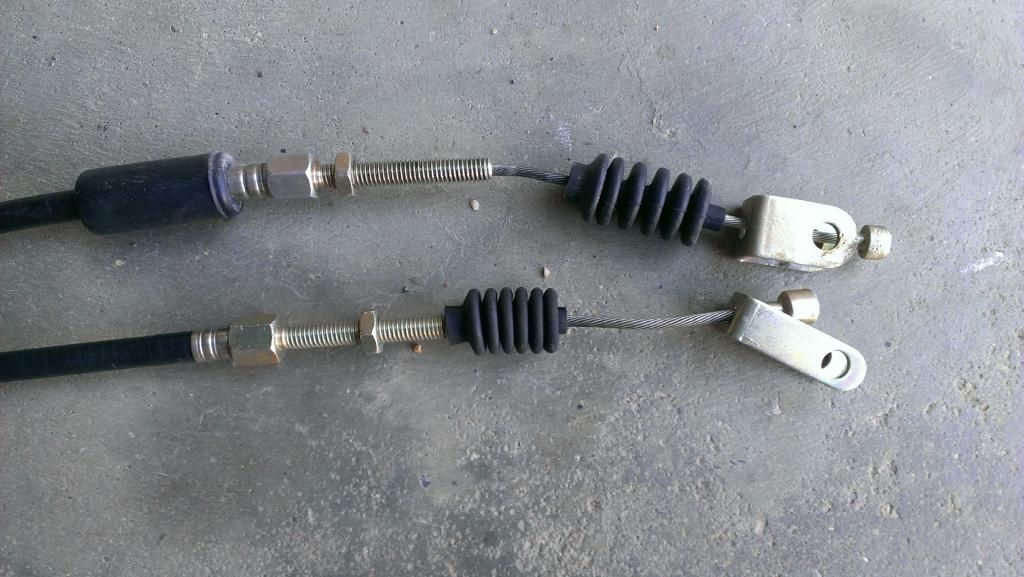
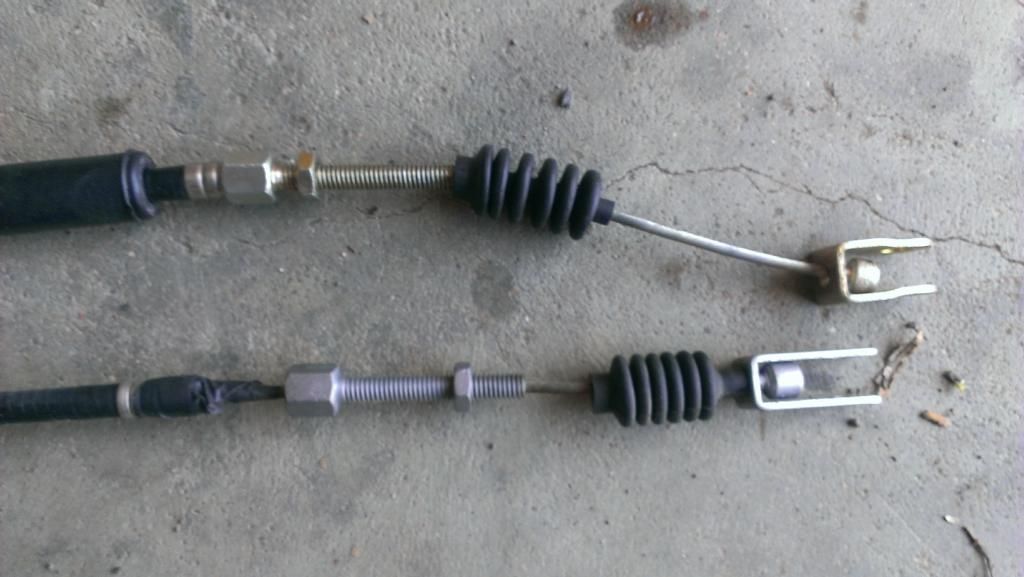
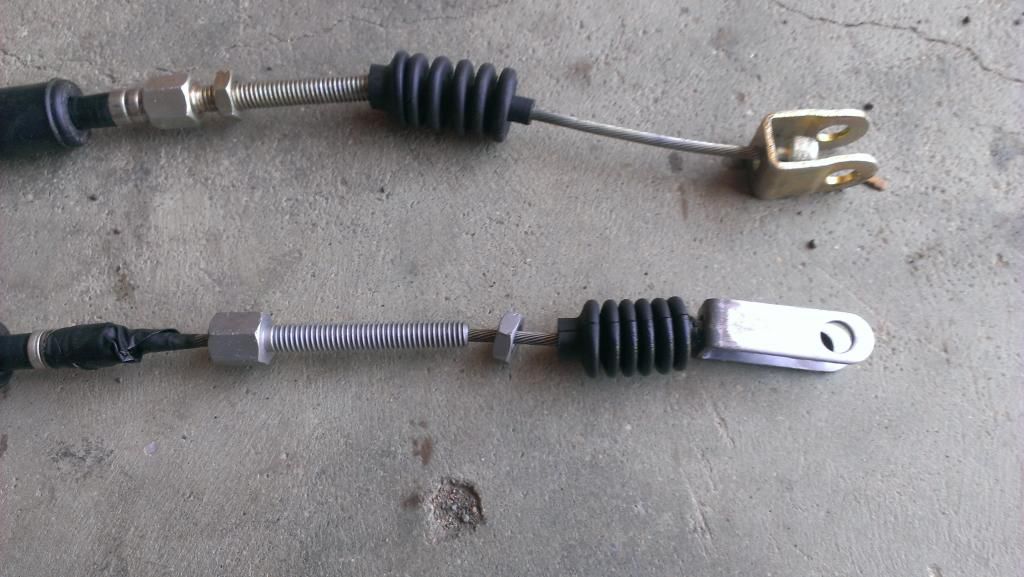
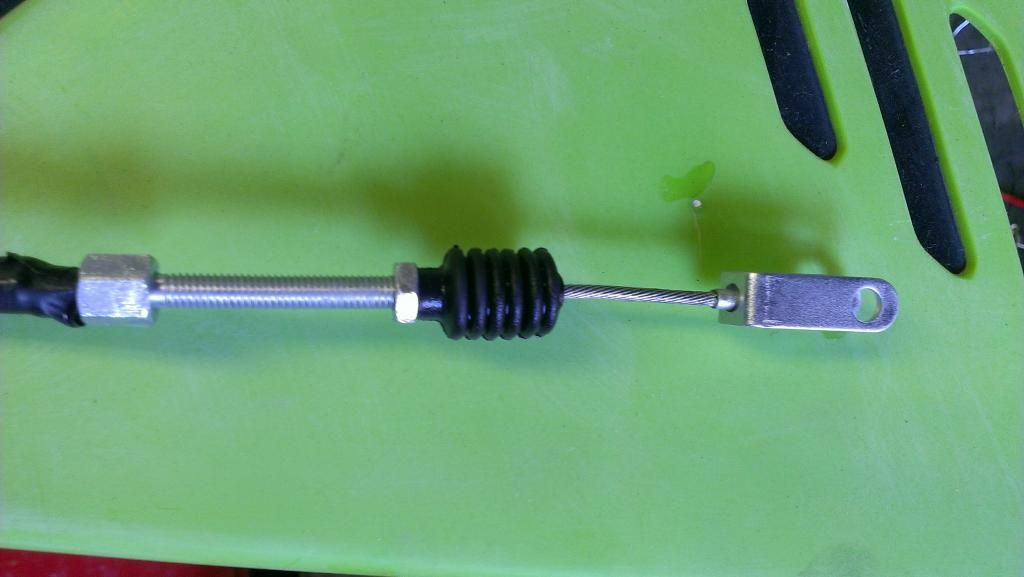
The top cable is the shorter US front brake cable and below is the AU cable. First degrease and bead blast.
Image

This is a mild solution of pool (hydrochloric) acid. It removes the old zinc platinf but wont move rust or oil/grease so your part must be very clean beforehand.
Image

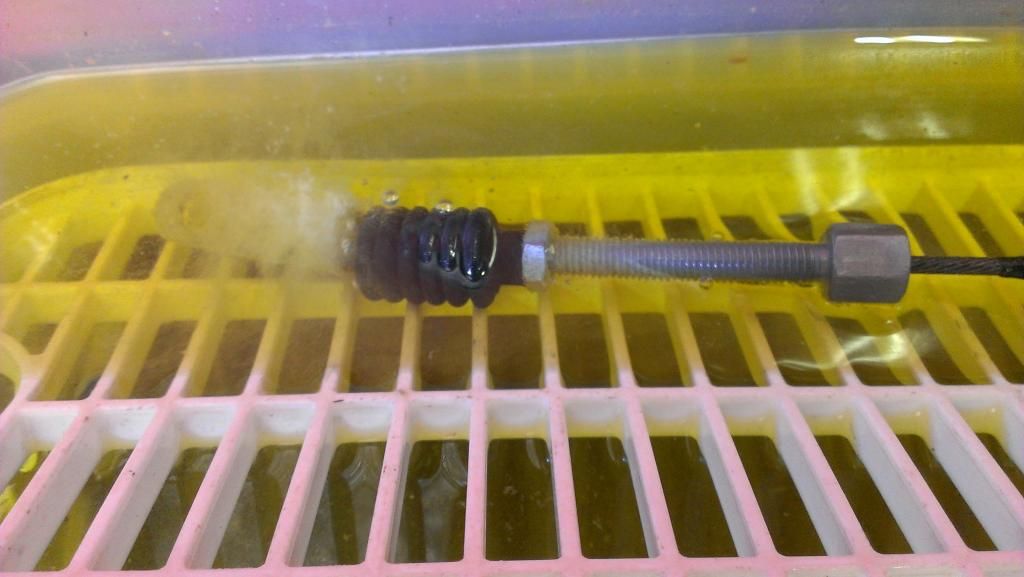
It doesn't look any different to the above shot but with the zinc removed surface rust can start in a few hours.
Image

The rubber gloves go on now because the oil in your skin can affect the finish. The parts need to be scrubbed with a detergent super clean and rinsed in distilled water as the chemicals in tap water apparently muck things up.
The disc on the right is the zinc anode which gives the zinc coating to the part through the electrolyte (liquid) via an electric current.
Image

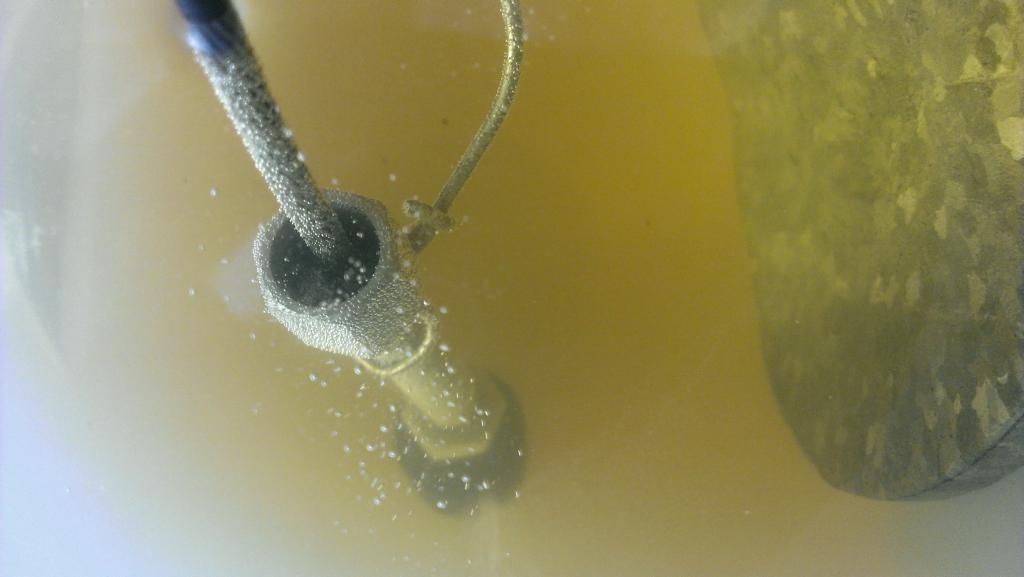
l dont go over the top wiring bits up, as long as they're touching it all works well
Image

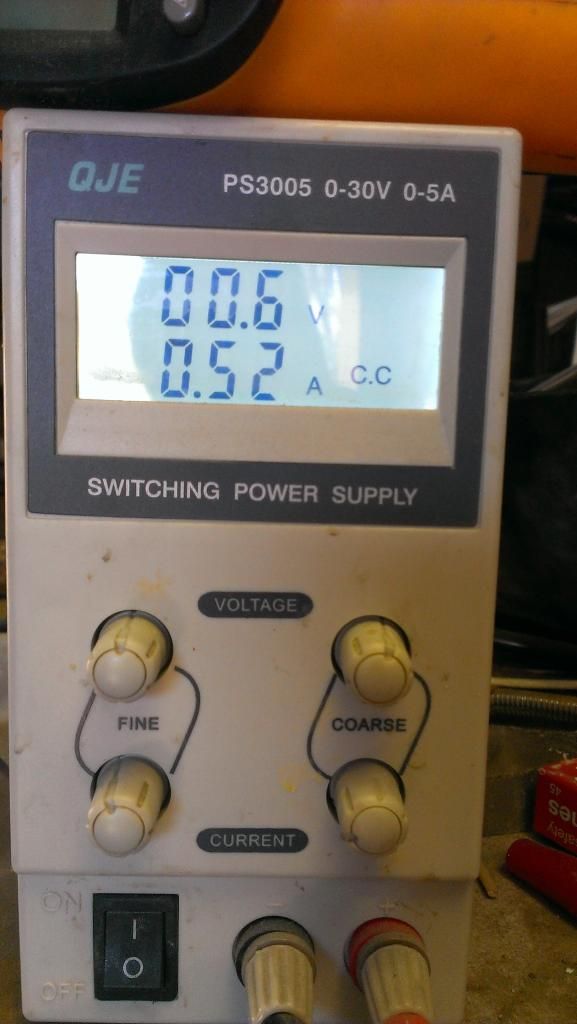
l put half an amp into these parts for around half an hour.
Image

Out comes the part shiny and new
Image

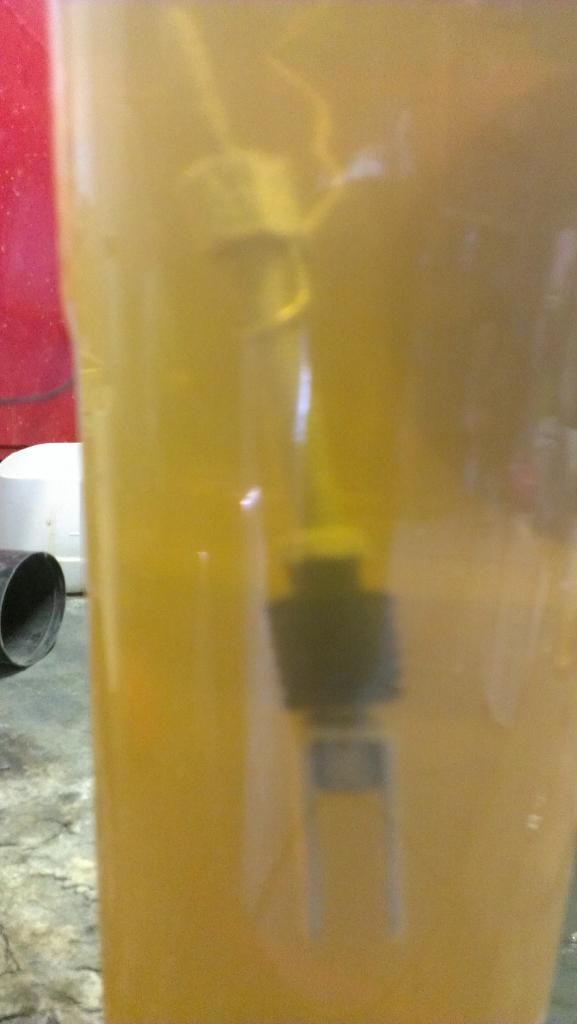
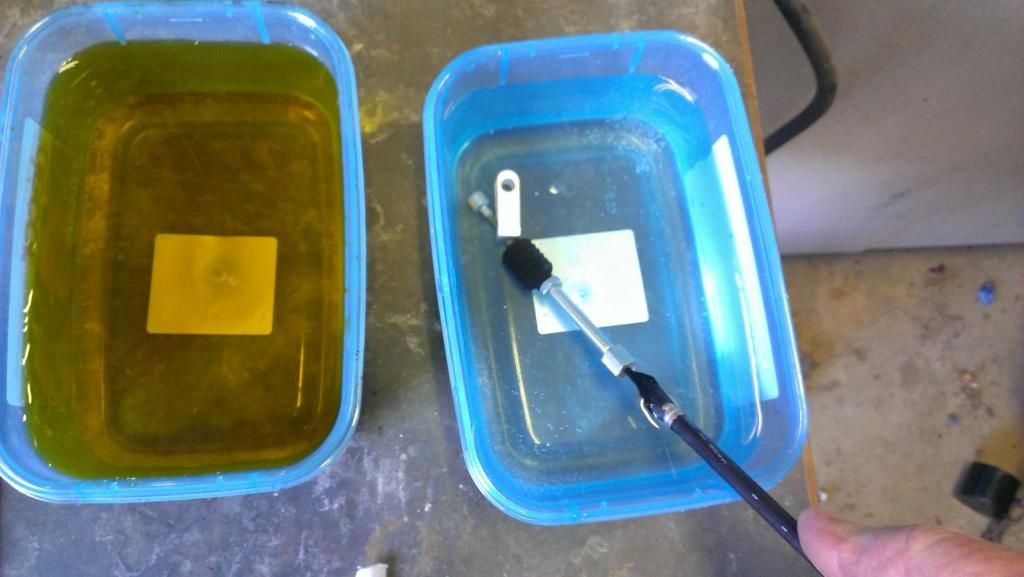
On the right is a pre chromate dip that makes the chromate stick better and make the zinc plating more durable. l dipped the part into the yellow chromate solution for around 10 seconds, longer time equals deeper color.
Image

And here's another one :grin:
Image
User avatar
Sullyfam
Gold Member
Gold Member
Posts: 459
Joined: 12:19 am Dec 10 2013
Country:
Location: Fort Worth, tx

Re: kdx450 Restoration in Oz

Post by Sullyfam »

Very cool and thanks for the details. I just might give it a whack!


Sent from my iPhone using Tapatalk
newbbewb
Supporting Member II
Posts: 579
Joined: 12:20 am Jan 22 2012
Country:
Location: sw washington state

Re: kdx450 Restoration in Oz

Post by newbbewb »

wow, excellent job!
93 kdx200-Highly modified
89 kx125/kdx200E engine
Buelldustin@gmail.com
KDX Geoff
Supporting Member I
Supporting Member I
Posts: 156
Joined: 11:29 pm May 26 2013
Country:

kdx450 Restoration in Oz

Post by KDX Geoff »

Time to get the lights working.

User avatar
JoKDX220r
Gold Member
Gold Member
Posts: 201
Joined: 04:04 pm Oct 03 2008
Country:

kdx450 Restoration in Oz

Post by JoKDX220r »

KDX Geoff wrote:
Do you mean the cable end at the brake ?
Yes the boots at the cable end and your brake/control cables and electric wires, what did you use to clean them ?
KDX Geoff
Supporting Member I
Supporting Member I
Posts: 156
Joined: 11:29 pm May 26 2013
Country:

kdx450 Restoration in Oz

Post by KDX Geoff »

JoKDX220r wrote:
KDX Geoff wrote:
Do you mean the cable end at the brake ?
Yes the boots at the cable end and your brake/control cables and electric wires, what did you use to clean them ?
A strong mix of laundry detergent, hot water, sponge and elbow grease. l tended to chuck those grotty plastic/rubber things in the bucket and leave them to soak for a day or two .
Post Reply