Project KDX 220R - The Rebuild

Got questions? We got answers....
Post Reply
User avatar
Slick_Nick
Supporting Member
Posts: 1690
Joined: 10:06 pm Oct 22 2009
Country: Canada
Location: Calgary, Alberta
Contact:

Post by Slick_Nick »

Shipped my head, crank, and carb to RB designs today. Got my other RMATV package today too. WOW those guys are fast! (remember I'm in Canada.) Clutch, springs, safety wire, and temp stickers.

Image

Honed the cylinder, and got everything cleaned up for paint.

Image

Image

I decided the easiest way to paint the engine was to kinda assemble it, mask what I could and spray it. I did just that. The head will get done when it's back from RB.

Image

I'm using DupliColor engine enamel, started with 3 coats of base silver:

Image

Image

Alot of people do the "KIPS" lettering green, I wanted to be different. I thought black looked classy, and stood out. So once the silver was dry, i used some black and did the letters.

Image

Did some detail on the case too, like the "low / full" markings on the case, and the trans oil quantity.

Image

Image

Reinstalled the KIPS cover, and sprayed 3 coats of clear on everything. She really shines now.

Image

Image

Image

Sorry if the last two are a bit blurry, I tried to show the shine with the flash off. That's all for tonight!
'00 KDX 220R
User avatar
Slick_Nick
Supporting Member
Posts: 1690
Joined: 10:06 pm Oct 22 2009
Country: Canada
Location: Calgary, Alberta
Contact:

Post by Slick_Nick »

Well, an update, although no pics today. The guy that I bought the set of forks from couldn't get the base valves out, so I found a really generous forum member who helped me out by parting out his stock forks for a minimal fee! As it stands right now, this is what I'm looking at:

Parts to order:

- Seat cover (I'm getting rid of the all black for a black / green unit)
- Fuel Lines (I'm really liking the neon yellow overflow lines.)

Parts ordered, waiting to recieve:

- Left Side KIPS shaft
- Fork Base Valves
- Fork preload spacers
- 2003 "220R" swingarm decals
- Output shaft collar

Stuff to do:

- Rewind Stator
- Finish fork assembly (once new base valves and preload spacers arrive)
- Blast and paint forks
- Install front wheel
- Install bars / grips / barkbusters / controls / fender (once forks are installed)
- Install new seat cover
- Assemble engine (when parts back from RB)
- Install engine into frame
- Set rear shock preload
- Install airbox and rear fender (once rear shock is set)

That's all I can think of right now. I'm working on getting a KIPS shaft and seat cover ordered, so I'm not held up on anything else. I'll try and have some pics up tomorrow!
Last edited by Slick_Nick on 09:22 pm Mar 24 2010, edited 3 times in total.
'00 KDX 220R
User avatar
RBD
Gold Member
Gold Member
Posts: 210
Joined: 02:00 am Jan 18 2005
Country:
Location: Portland, Oregon USA
Contact:

Post by RBD »

Nice detailing, looks sharp!

Ron
User avatar
Slick_Nick
Supporting Member
Posts: 1690
Joined: 10:06 pm Oct 22 2009
Country: Canada
Location: Calgary, Alberta
Contact:

Post by Slick_Nick »

Thanks Ron! Can't wait to get my stuff back to put it all together!
'00 KDX 220R
User avatar
Julien D
KDXRider.net
KDXRider.net
Posts: 5858
Joined: 07:53 pm Nov 07 2008
Country: USA
Contact:

Post by Julien D »

Very nice work on the engine paint, I like it! Cylinder looks like it came out good as well.
Image
User avatar
fuzzy
KDXRider.net
KDXRider.net
Posts: 3437
Joined: 01:29 pm Jun 18 2003
Country:
Location: Fredneck, MD

Post by fuzzy »

Looks great!
'91 KDX 200 Project $300 KDX
'95 KDX 200 Project $600 KDX
'94 WR 250 Always a project
SteveWR450f
Member
Posts: 240
Joined: 11:33 pm Dec 06 2006
Country:
Location: Newberg, Oregon

Post by SteveWR450f »

Love this post and rebuild projects. At the risk of stealing the thread, does anyone know if painting your engine cases causes it to retain more heat?

I am in the process of a rebuild myself. A "friend" told me that I should not paint the engine because it will cause it to retain heat. Any truth to that? Auto engines get painted all the time just dont know. Really like how Nick's engine looked after painting.

Thanks.
WR sold. Now have 03 and 04 KDX 220s.
KXF 250 forks. RB Carb and Head. FMF rev pipe. Long live the KDX !!!
User avatar
Indawoods
Creator and Founder
Creator and Founder
Posts: 9951
Joined: 09:59 am Jun 12 2003
Country:
Location: Midwest

Post by Indawoods »

The majority of the engines heat dispensation is through the radiators on a KDX.
*** Administrator //***
****'95 KDX 200/****

"People ate cows a thousand years ago for the same reason we eat them now. Cause they are easy to catch.We're not savages,we're just lazy. A cheetah could taste like chocolate heroin. But will never know. Those bastards are fast!!! "
User avatar
Julien D
KDXRider.net
KDXRider.net
Posts: 5858
Joined: 07:53 pm Nov 07 2008
Country: USA
Contact:

Post by Julien D »

Agree with Inda. Paint on the engine will make little to no measurable difference in running temps.
Image
User avatar
scheckaet
KDXRider.net
KDXRider.net
Posts: 3740
Joined: 12:09 am Nov 10 2005
Country:
Location: edmond oklahoma

Post by scheckaet »

I think I'm gonna give it a shot myself.
Here is from the duplicolor website:

"Both Engine Enamel and High Heat Paint formulas now contain ceramic resins for maximum heat dissipation and gloss retention. The resins also offer protection from exposure to excessive heat and automotive fluids. Developed and tested in the lab, Dupli-Color® Engine and High Heat Paints will perform to the most rigorous standards of racing and street rod enthusiasts.

Dupli-Color® Engine Enamel with Ceramic

Resists temperatures up to 500 degrees F
Durable ceramic formulatio
Superior high gloss finishes
Oil and gas resistant
Will not blister, flake, crack or peel
36 colors matched to OEM standards
6 Classic Colors, 7 Hot Rod Colors

whether you believe it or not, time will tell.
User avatar
JoKDX220r
Gold Member
Gold Member
Posts: 201
Joined: 04:04 pm Oct 03 2008
Country:

Post by JoKDX220r »

Hi Slick Nick, nice job on your rebuild!!
I wonder on your 4th pic (on top of this page) what's on t.v.. look like security or spycam :shock:
Last edited by JoKDX220r on 07:08 pm Mar 23 2010, edited 1 time in total.
User avatar
Slick_Nick
Supporting Member
Posts: 1690
Joined: 10:06 pm Oct 22 2009
Country: Canada
Location: Calgary, Alberta
Contact:

Post by Slick_Nick »

No it was a home rebuild show. Even on old air cooled engines, and even if you paint your radiators, it's been shown to have a negligible difference in heat dissapation. I hope it holds up well. Worst case, I'll need to repaint the clutch cover and magneto cover once a year - not a big deal at all.
'00 KDX 220R
SteveWR450f
Member
Posts: 240
Joined: 11:33 pm Dec 06 2006
Country:
Location: Newberg, Oregon

Post by SteveWR450f »

I think try painting engine as well. Thanks for the input. I dont think I will paint the ignition and clutch covers because then I will get stuck painting them when I mark it up with boots. Going to Autozone at lunch time to check out the paint! :supz:
WR sold. Now have 03 and 04 KDX 220s.
KXF 250 forks. RB Carb and Head. FMF rev pipe. Long live the KDX !!!
User avatar
Slick_Nick
Supporting Member
Posts: 1690
Joined: 10:06 pm Oct 22 2009
Country: Canada
Location: Calgary, Alberta
Contact:

Post by Slick_Nick »

Did lots of little things today that I've been putting off. RB Designs has my stuff, they are going to start on it in the next few days. To start, I decided I'd throw the rear wheel on after I did the sprocket.

Remember to Loctite the bolts, but not the threads, do the chamfered part so it won't spin in the hub.

Image

All torqued on. Old and busted, meet new hotness! The PD sprocket is only slightly heavier than stock, but the teeth look much beefier.

Image

Got the rear wheel installed, need to get the engine in and chain on before I can torque the axle:

Image

Installed the rear brake so I could bleed it:

Image

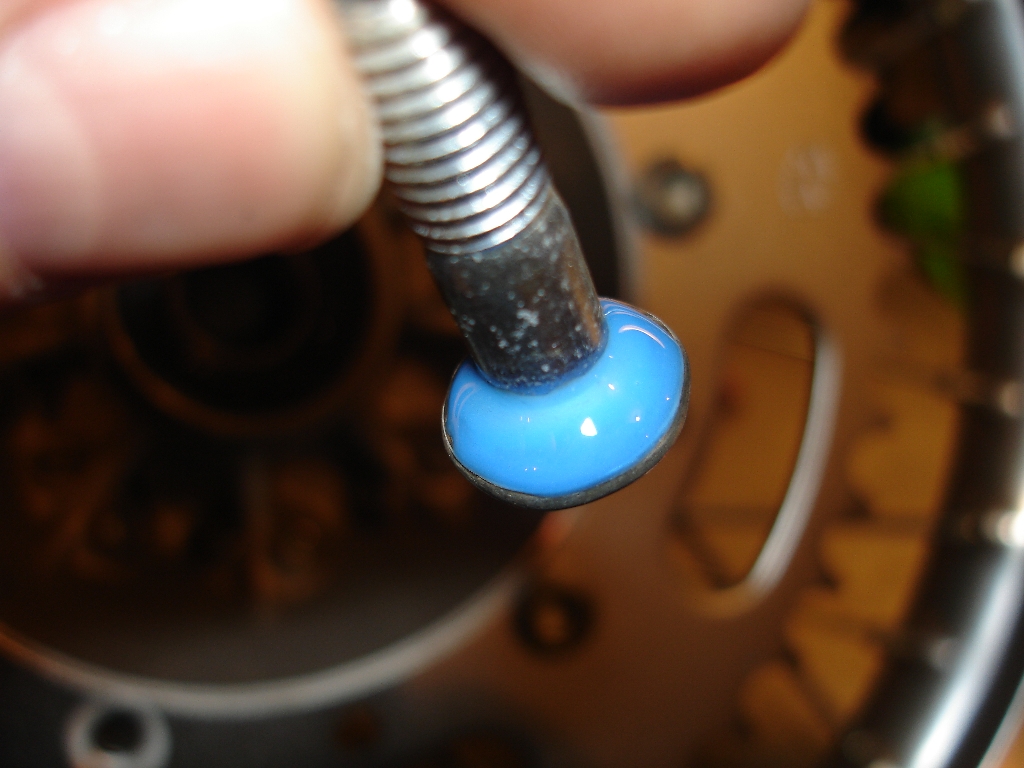
I decided to flush the brake system. Glad I did. This is after it was all done, nice and clean. I used Prestone DOT 4.

Image

This is what came out:

Image

Changed the pads with my new Tusk ones too. The old ones were still the stock Nisin's, worn down to the backing almost.

Image

Image

Next up, I went on a cleaning frenzy, and I'm happy to say, I'm now DONE! As in, now I can just re-assemble as I get parts, I don't have to clean then re-assemble. Every misc. nut, bolt, washer, whatever was cleaned with brake cleaner, and set aside. I covered everything with another towel too so it wont get dusty.

Here's the transmission parts:

Image

And everything else. Transmission gears, kickstarter assy, KIPS, water pump, etc.

Image

I had some time to kill, so I decided I'd disassemble my freshly painted engine, and install all my new seals n stuff. I'm using a Moose Racing complete gasket kit, and boy they aren't kidding. It has EVERY gasket, seal, o-ring, etc in the whole engine. I would definitly buy it again. Here you can see new seals installed.

Kiskstart seal:

Image

Clutch lever seal:

Image

Removed the bearing and put in a new water pump seal:

Image

Output shaft and shift shaft seals:

Image

And finally new main seals:

Image

Tomorrow I'm going to snag some dry ice from work for my main bearings, so I can get them installed in the case halves. My fork base valves are on the way, so once they get here I can get the front end all done up. I'm looking forward to that, because it's a big VISUAL milestone. It makes the bike look like a bike again. Then, I'm just waiting on RB for my crank back so I can get it all together. Depending on when that happens, I might be riding within a week or two!
'00 KDX 220R
User avatar
ihatefalling
Supporting Member
Posts: 410
Joined: 09:30 am Jul 20 2008
Country:

Post by ihatefalling »

This is much better than watching a romantic comedy with my wife :cool:
2005 KDX 220
R&B Carb Mod
R&B Head Mod
Fork Swap - 99 KX125 Valved for B woods plush
FMF Gnarley
Airbox Mod
Tagged
User avatar
Slick_Nick
Supporting Member
Posts: 1690
Joined: 10:06 pm Oct 22 2009
Country: Canada
Location: Calgary, Alberta
Contact:

Post by Slick_Nick »

Did a quick photoshop tonight. Thinking of adding a number plate background to my headlight. What do you think? Like it better with or without? I kinda dig the "with" look. Balances out the side number plates a bit. Plus it will give me a place to mount my licence plate. (Required in Alberta for off road.)

Image

Image
'00 KDX 220R
User avatar
Indawoods
Creator and Founder
Creator and Founder
Posts: 9951
Joined: 09:59 am Jun 12 2003
Country:
Location: Midwest

Post by Indawoods »

Rockymountainmc.com offers customized plate faces with graphics and numbers.... check them out....


Here's mine....

Image
*** Administrator //***
****'95 KDX 200/****

"People ate cows a thousand years ago for the same reason we eat them now. Cause they are easy to catch.We're not savages,we're just lazy. A cheetah could taste like chocolate heroin. But will never know. Those bastards are fast!!! "
User avatar
fuzzy
KDXRider.net
KDXRider.net
Posts: 3437
Joined: 01:29 pm Jun 18 2003
Country:
Location: Fredneck, MD

Post by fuzzy »

Does it cost extra for #3? :mrgreen: :cool: Those are sweet.
'91 KDX 200 Project $300 KDX
'95 KDX 200 Project $600 KDX
'94 WR 250 Always a project
User avatar
Slick_Nick
Supporting Member
Posts: 1690
Joined: 10:06 pm Oct 22 2009
Country: Canada
Location: Calgary, Alberta
Contact:

Post by Slick_Nick »

I spent ALL day running around gathering misc. parts for the build, so I didn't have much time for actual work before I had to retrieve my girlfriend from work. Got a new tube, got it half installed and ran out of time. Will finish the rear tire tomorrow. Got new stator wire, 18GA magnet wire, should give me 60-65 watts or so. I'm not looking for a big improvement, I only run a single 55w bulb. I'm not adding any plates to the stator, just thicker wire and more of it.

I did get some vinyl and get the headlight done, that's about it.

Wrapped it with the white vinyl:

Image

Trimmed it nice

Image

Finished product:

Image

Also, I bought a Sixsixone Vapor pressure suit. This thing is sick. So many features, and it doesn't feel like anything once it's on.

Image

Thanks guys, have a good night.
'00 KDX 220R
User avatar
Slick_Nick
Supporting Member
Posts: 1690
Joined: 10:06 pm Oct 22 2009
Country: Canada
Location: Calgary, Alberta
Contact:

Post by Slick_Nick »

Didn't get much done today, the Stator took longer than I thought. I rewound it with 18ga magnet wire. Should up the output slightly, even if it doesn't I don't care. I only run one 35W headlight bulb. I don't ride at night, it's just there "in case" i'm out on the trails and I dont get back till after dusk, so please keep the "oh you should have added more plates..." stuff to yourself. I did not do this as an upgrade, I did it because the stock wire was broken, and I figured I might as well rewind with 18ga while I was in there. Rewinding is actually pretty easy, and I was surprised how cheap the wire is. I got enough to do the coil as you see it (1/4 lb) for $13, and it only took me about an hour to do. Not trying to take any business from indawoods by the way, I was just looking for a good stock replacement. If it happens to output more, sweet. :cool:

It's alot tighter than it looks, the layers underneith are nice and "square" just the top one I had to cut across.

Old and busted:

Image

New hotness:

Image

Image

After I checked with a multimeter for continuity, I got it epoxied up. This is not a "required" step, but it gives me piece of mind. It doesn't look pretty, but it works!

Image

More to come next week!
'00 KDX 220R
Post Reply