Page 4 of 8
Re: 1991 KDX 200 Rebuild
Posted: 10:54 pm Sep 21 2016
by KDXGarage
wow again! great job
Re: 1991 KDX 200 Rebuild
Posted: 02:38 pm Sep 24 2016
by TheGriz
Re: 1991 KDX 200 Rebuild
Posted: 02:40 pm Sep 24 2016
by TheGriz
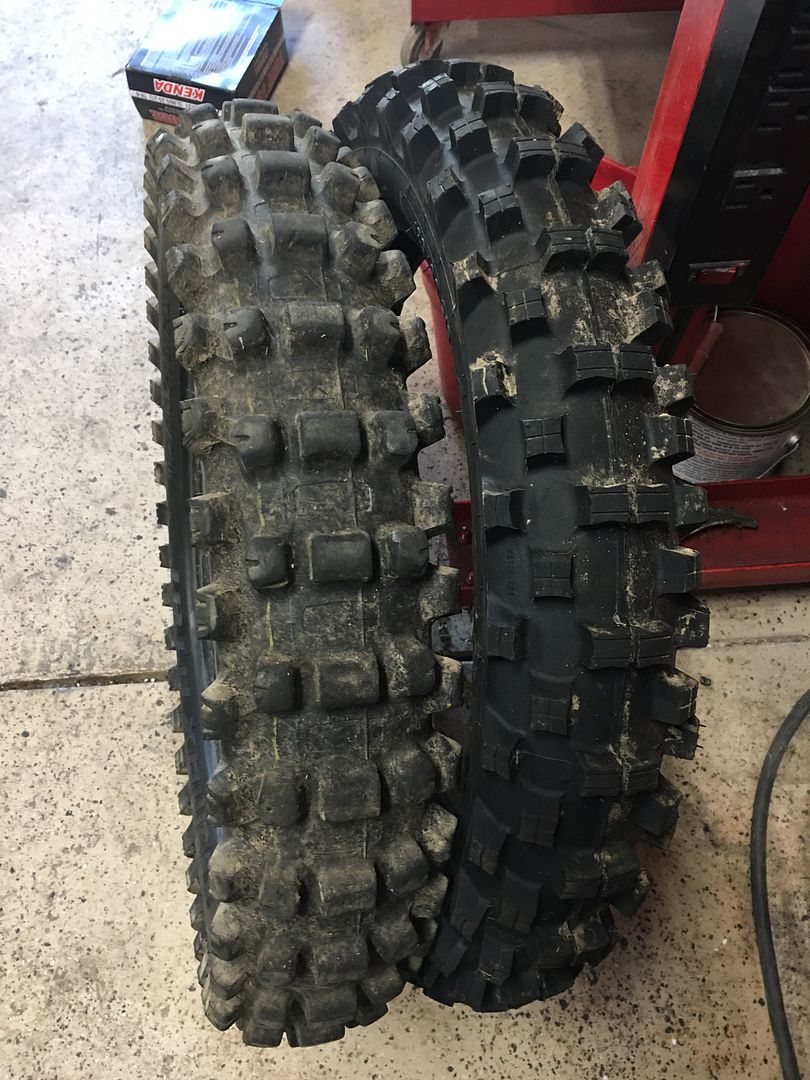
I was looking through my tire rack, trying to decide which used tire I was going to throw on, when I found an S12 with only one ride on it!!! It was too narrow for my KTM300, but will be perfect on the KDX!
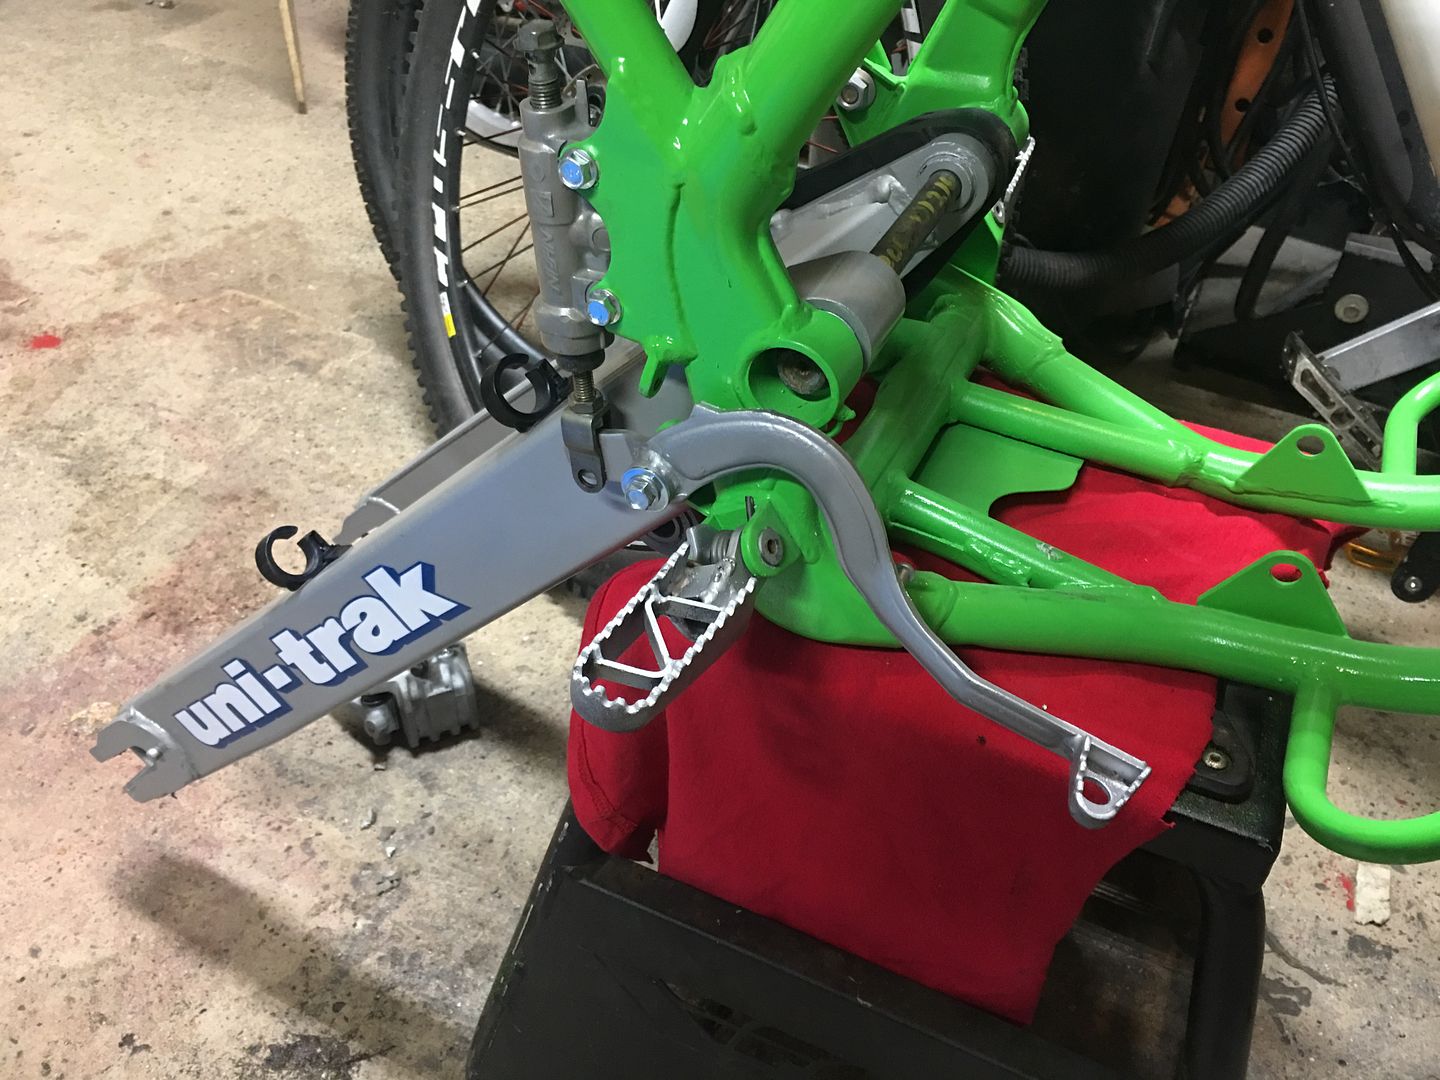
1991 KDX 200 Rebuild
Posted: 06:24 pm Sep 26 2016
by TheGriz
Front caliper rebuild
Posted: 06:27 pm Sep 26 2016
by TheGriz
Front Master Cylinder Rebuild
Posted: 06:32 pm Sep 26 2016
by TheGriz
Re: 1991 KDX 200 Rebuild
Posted: 06:40 pm Sep 26 2016
by KDXGarage
AH HA!! I wondered how that came apart on the master cylinder.
The insides looked rough. Who knew?
What are you "blasting" the parts with??
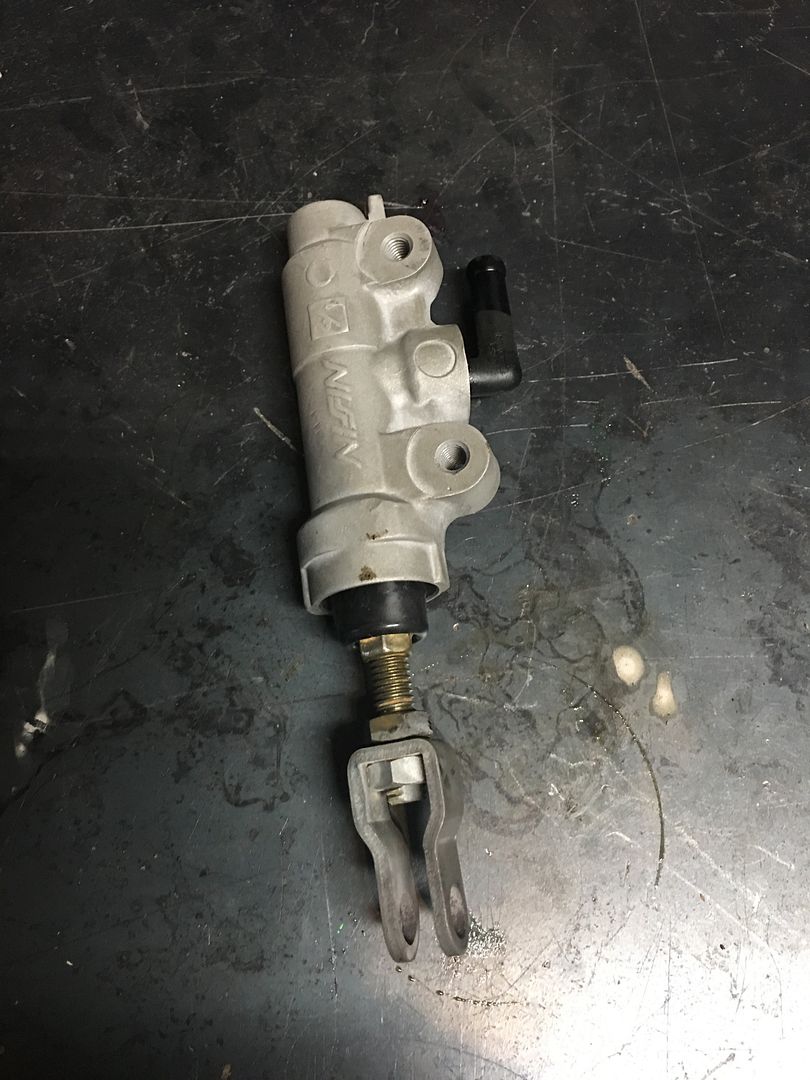
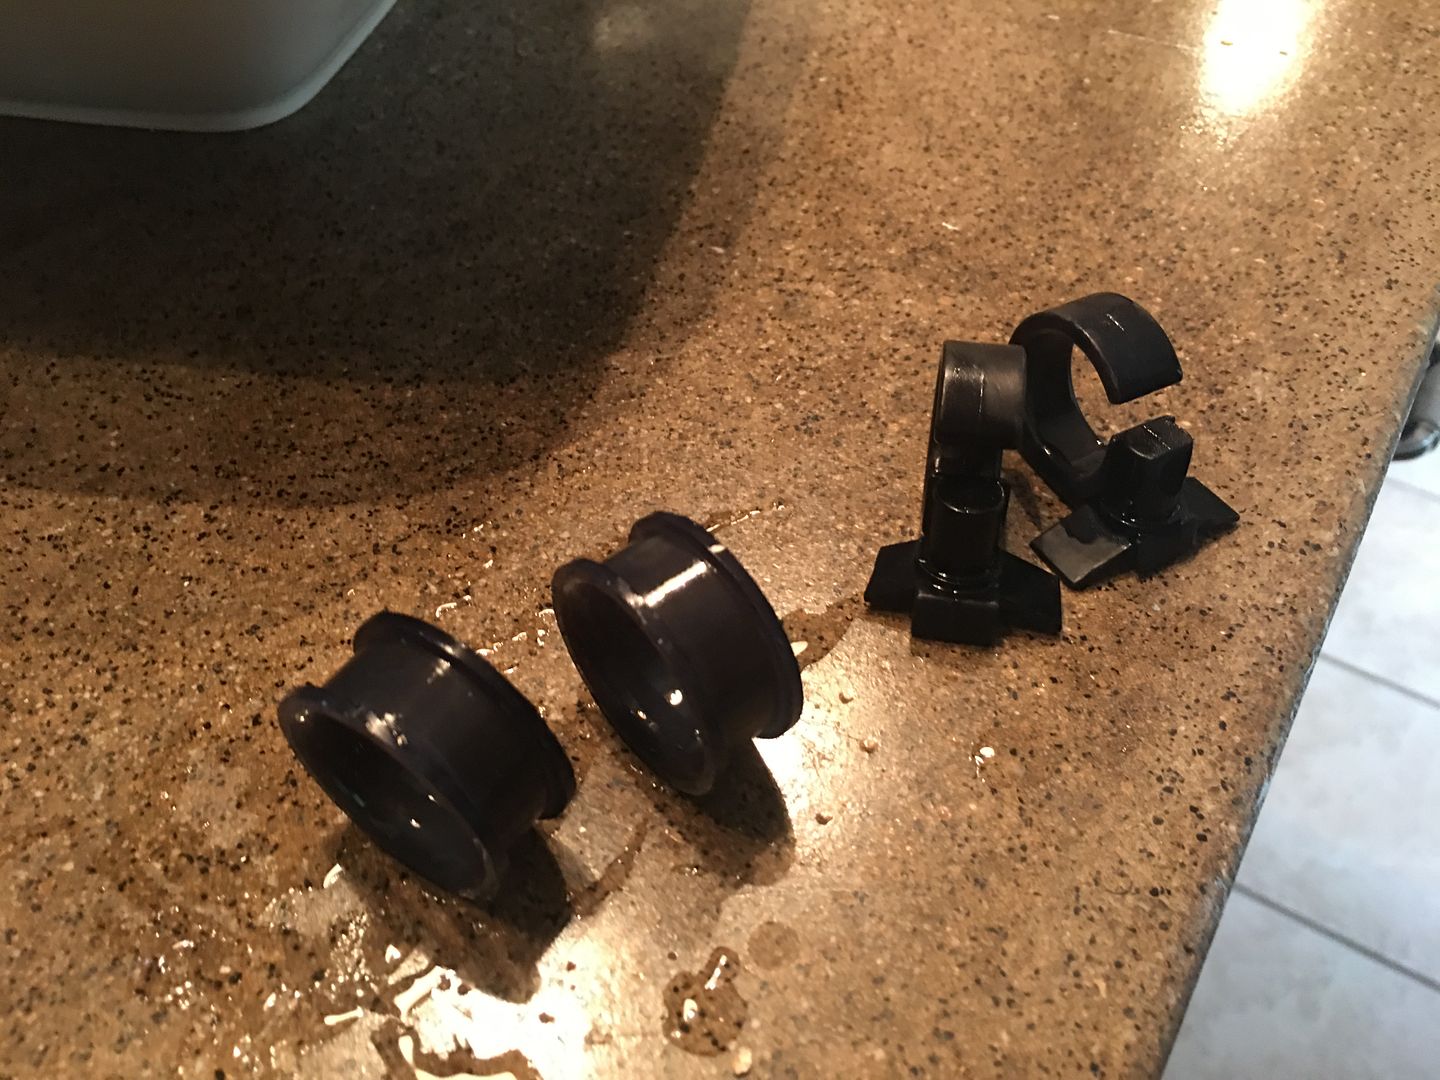
Rear master cylinder rebuild
Posted: 06:42 pm Sep 26 2016
by TheGriz
Time to tackle the rear master cylinder:
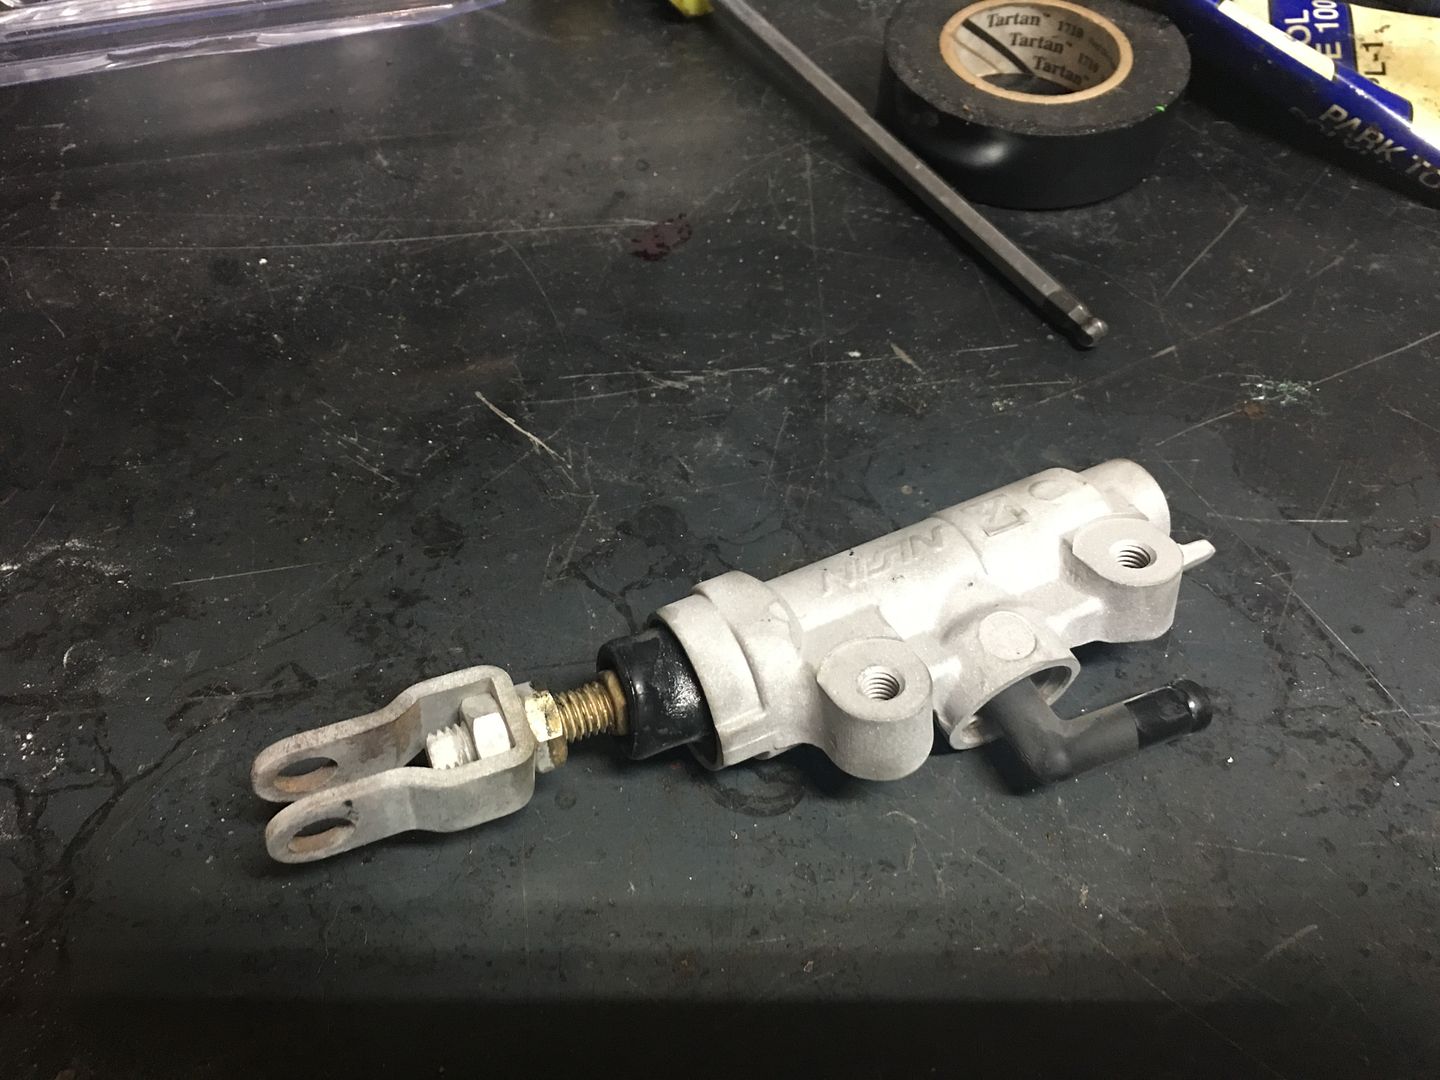
Pull up the rubber boot to reveal the C-Clip:
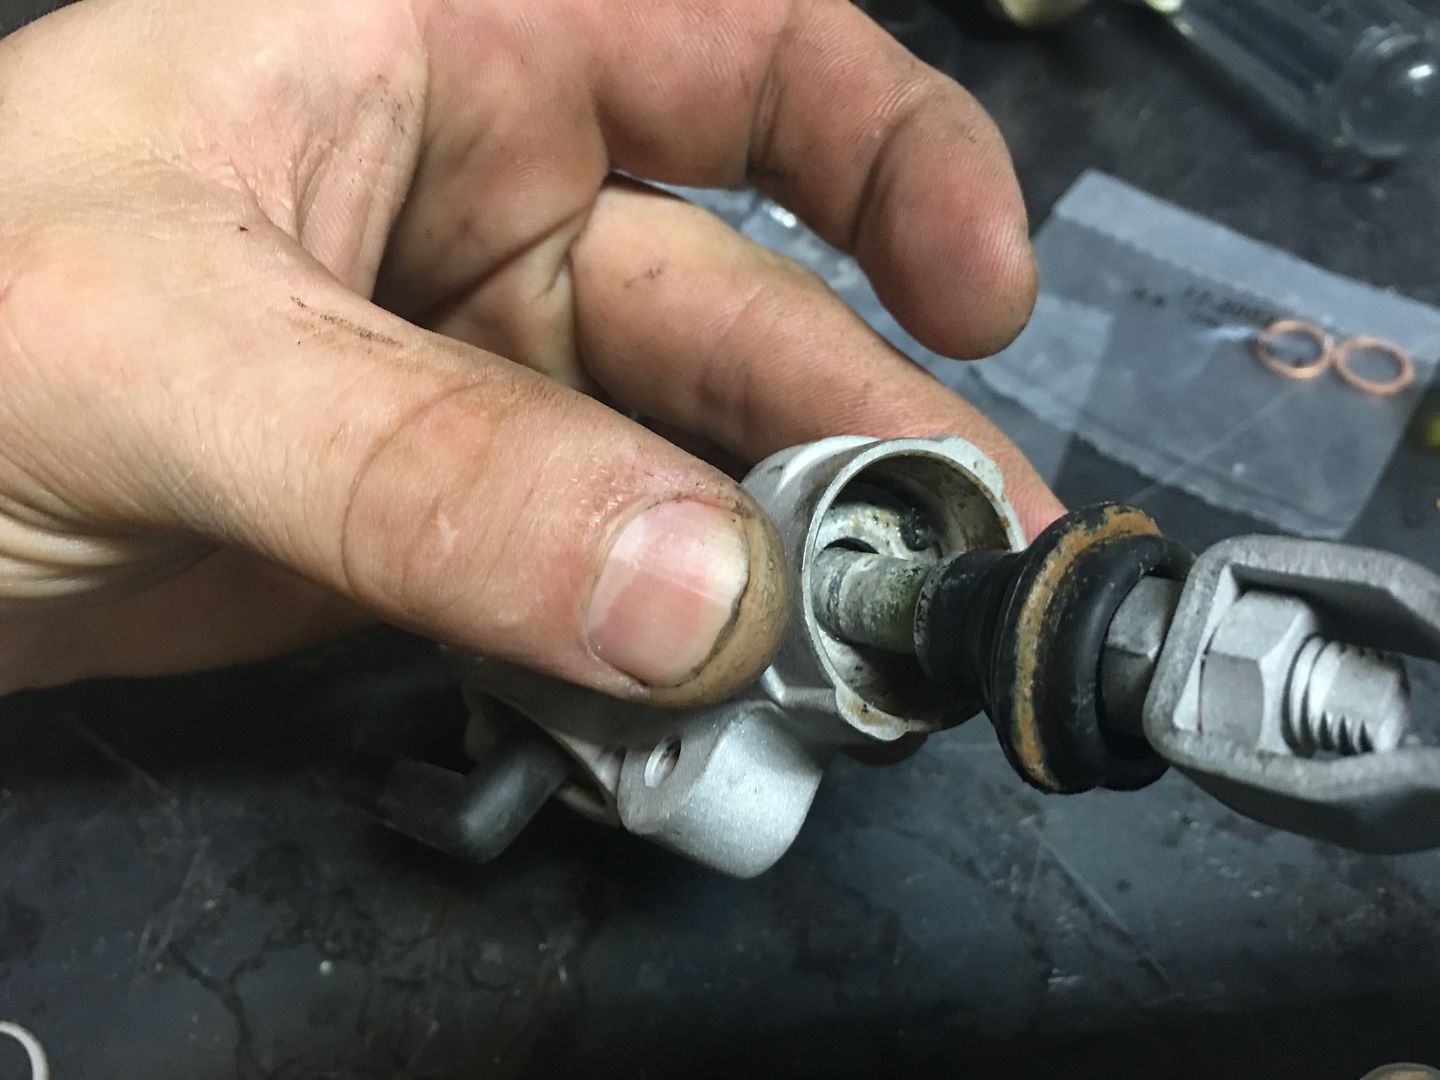
Remove the clip and remove the plunger assembly:
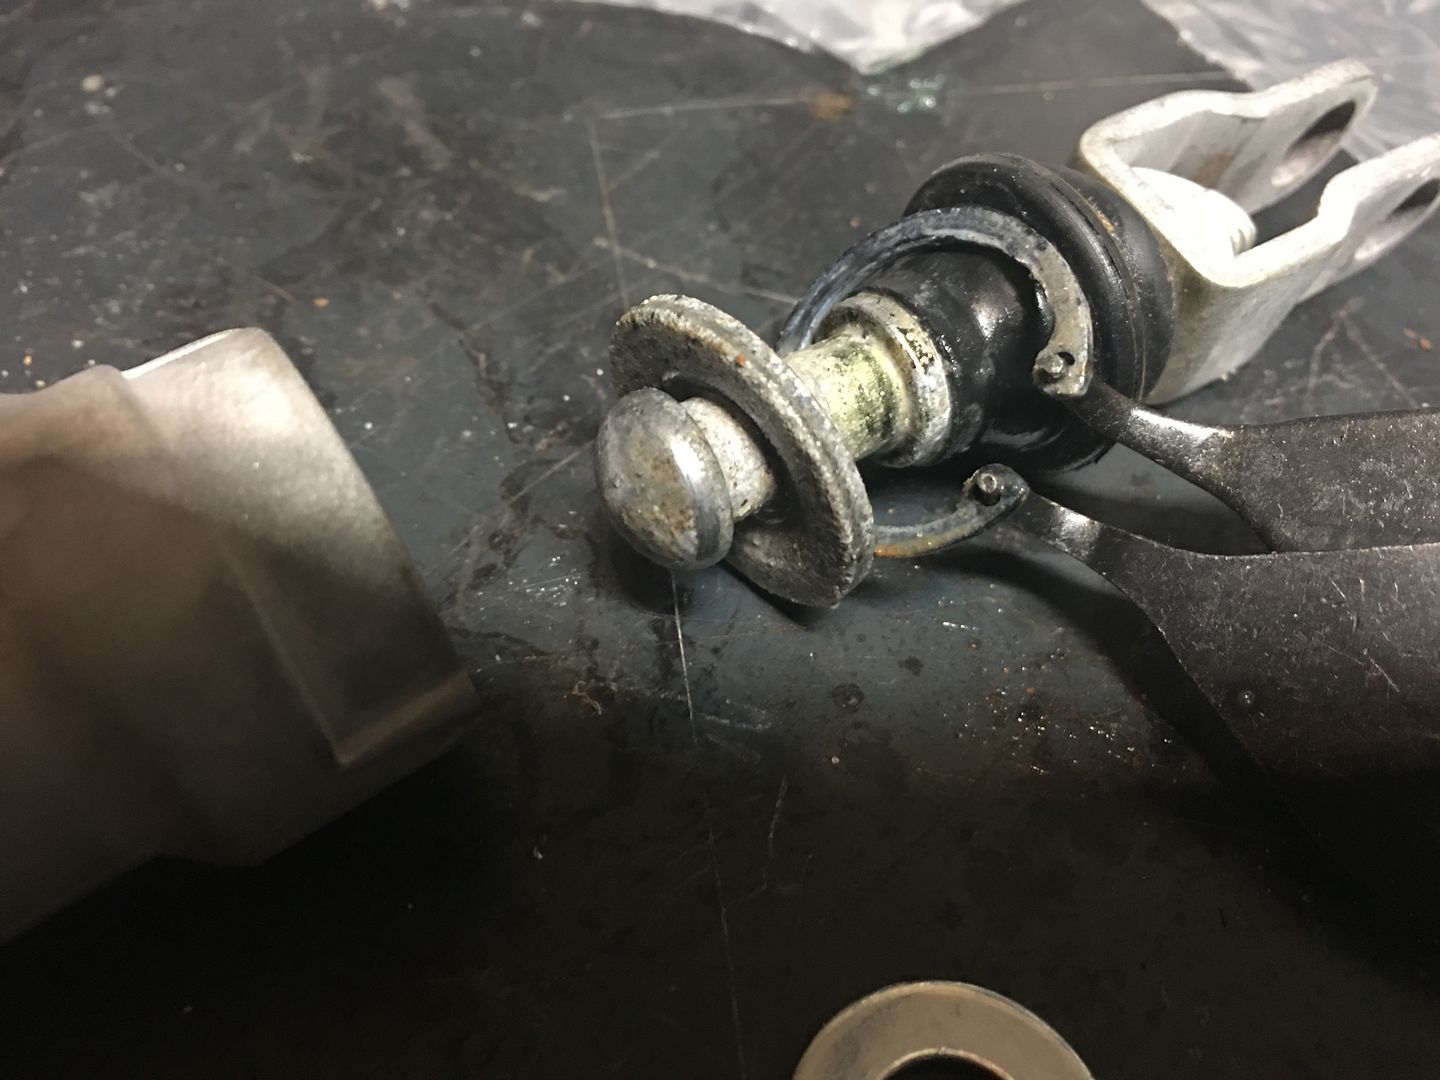
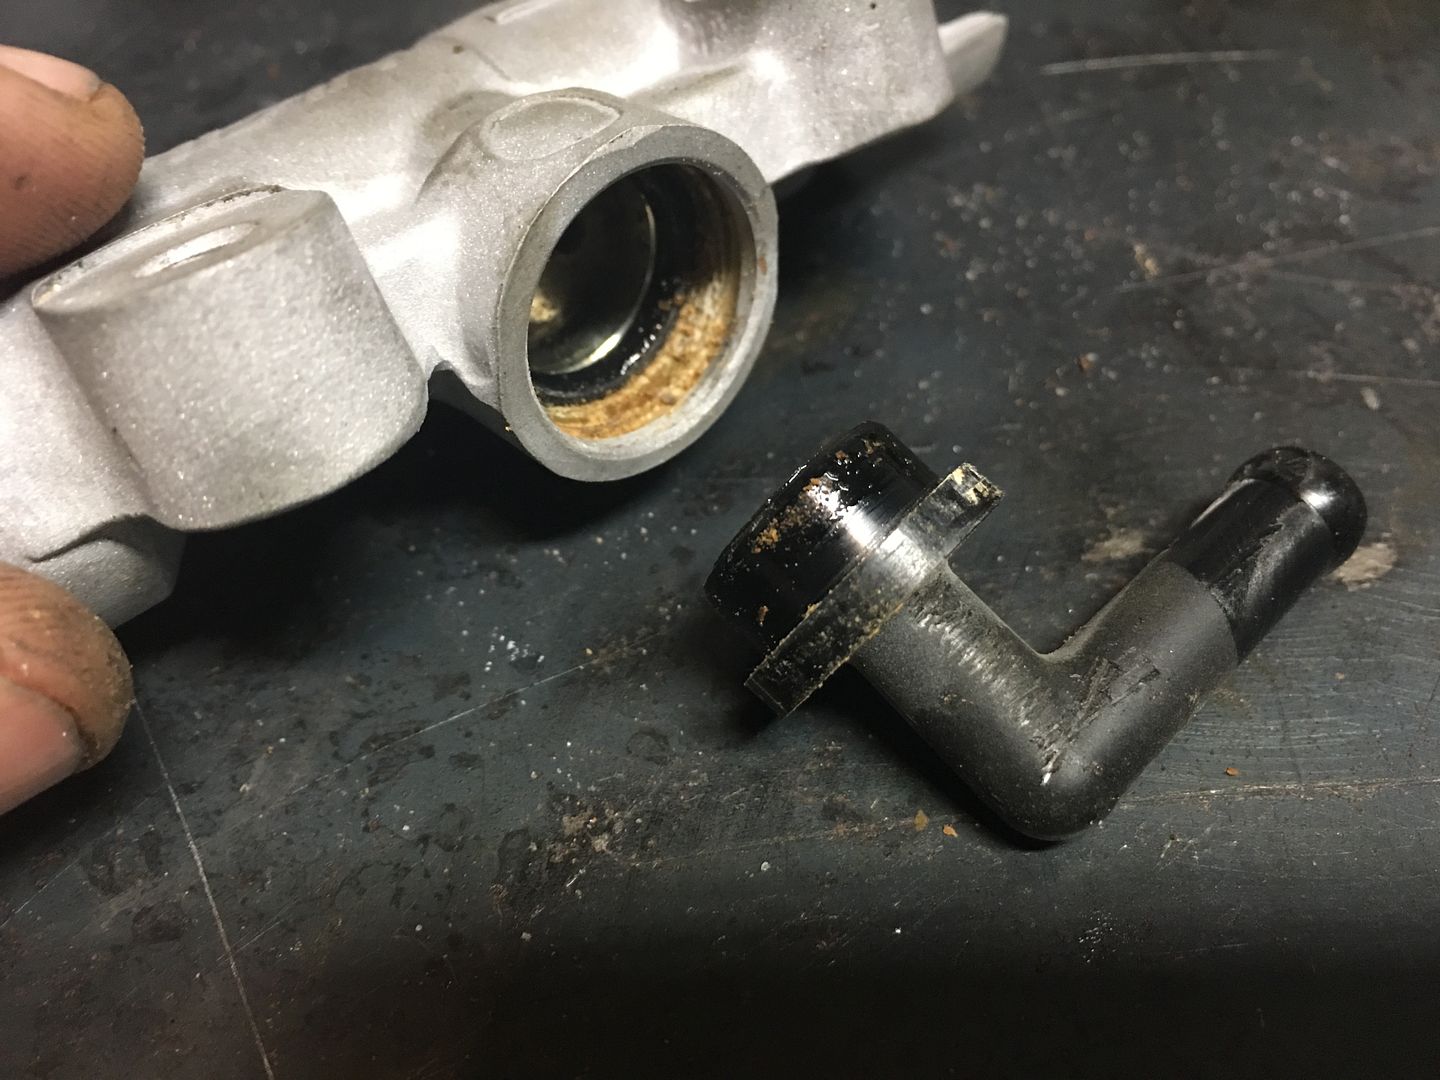
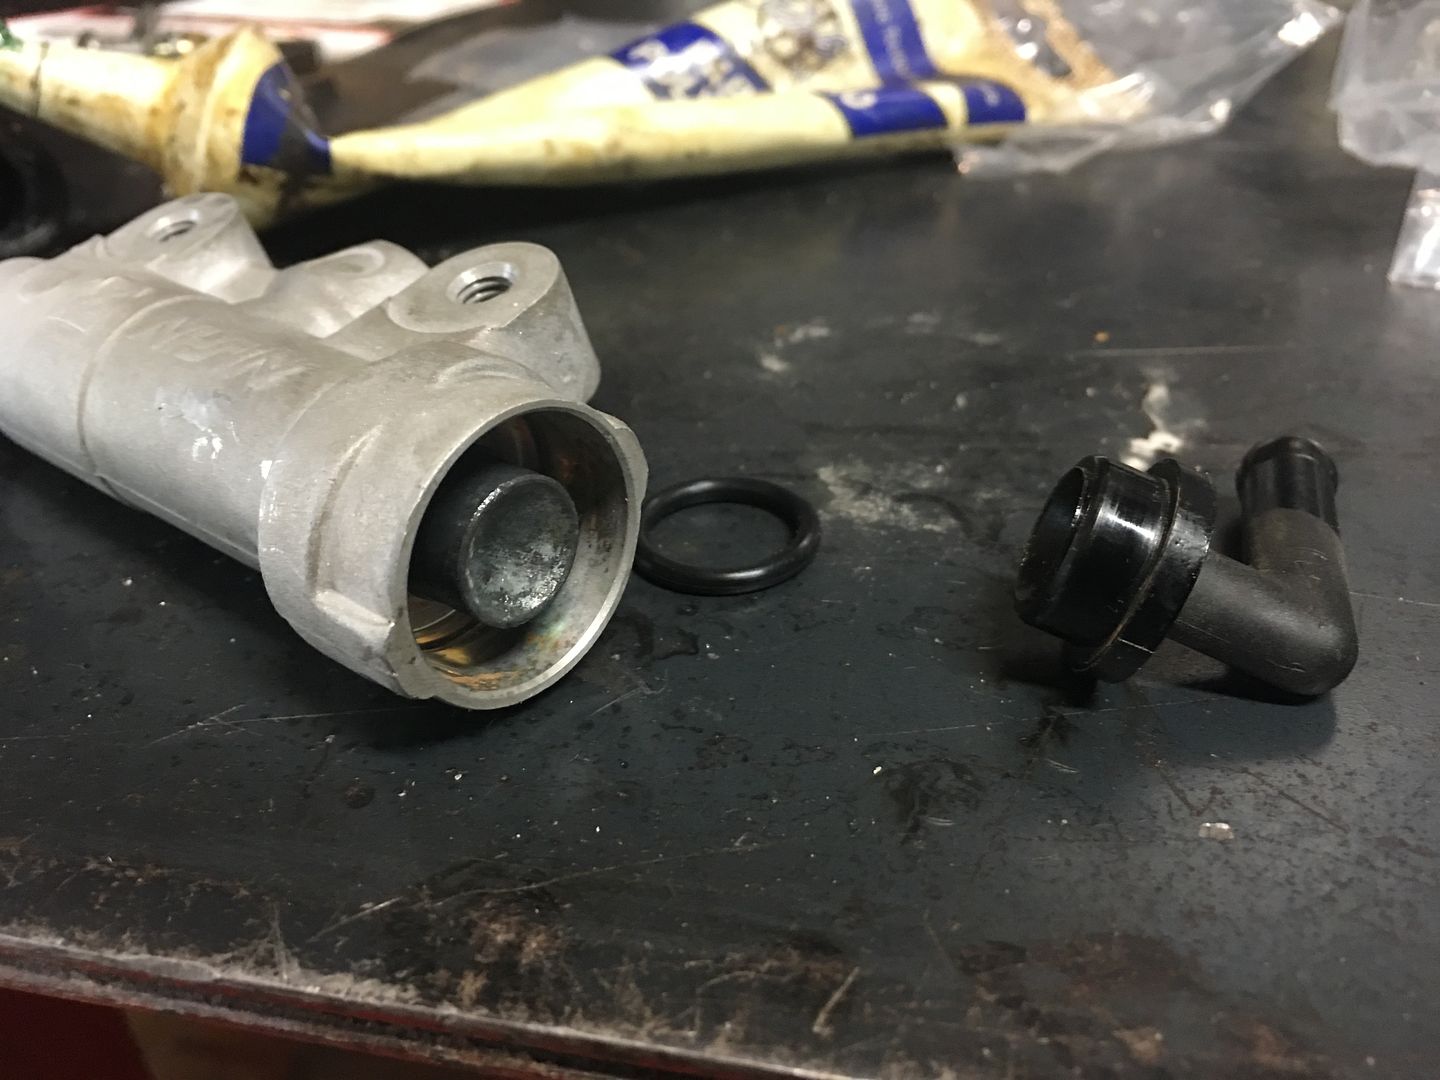
My inner plunger was frozen inside the master cylinder body. I switched over to remove the reservoir fitting, so that I could heat up the aluminum body without melting any plastic.
I removed the C-Clip and gently pulled out the plastic fitting. I grasped it down low with some pliers and wiggled it out. Pull out the o-ring too. My rebuild came with a new one.
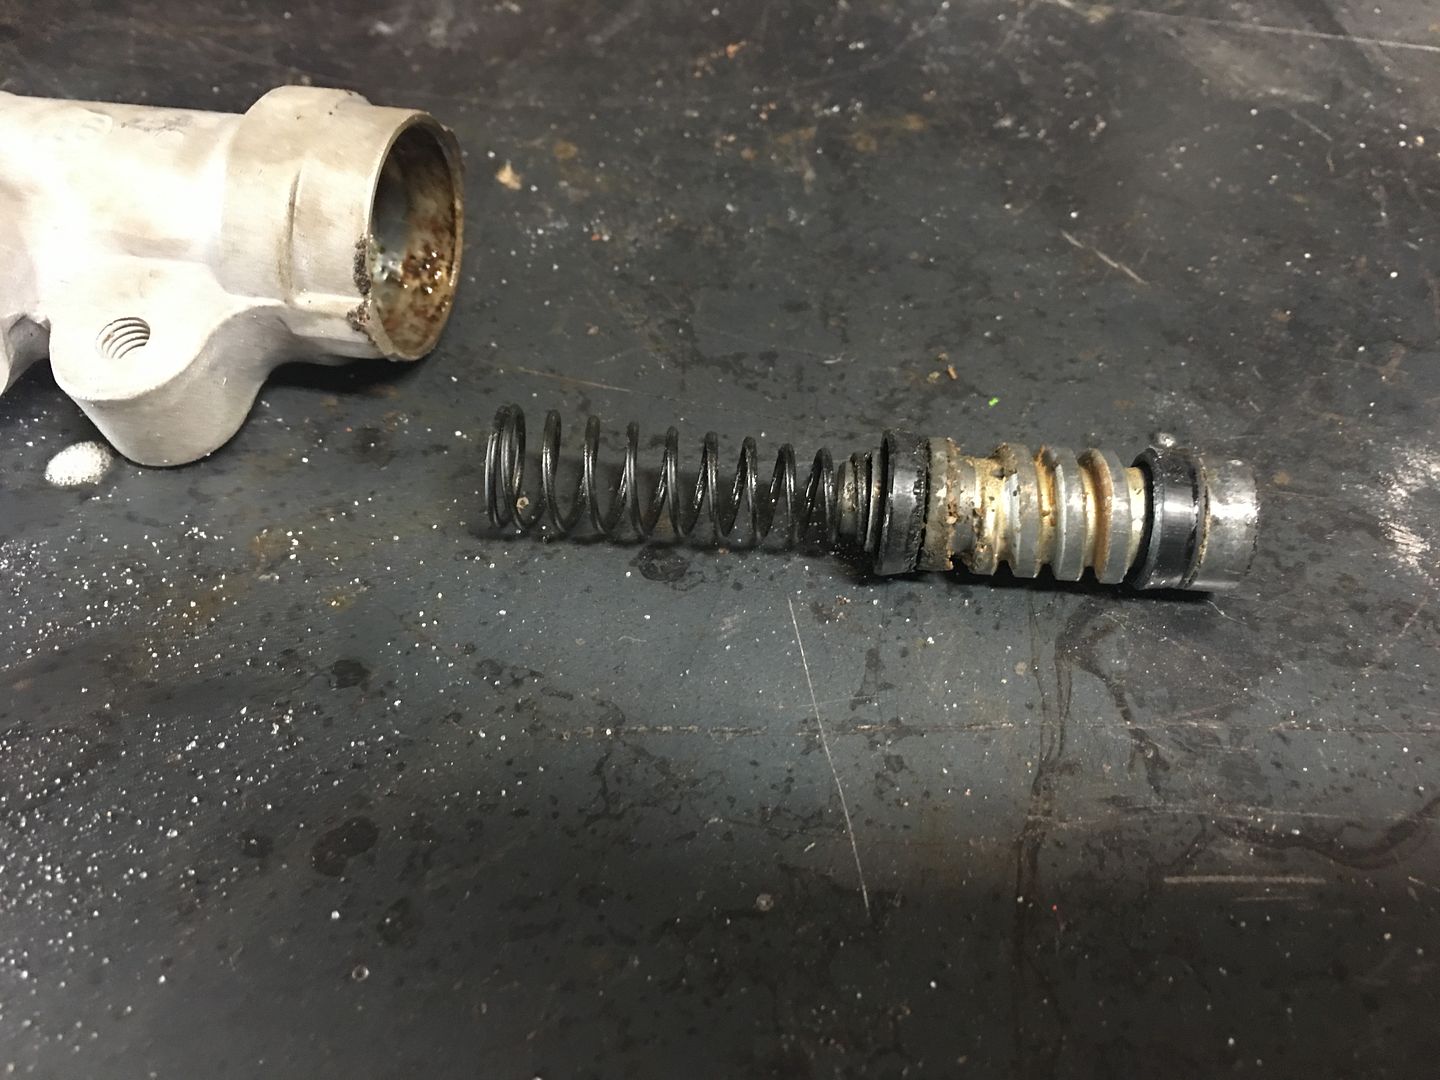
After heating up the master cylinder body multiple times, followed by penetrating oil, I used air pressure in the small hole in the master to help convince the inner plunger to pop out. I was almost ready to give up and replace the master with one from my parts drawer when it finally came out!
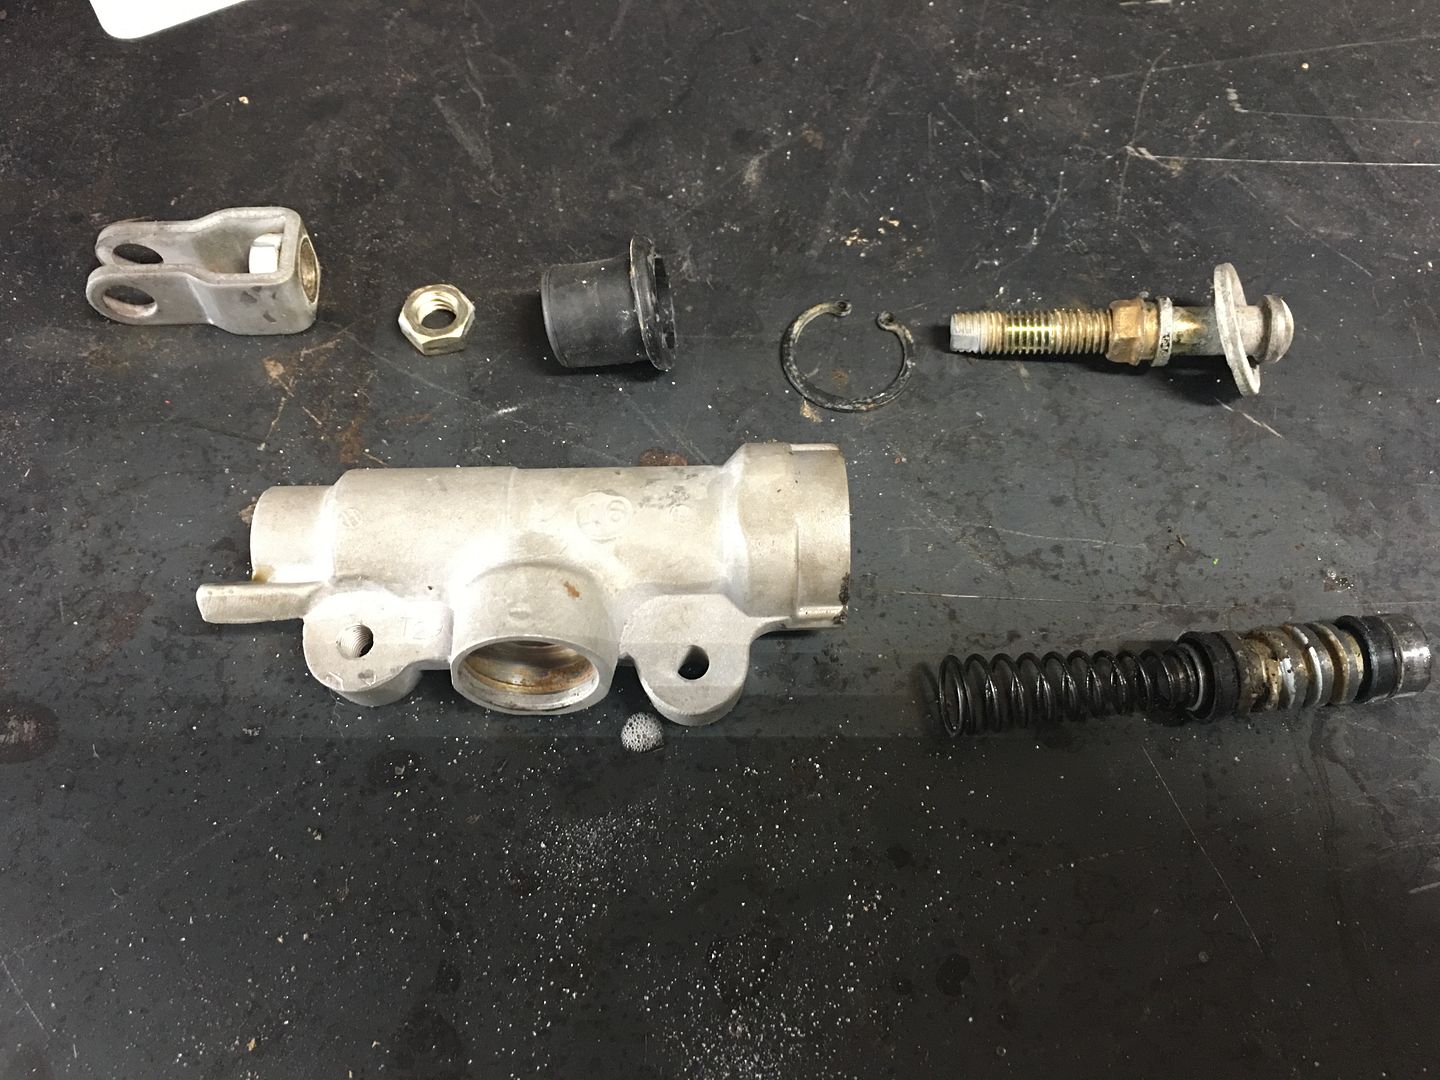
New O-ring and the old reservoir fitting go back in:
Reinstalled the rest reversing my procedure. I remembered to lube all the seals again:
Re: 1991 KDX 200 Rebuild
Posted: 06:47 pm Sep 26 2016
by TheGriz
Jason wrote:AH HA!! I wondered how that came apart on the master cylinder.
The insides looked rough. Who knew?
What are you "blasting" the parts with??
The insides were very rough. They went through the parts washer and got plenty of attention. I scratched my head for a while too. I was poking around in there, wondering why it didn't come apart like the other master cylinders I've rebuilt. At first, when I pushed on that clip, I thought that I broke it... happily, I stumbled on the right disassembly procedure.
I am blasting the parts with glass media. It is much less abrasive than sand or some of the other medias. I've tried walnuts, but my air compressor air isn't dry enough to let my scat gun pull it in without clogging. I've tried black oxides, but they leave the aluminum discolored.
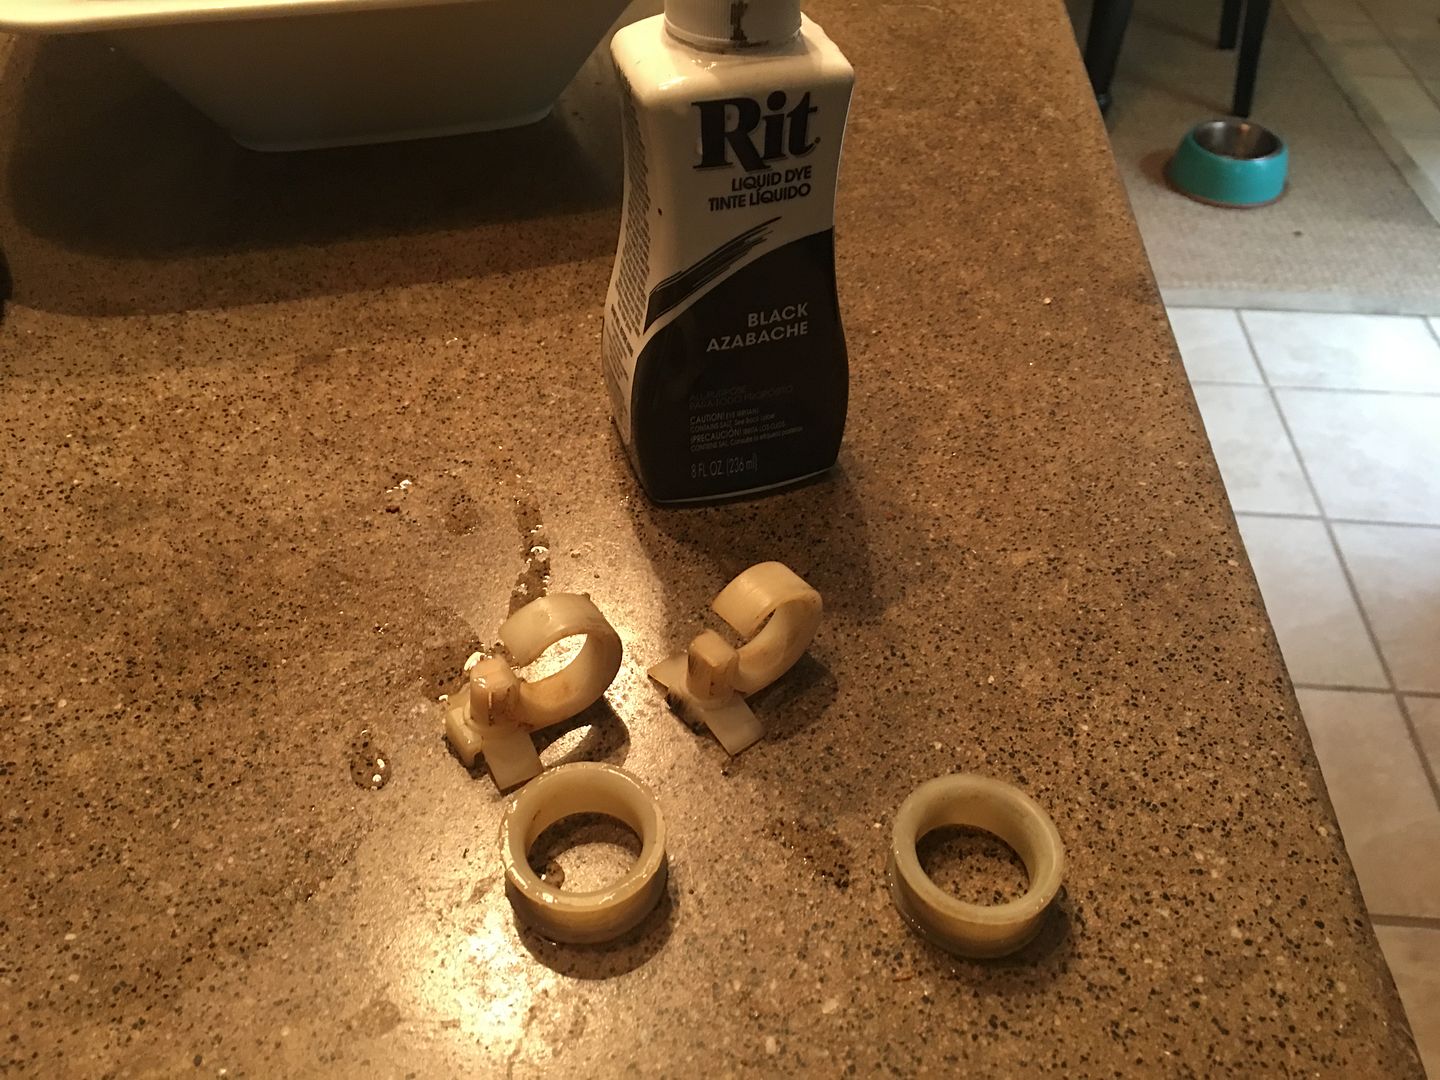
1991 KDX 200 Rebuild
Posted: 11:10 am Sep 27 2016
by TheGriz
Here's a little trick for sprucing up the look of nasty yellowing parts. It doesn't work for all plastics, but it won't hurt most plastics to drop them in and try.
Clean the part as best as you can and drop them into a pot of boiling water with a spoonful of RIT dye. I left these parts in boiling water for about 1-2 minutes.
Re: 1991 KDX 200 Rebuild
Posted: 07:01 pm Sep 27 2016
by TheGriz
This baby may end up being too clean to ride!
1991 KDX 200 Rebuild
Posted: 09:01 pm Sep 27 2016
by Dekon
That's a great tip with the dye!
I said the same thing when I rebuilt mine, to clean to ride. That lasted for about a week.
Re: 1991 KDX 200 Rebuild
Posted: 10:39 am Sep 29 2016
by ubareddition
It's looking so nice.
Sent from my SM-N910V using Tapatalk
Re: 1991 KDX 200 Rebuild
Posted: 11:30 am Sep 29 2016
by Tyl3r
Great work man, its all looking awesome. I know to what you mean about it being too nice to ride haha I'm in the same phase with the hybrid I just finished. That feeling is slowly starting to fade, I still clean it from head to toe before I put her away!
Going to have to try that plastic dye trick! Does that seem to stand up for a while?
When you blasted those master cylinders, did you get any media inside that you couldn't get out? And when you had them all apart, were they basically bare castings? The reason I ask is because I wanted to powdercoat mine, but was afraid of accidentally messing up the sight glass on the front one, and I didn't know if I could get them all the way down to bare metal.
Did I see you say somewhere that you are using a Scat Blast? That's what I have, the 970 with the Scat Magic media for aluminum stuff. Its a pretty nice little unit, I just want to upgrade the vacuum/dust collection
Re: 1991 KDX 200 Rebuild
Posted: 02:06 pm Sep 29 2016
by ubareddition
TheGriz wrote:Here's a little trick for sprucing up the look of nasty yellowing parts. It doesn't work for all plastics, but it won't hurt most plastics to drop them in and try.
Clean the part as best as you can and drop them into a pot of boiling water with a spoonful of RIT dye. I left these parts in boiling water for about 1-2 minutes.
I know you said your making a new shaft but I have an extra. The new case I bought to replace my cracked one came with an extra shaft. Just wanted to offer. Let me know if your intrested.


Sent from my SM-N910V using Tapatalk
1991 KDX 200 Rebuild
Posted: 03:47 pm Sep 29 2016
by TheGriz
The dye is permanent. I did it to some plastic bits on my GasGas bike a year ago and there is no change. In my GasGas build I found that it didn't seem to work on my chain slider, which I replaced with new anyway. I have heard that depending on how long the plastic molecule chains are, it can just take longer... maybe I didn't leave it in long enough.
You can dye a part darker, but never lighter... You can use all sorts of colors, but I've found that the black hides the age and discolorations the best.
Re: 1991 KDX 200 Rebuild
Posted: 04:01 pm Sep 29 2016
by TheGriz
Tyl3r wrote:
When you blasted those master cylinders, did you get any media inside that you couldn't get out? And when you had them all apart, were they basically bare castings? The reason I ask is because I wanted to powdercoat mine, but was afraid of accidentally messing up the sight glass on the front one, and I didn't know if I could get them all the way down to bare metal.
Did I see you say somewhere that you are using a Scat Blast? That's what I have, the 970 with the Scat Magic media for aluminum stuff. Its a pretty nice little unit, I just want to upgrade the vacuum/dust collection
I taped off the reservoir of the front master cylinder and stuck a foam ear plug in the banjo end. I blasted off all the paint, down to bare aluminum. The glass media that I'm using doesn't appear to be very aggressive with the metal and leaves a like-new finish. I've been clear coating most of my bare aluminum parts... I wish I had a spare oven to powder coat with, or at least a little more shop space to put an oven.
After blasting the part, it looks like a fresh new casting. I blow it off with air, and then wash it with solvent in my parts-washer. I like to blow it all out and rinse multiple times to be sure no media is in there. Glass in the master would be like sandpaper to the seals/surface.
My front master doesn't have a sight glass. If you tape off the glass with electrical tape, the media should bounce off of it. To be safe, you could leave the reservoir cap on, tape over the glass, and plug the end. Just rinse real well. The media will work into little cracks.
I have a harbor freight cabinet. Caulked the inside real well. I use a Skat blast S35 gun... I use a shop vac for my dust, but I def need to upgrade mine as well.
Re: 1991 KDX 200 Rebuild
Posted: 04:05 pm Sep 29 2016
by TheGriz
ubareddition wrote:
I know you said your making a new shaft but I have an extra. The new case I bought to replace my cracked one came with an extra shaft. Just wanted to offer. Let me know if your intrested.
Sent you a PM. It would be awesome to get yours... I haven't been able to get more shop time to mill the flat end.
Re: 1991 KDX 200 Rebuild
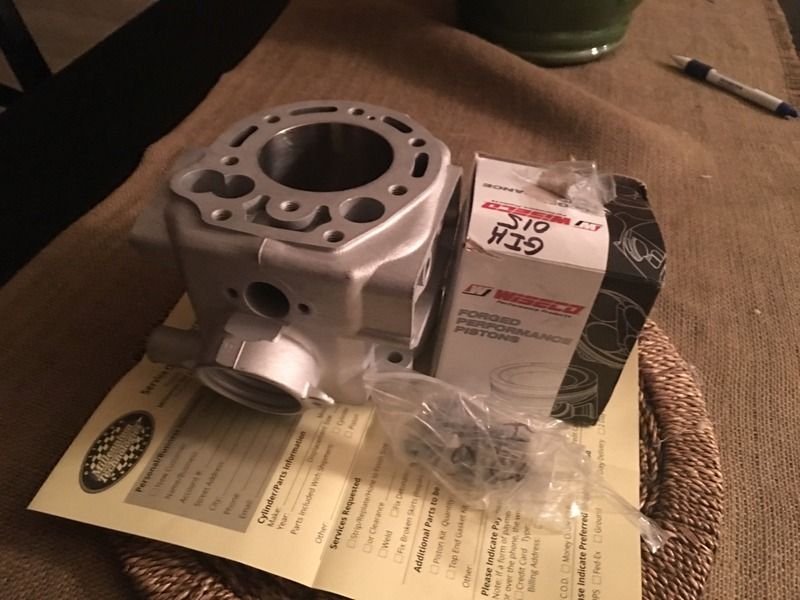
Posted: 07:27 pm Sep 29 2016
by TheGriz
Got my cylinder back! Looks fantastic. I'll start reassembling the engine tomorrow...
1991 KDX 200 Rebuild
Posted: 12:33 pm Sep 30 2016
by TheGriz
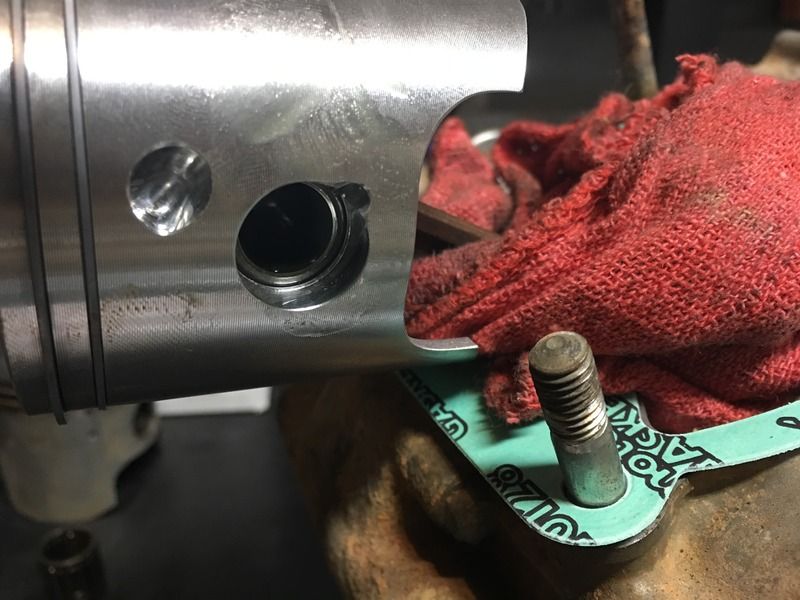
Scraped the gasket surface and installed a fresh base gasket:
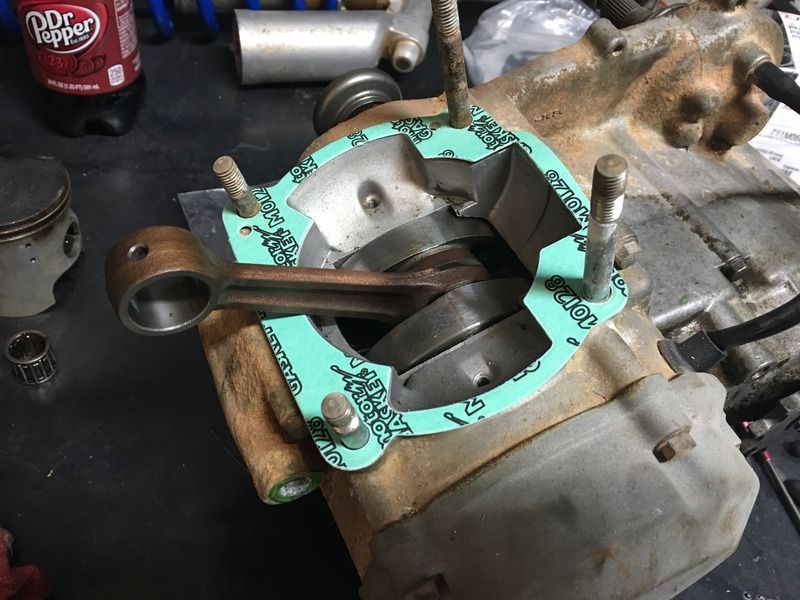
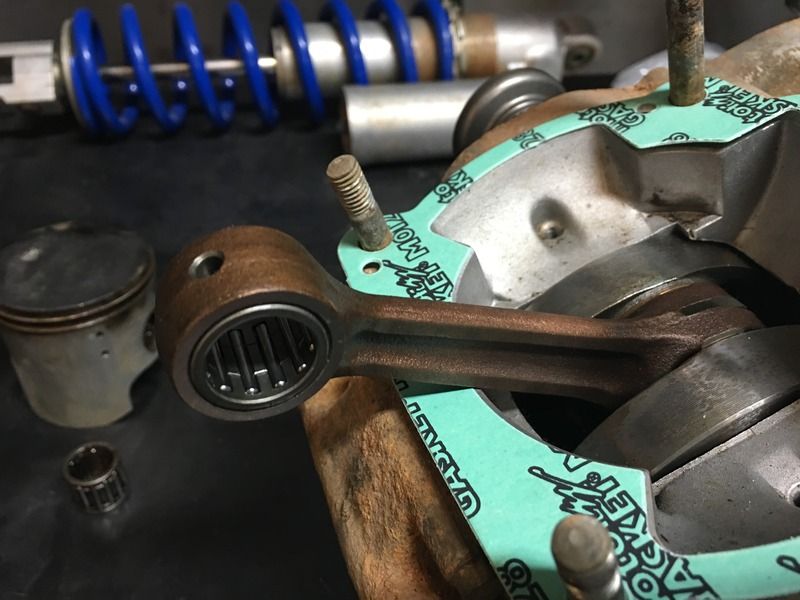
Needle Bearings - new and lubed with 2T oil
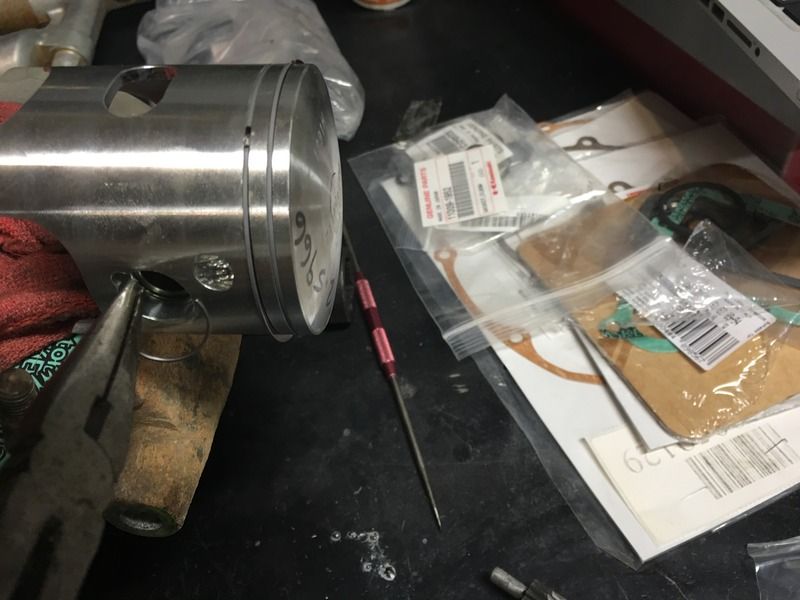
Rings installed in the grooves. Letters up and aligned with the ring stops.
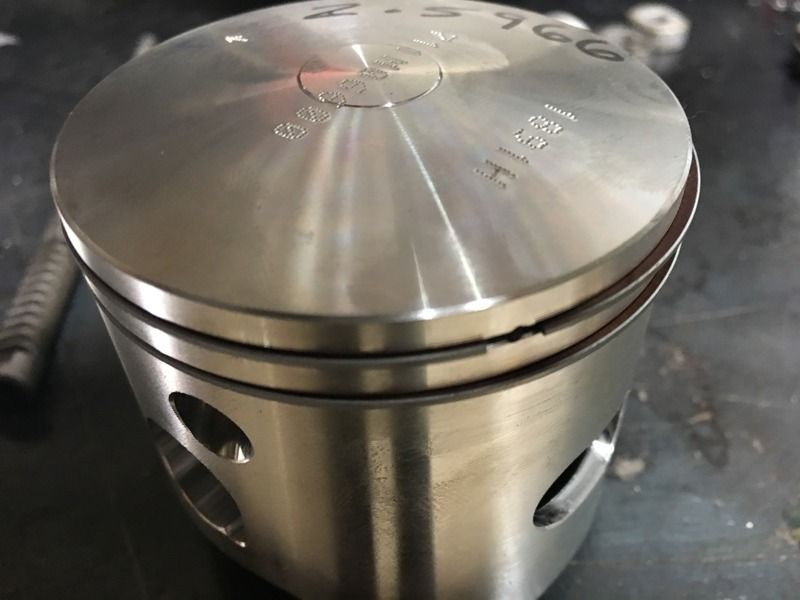
Lubed and installed the new wrist pin and installed the circle clips. It is a good idea to keep a rag in place. Dropping a circle clip into the bottom end wouldn't be fun: