kdx450 Restoration in Oz
-
kdx87
- Member
- Posts: 68
- Joined: 05:48 pm Jul 23 2014
- Country:
-
Julien D

- KDXRider.net

- Posts: 5901
- Joined: 07:53 pm Nov 07 2008
- Country: USA
- Has thanked: 15 times
- Been thanked: 27 times
- Contact:
Re: kdx450 Restoration in Oz
Lookin good! I'd love to get my hands on any of the 4XX models. Glad to see one coming back to life!
kdx450 Restoration in Oz
l think lm blushing 
That took some work !
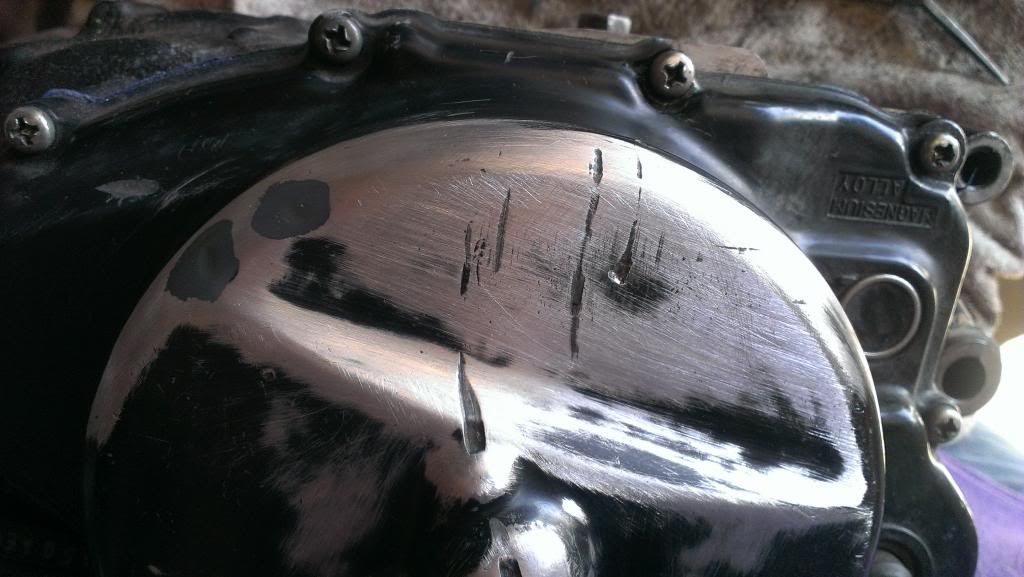

The repair was visible through the black primer but not the hi temp grey but the grey didn't stick to the alloy like the black did.

So it was a layered combination of both. When l rubbed through to alloy the black went on and if l didn't, it was grey which went on thicker without running.

There's a kv100 down the back of the shed

Its contribution is the clutch and brake lever perch's, they have mirror mounts.

When l first saw this l thought l had done some poor blasting.

The engines painted, now just walk away and let the paint dry

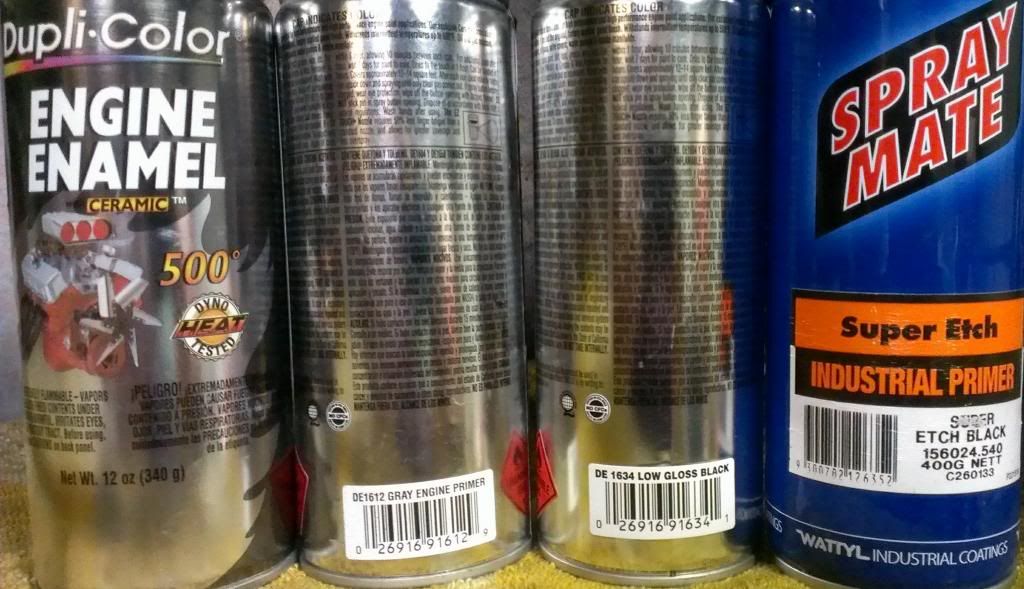
l have 9 different tins of black paint on the shelf and l mainly use 3. Frame and bits black, switchgear black and engine & exhaust black which is this hi temp stuff. l use this primer on everything except the hot stuff.
Minimising the risk......

No problems there. The fin repair is on this side.

The wiring transfer from the parts kdx250 starts now. l have plenty of other things to do but lm happy to be fitting things onto the bike now rather than putting parts on the shelf for later. The wiring may be the sort of job l want to walk away from regularly

The kick start lever hits on the head and has caused some damage. On one spline it hits the head but moving it back a spline it sits.... untidily. l have a 175 lever that sits just right as the spline is in a slightly different spot but the knuckle is smaller than the 450 so I'll swap the knuckles over but the O rings are in different places. l might just use the 175 lever and take the other one as a spare.

Restored perches with mirror mounts. None of these parts are original to the 450 but came from the depths of the shed...

for these mirrors. Just bought them from our friends at eBay and as they're in Australia, the postage is very reasonable

The wiring is very simple on the 450, there's not much to it with basic lights only. lm not sure yet if the 250 wiring will replace this wiring or work around it.

This doesn't look very simple at all

It doesn't look that bad off the bike. There's 3 plugs on the front of the loom for the ignition switch, switchgear and headlight.

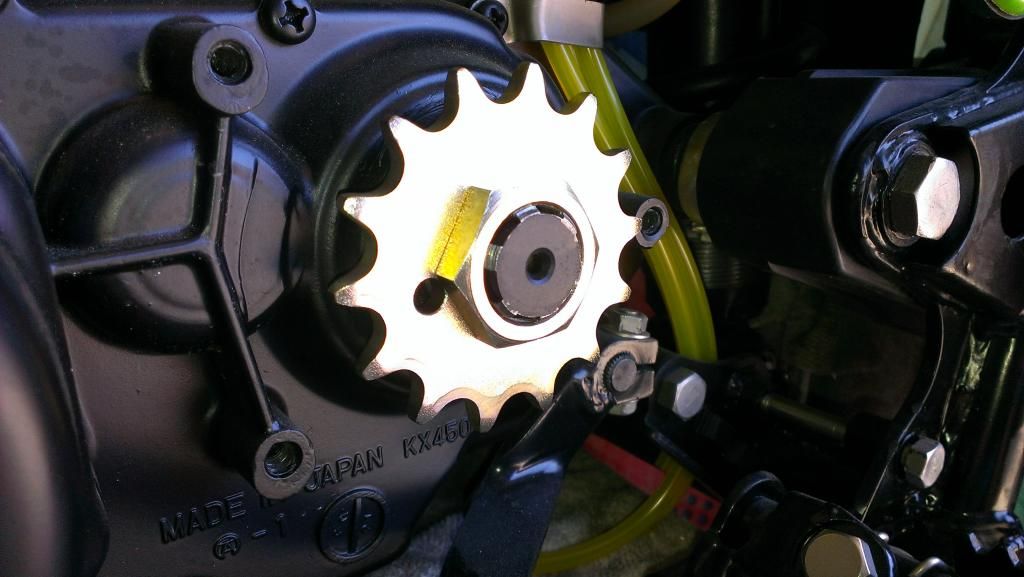
The wiring loom cleaned up well. The original piece of white tape with the loom part number is still attached and sits on top of the airbox. The air box fits well with only the top mount in the box needing a small spacer between it and the mount so the airbox lid/sidecover fits well with no gaps. My repo sprocket cover arrived today, its a faithful copy of an original.

There looks to be enough room under the tank for the resistor and flasher can to fit, at least without the pipe fitted Grin. I'll need to fashion a bracket to mount them.

The wiring sits well under the tank. With the pipe on there wont be much to see.

That took some work !


The repair was visible through the black primer but not the hi temp grey but the grey didn't stick to the alloy like the black did.

So it was a layered combination of both. When l rubbed through to alloy the black went on and if l didn't, it was grey which went on thicker without running.

There's a kv100 down the back of the shed

Its contribution is the clutch and brake lever perch's, they have mirror mounts.

When l first saw this l thought l had done some poor blasting.

The engines painted, now just walk away and let the paint dry

l have 9 different tins of black paint on the shelf and l mainly use 3. Frame and bits black, switchgear black and engine & exhaust black which is this hi temp stuff. l use this primer on everything except the hot stuff.

Minimising the risk......

No problems there. The fin repair is on this side.

The wiring transfer from the parts kdx250 starts now. l have plenty of other things to do but lm happy to be fitting things onto the bike now rather than putting parts on the shelf for later. The wiring may be the sort of job l want to walk away from regularly

The kick start lever hits on the head and has caused some damage. On one spline it hits the head but moving it back a spline it sits.... untidily. l have a 175 lever that sits just right as the spline is in a slightly different spot but the knuckle is smaller than the 450 so I'll swap the knuckles over but the O rings are in different places. l might just use the 175 lever and take the other one as a spare.

Restored perches with mirror mounts. None of these parts are original to the 450 but came from the depths of the shed...

for these mirrors. Just bought them from our friends at eBay and as they're in Australia, the postage is very reasonable

The wiring is very simple on the 450, there's not much to it with basic lights only. lm not sure yet if the 250 wiring will replace this wiring or work around it.

This doesn't look very simple at all

It doesn't look that bad off the bike. There's 3 plugs on the front of the loom for the ignition switch, switchgear and headlight.

The wiring loom cleaned up well. The original piece of white tape with the loom part number is still attached and sits on top of the airbox. The air box fits well with only the top mount in the box needing a small spacer between it and the mount so the airbox lid/sidecover fits well with no gaps. My repo sprocket cover arrived today, its a faithful copy of an original.

There looks to be enough room under the tank for the resistor and flasher can to fit, at least without the pipe fitted Grin. I'll need to fashion a bracket to mount them.

The wiring sits well under the tank. With the pipe on there wont be much to see.

kdx450 Restoration in Oz
There's a bit more wiring under the tank now. It all fits but I'll be taping it all up and cable tying everything. You cant see any part of the wiring with the tank and pipe fitted.

Best spot for the horn. Out of the way and l didn't have make anything, just 2 shallow 6mm holes for the bolts. Horn and mount courtesy KV100.

l had to offset the horn to give clearance to the headlight bulb. It all fits very neatly.

l had planned to use the drug smugglers muffler to give it that standard kdx look but l don't have a standard 450 muffler. The one l have is off a 250 and because the frame is different between the 2 models where the pipe goes into the muffler, I'd have to modify things a bit to make it work...... so I'll run with the little muffler that came with the bike. l might paint it aluminium instead of black, I'm not sure yet.

The swing arm's back and in the bike. With the 450's swingarm bush sleeves firmly rusted to the swingarm bolt its 175 to the rescue. The 175 has needle rollers and the 450 uses bushes but the same sleeves as the 175 so in they go.

All lubed up and adjusted. The spec for the distance between the centre of the spherical bearing and the unitrak upright arm is 27mm. l set these ones at 35mm because the old girl was a bit saggy in the arse before l started Grin
The boots for the bearings are new. The old bolts had to be ground out so l used lower shock mount bolts which are the right size and a tad longer than standard but not long enough to cut down. The 175 bolts were too short because this is an alloy mount and much thicker than the steel 175 arm

The chain slider on the swingarm is new, the chain guard is off a 420 (there's not a lot of differences between the 2 bikes) and the chain guide polished up well.

These would be hidden under the rubber caps....... l bought a couple of used ones that look much better.

The battery situation has turned out well. This is a 175 battery box and top mounting bracket. Slightly reshaped on the left to clear the shock res and a custom lower mount. The battery from jcar is smaller than standard so I'll mount the brake light switch in here too. No mods to the frame and happy l didn't have to chop up a perfectly good 175 battery box to get it to fit Smiley The bottom corner of the box just peeks out from behind the cover, once its painted black l don't think it will be too noticeable.

The bars are off a KLX. Best they've looked in a long time. I don't see that Ill need to remove them again so l can start to fit bits.

There's a bit of fuel stain down low but the tanks polished up well.

kdx450 Restoration in Oz
I got a good result cleaning up my kdx tank, so l thought l would go through the process here.
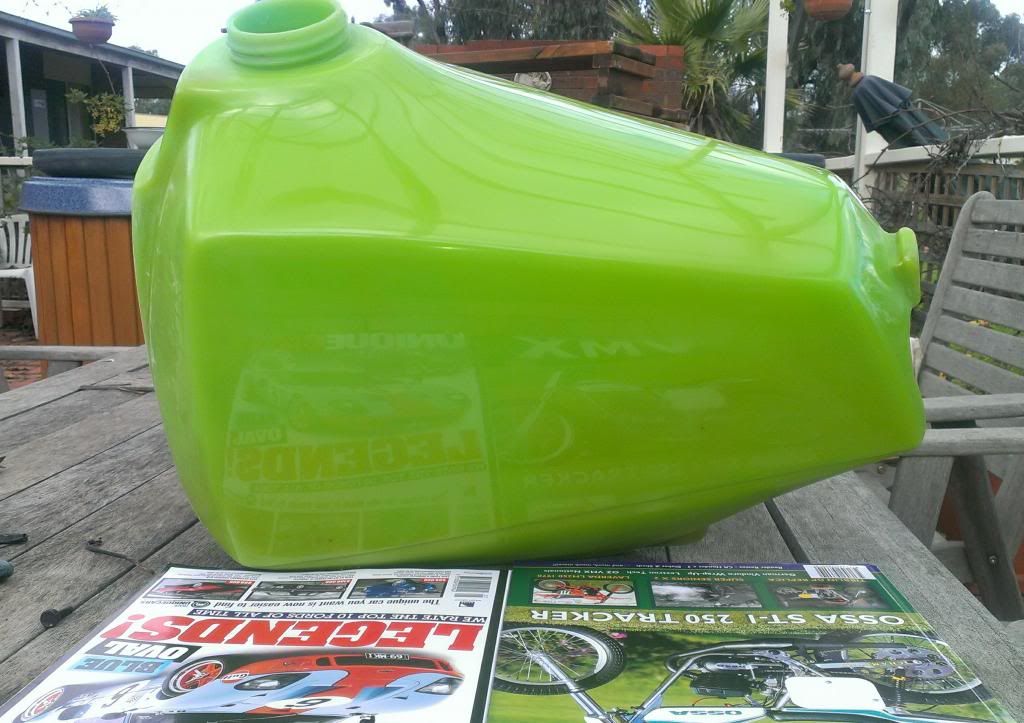
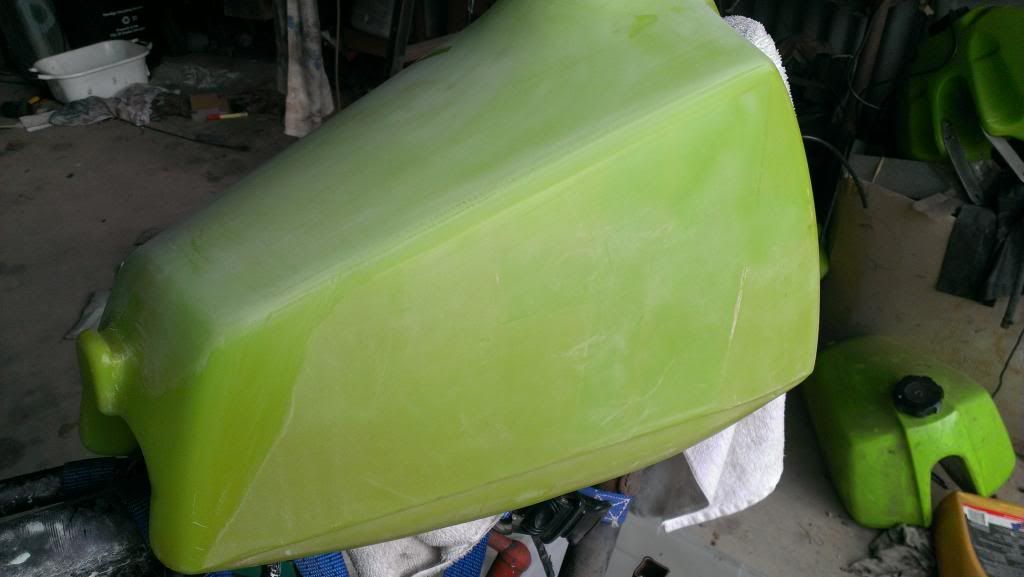
Start with an unloved tank. All the crud has helped protect this tank from UV damage.
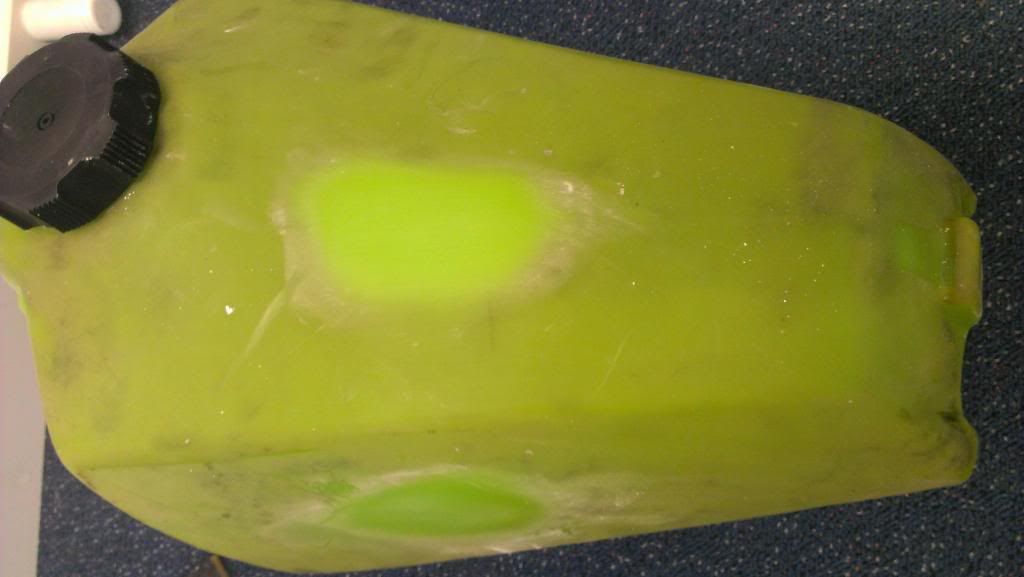
I scrubed the tank with fine steel wool and hot soapy water to remove the crud.
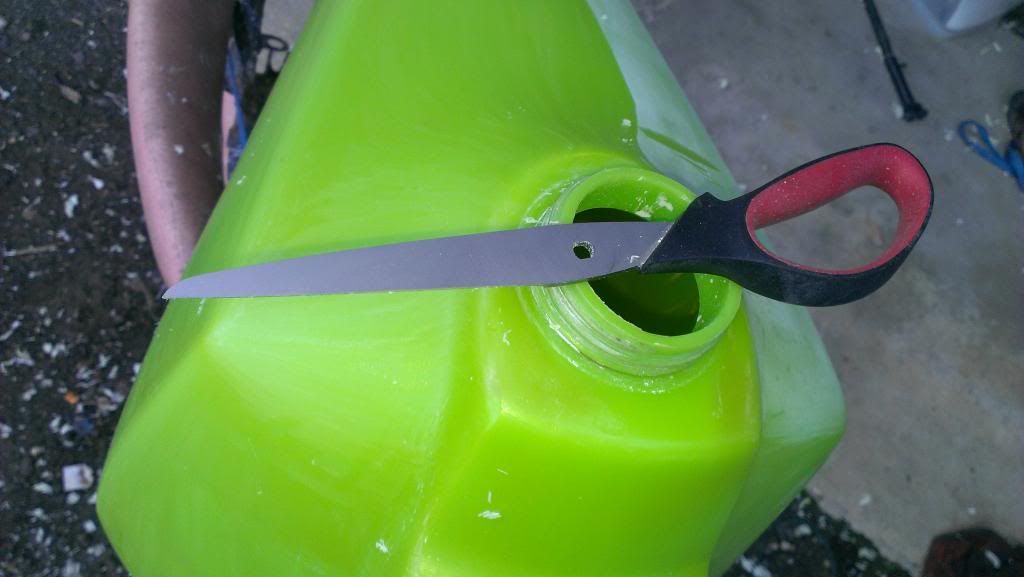
l scraped the tank with a half a pair of scissors. l find them easier to hold and use than a blade.
The tank on the left is the crud tank scraped showing the UV undamaged surface. The tank on the right has severe UV damage that l wasn't going to be able to fix. As a point of interest the UV damaged tank came from the US and the crud tank came from the UK. l wonder if the location had some impact on the amount of UV these tanks were exposed to...
Plenty of kx kdx 420 450 tanks that l had seen on the net suffered from this sort of damage. l was told that the tank on the right could be made to look new again (2 quotes, around $850 and $600) but l couldn't find any before/after picks of a Kawasaki tank that had come back from this damage.

I wet sanded with an orbital sander 360 than 800. l found that the sander didn't level all the scrape marks so l had to use a rubber rubbing block to get the tank surface flat again. Wet 360 than 800 again. It didn't take long to sand the high points off
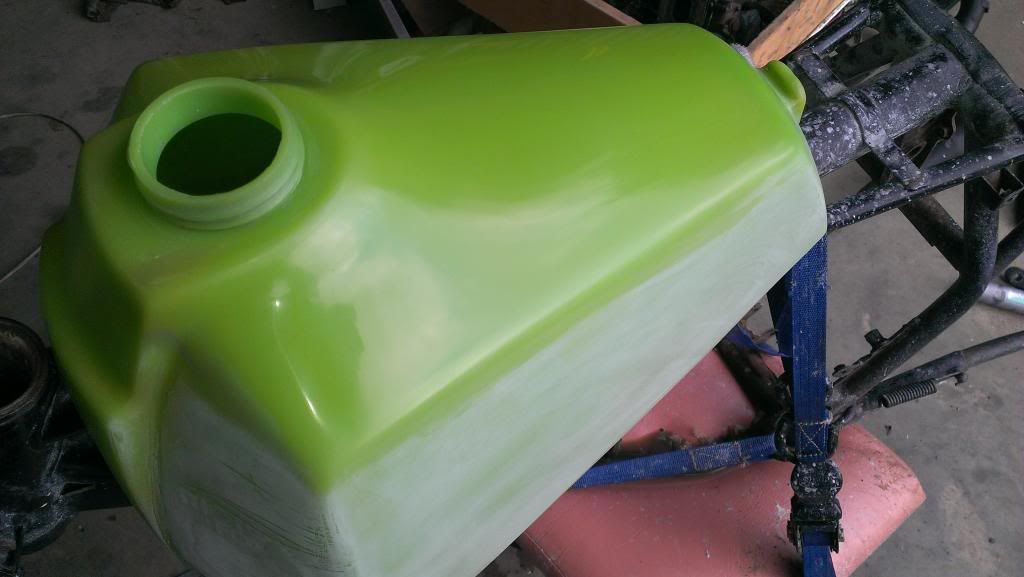
The buffing.
Wool buff pad and lots of the polishing compound. l was conscious of burning/ melting the plastic so l kept the pressure light.
Different pad for the polish, lots of polish and low pressure.

Another clean pad for the final polish. I tried a foam pad but it didn't work as well as the wool pad.
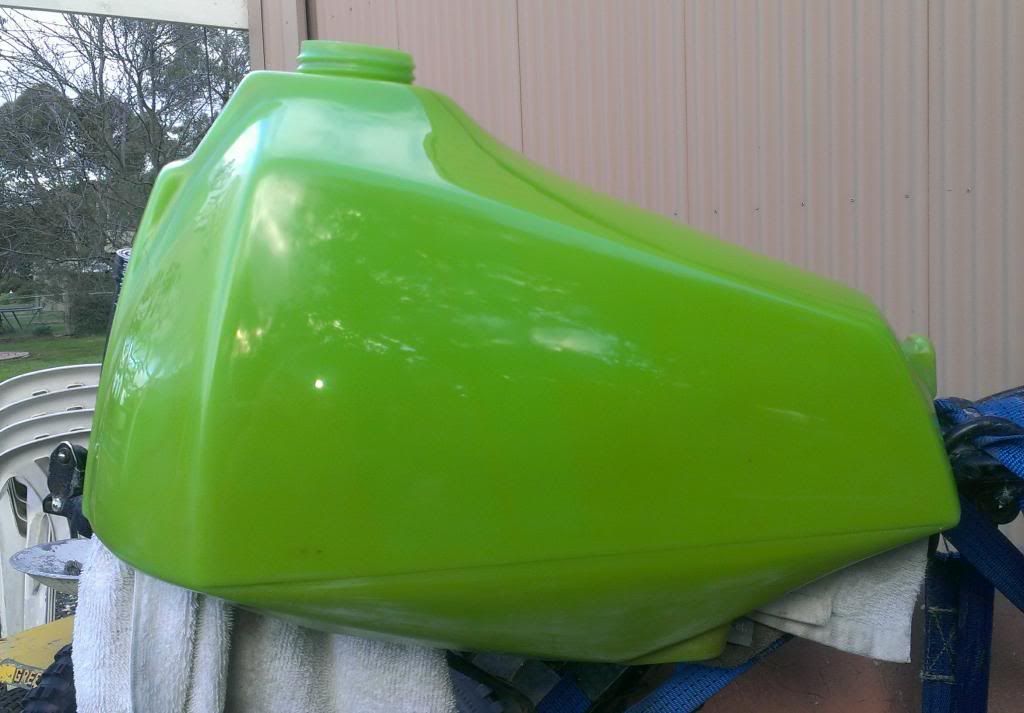
Total time investment for this tank will be around 13 hours. There is some fuel staining low on the tank but it is a 33 year old tank.
Cheers
Geoff
Start with an unloved tank. All the crud has helped protect this tank from UV damage.

I scrubed the tank with fine steel wool and hot soapy water to remove the crud.

l scraped the tank with a half a pair of scissors. l find them easier to hold and use than a blade.

The tank on the left is the crud tank scraped showing the UV undamaged surface. The tank on the right has severe UV damage that l wasn't going to be able to fix. As a point of interest the UV damaged tank came from the US and the crud tank came from the UK. l wonder if the location had some impact on the amount of UV these tanks were exposed to...
Plenty of kx kdx 420 450 tanks that l had seen on the net suffered from this sort of damage. l was told that the tank on the right could be made to look new again (2 quotes, around $850 and $600) but l couldn't find any before/after picks of a Kawasaki tank that had come back from this damage.

I wet sanded with an orbital sander 360 than 800. l found that the sander didn't level all the scrape marks so l had to use a rubber rubbing block to get the tank surface flat again. Wet 360 than 800 again. It didn't take long to sand the high points off

The buffing.
Wool buff pad and lots of the polishing compound. l was conscious of burning/ melting the plastic so l kept the pressure light.
Different pad for the polish, lots of polish and low pressure.

Another clean pad for the final polish. I tried a foam pad but it didn't work as well as the wool pad.

Total time investment for this tank will be around 13 hours. There is some fuel staining low on the tank but it is a 33 year old tank.
Cheers
Geoff
kdx450 Restoration in Oz
Things are going to move a bit slower now as everything from the other site is here 
-
bufftester

- Platinum Member

- Posts: 3559
- Joined: 06:03 pm Oct 31 2012
- Country: USA
- Location: University Place, WA
- Been thanked: 10 times
- Contact:
Re: kdx450 Restoration in Oz
Beautiful work. I have not seen a better restoration on a tank, gives me hope for some jet ski parts I have to work on. Keep up the great work. I have it in the back of my mind to put one of these big old air cooled motors in a modern frame, that would turn some heads at my local riding area
-
KDXGarage

- KDXRider.net
- Posts: 14747
- Joined: 06:45 am Nov 01 2004
- Country: United States of America
- Location: AL, USA
- Has thanked: 191 times
- Been thanked: 48 times
- Contact:
Re: kdx450 Restoration in Oz
DAMN. Congratulations on being able to achieve such results on the tank (and the bike too, of course). That tank looks quite wonderful.
Thank you for participating on kdxrider.net. 
To post pictures from a device: viewtopic.php?f=88&t=24128
To post pictures from a device: viewtopic.php?f=88&t=24128
-
MercMenace
- Member
- Posts: 1
- Joined: 09:10 am Aug 25 2014
- Country:
kdx450 Restoration in Oz
That thing is going to be Beautiful! Nice work.
I have a couple questions as I am planning to do a similar build with my 450.
For the electrical, did you end up using the full 250 loom or did you only use part of it in conjunction with the stock 450 loom? Mine is chopped to hell and back. Also when adding the battery how are you charging? off the stator I am guessing. How did it wire up? And lastly are you using a light/horn/indicator/kill switch from another model or a universal switch?
Actually I guess my question should be revised. When adding the battery on these bikes is it necessary to rewind the coil or will the stock lighting coil charge a 12 volt system adequately? I was able to add blinkers to my old blaster without rewinding the coil and If I am not mistaken the Lighting coil output is about the same.
kdx450 Restoration in Oz
Hi MercMenace,
Im using the kdx250 loom. Not Knowing what country you're from, in Australia we have design rules for rego so our kdx's that can be registered have blinkers and electric horn powered by a battery. The charge system has 2 power wires, one for the battery to charge and the other for the lights.
The 450 only has power for the lights.
So what lm doing is fitting a battery box from a 175 and a $15 jell battery from J Car to run the blinkers and horn on occasion. The switchgear will be original parts off another kdx. If l don't ride with the lights on l could plug the battery into the system to charge it on occasion. l have working electrics on my 175 and 250 (which both have club reg) and don't have the battery connected when l ride but plug it in to the system sometimes for a bit of charge.
We have Club rego where l am in Victoria. This allows limited road use and l don't need the blinkers to work for that. Its more about the Aussie kdx look l want for the 450 :-)
New tank decals for these 3 this week !

Cheers
Geoff
-
emuzic
- Member
- Posts: 10
- Joined: 12:35 pm Feb 21 2014
- Country:
kdx450 Restoration in Oz

New Stilmotor rear guard arrived today and ready for fitment
Same as on the 175

-
bazwalton
- Supporting Member I

- Posts: 30
- Joined: 12:57 pm Feb 17 2013
- Country:
- Location: Isle of Man
- Contact:
Re: kdx450 Restoration in Oz
Looking good Geoff,
If i send you a ticket to the IOM will you do my 450 next ;-)
If i send you a ticket to the IOM will you do my 450 next ;-)
https://www.facebook.com/Classic-Mann-952895831458690/ Kdx racing and restoration.
Kdx175x5 Kdx200x4 Kdx220x2 Kdx450. Kdx200AF.
Kdx175x5 Kdx200x4 Kdx220x2 Kdx450. Kdx200AF.
Re: kdx450 Restoration in Oz
Thanks Baz.bazwalton wrote:Looking good Geoff,
If i send you a ticket to the IOM will you do my 450 next ;-)
Mate, the plan is for me to come to the IOM for a holiday (happy to use your ticket though) and you have restored your 450 for me to ride
kdx450 Restoration in Oz
We're back :-)
l took a break from the 450 over our winter and sorted this 200 out. Now that our Vinduro season is over, lm feeling a bit more motivated for the level of detail the 450 requires.

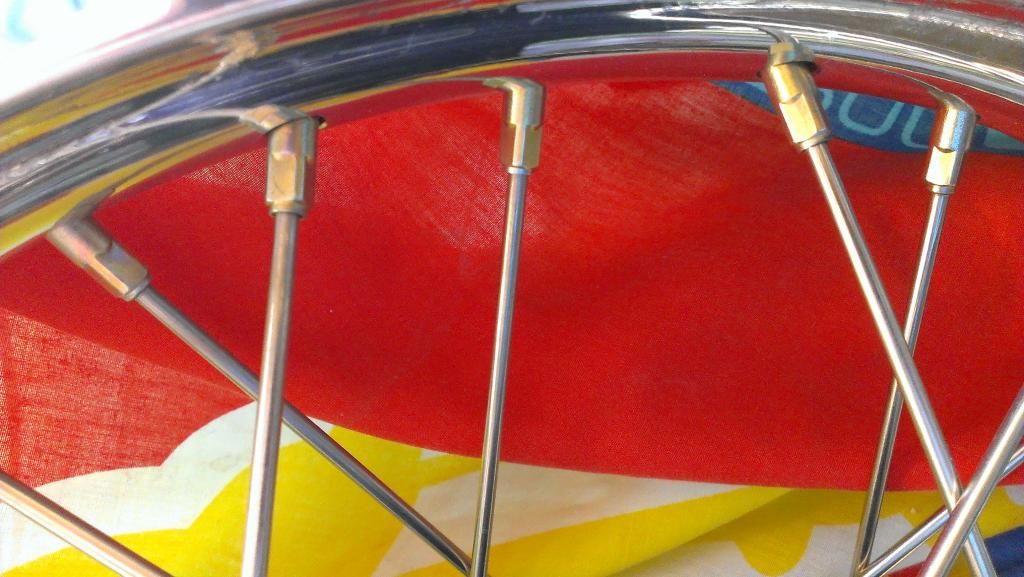
Back to the wheels. The spokes are nickel plated and the nipples are zinc with a gold chromate to replicate the color. l spent a lot of time getting a black for the hubs that l felt replicated the original black.

The 450 has Sun rims dated 1980 which l had the anodising removed and polished.
l took a break from the 450 over our winter and sorted this 200 out. Now that our Vinduro season is over, lm feeling a bit more motivated for the level of detail the 450 requires.

Back to the wheels. The spokes are nickel plated and the nipples are zinc with a gold chromate to replicate the color. l spent a lot of time getting a black for the hubs that l felt replicated the original black.

The 450 has Sun rims dated 1980 which l had the anodising removed and polished.
-
KDXGarage
- KDXRider.net
- Posts: 14747
- Joined: 06:45 am Nov 01 2004
- Country: United States of America
- Location: AL, USA
- Has thanked: 191 times
- Been thanked: 48 times
- Contact:
Re: kdx450 Restoration in Oz
DAMN DUDE, You rule. 


Thank you for participating on kdxrider.net.
To post pictures from a device: viewtopic.php?f=88&t=24128
To post pictures from a device: viewtopic.php?f=88&t=24128
-
Sullyfam

- Gold Member

- Posts: 459
- Joined: 12:19 am Dec 10 2013
- Country:
- Location: Fort Worth, tx
Re: kdx450 Restoration in Oz
Looks better than showroom! Very well done. Makes me wish I had the patience.
Sent from my iPhone using Tapatalk
Sent from my iPhone using Tapatalk
kdx450 Restoration in Oz
Thanks Blokes :-)
Rear brake lever is alloy and polished up nicely. The cam is zinc with a hint of gold and the bolt is nickel.

I've only just started plating zinc and the fact that you can color it means l can add some subtle bling to the bike.
Rear brake lever is alloy and polished up nicely. The cam is zinc with a hint of gold and the bolt is nickel.

I've only just started plating zinc and the fact that you can color it means l can add some subtle bling to the bike.
kdx450 Restoration in Oz
Liking the zinc :-)
Polished Sun rims, nickel plated spokes and zinc plated nipples with gold chromate color.


Polished Sun rims, nickel plated spokes and zinc plated nipples with gold chromate color.

-
KDXGarage
- KDXRider.net
- Posts: 14747
- Joined: 06:45 am Nov 01 2004
- Country: United States of America
- Location: AL, USA
- Has thanked: 191 times
- Been thanked: 48 times
- Contact:
Re: kdx450 Restoration in Oz
Looks terrific!!
Is that wheel fully built? The spoke nipples don't seem to be pulled down??
Is that wheel fully built? The spoke nipples don't seem to be pulled down??
Thank you for participating on kdxrider.net.
To post pictures from a device: viewtopic.php?f=88&t=24128
To post pictures from a device: viewtopic.php?f=88&t=24128