I had a very hard time getting the KIPS valves installed correctly. The left, right and idle gear drop down in with no problem. Lining them up with the diagram in the manual to the operating rod is easy. It's the center (main) exhaust valve thats the problem. There is no good explaination in the 1989 kawasaki service manual on how to properly install and align the main exhaust valve. Even Cyclepedia seems to get it wrong. Heres how I did it (this is for the e-series '92 - '93 - '94 Kips valves kdx200 ONLY). "Gotanubike" brought to my attention:
the '89 - '90 - '91 Kips valves are different (has a different main exhaust valve) so your procudure will probably follow the manual or cyclepedia.
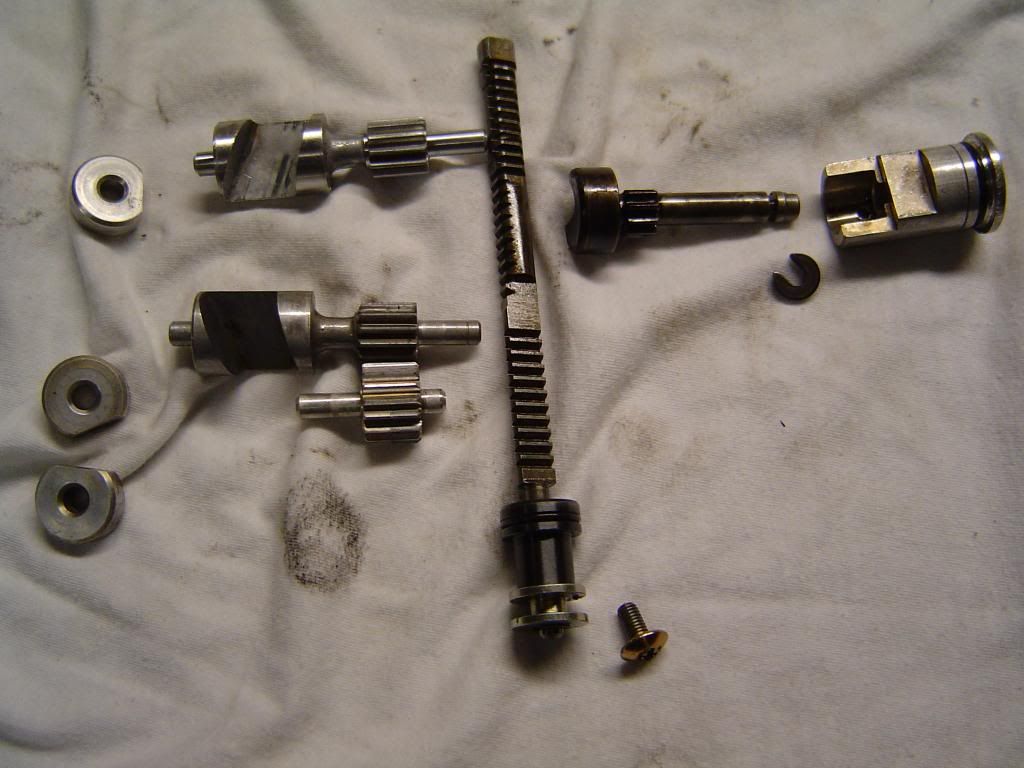
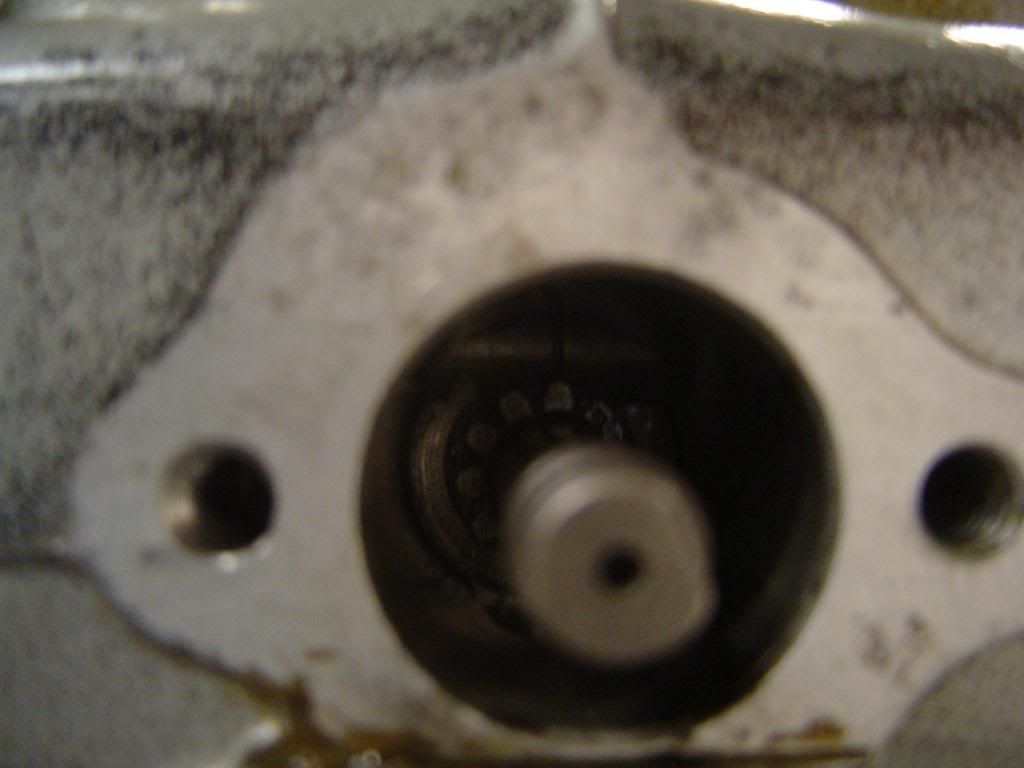
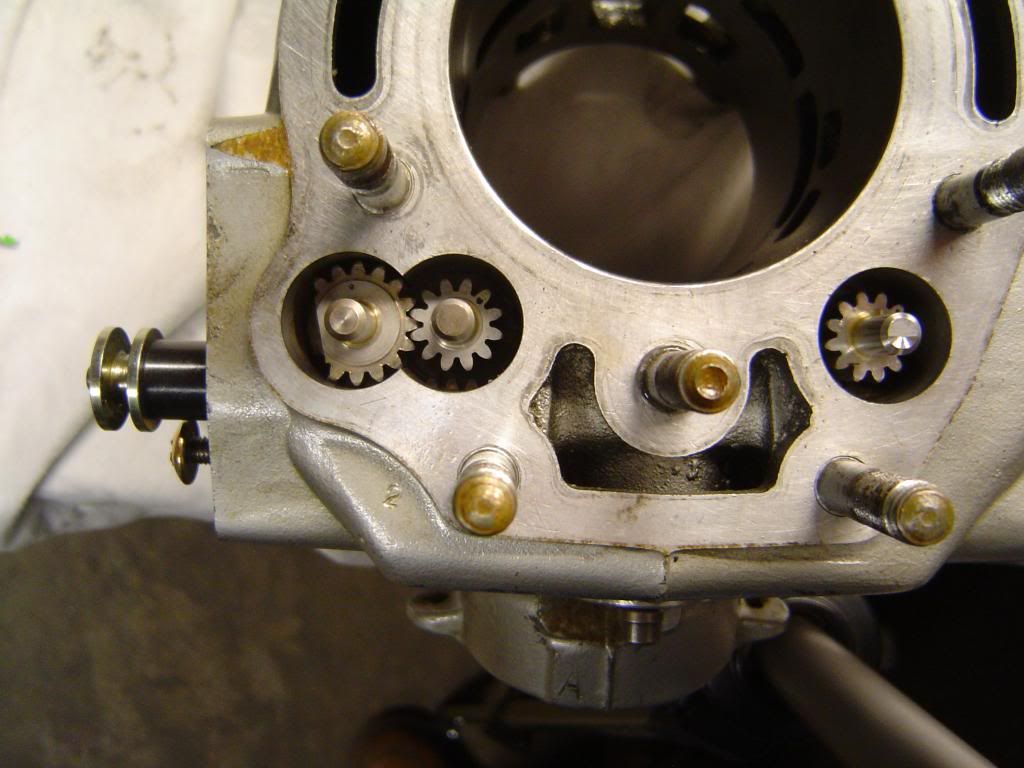
First, here are the parts for a e-series KIPS. Notice the main exhaust valve has a gear that wraps about halfway around with a flat spot on bottom.
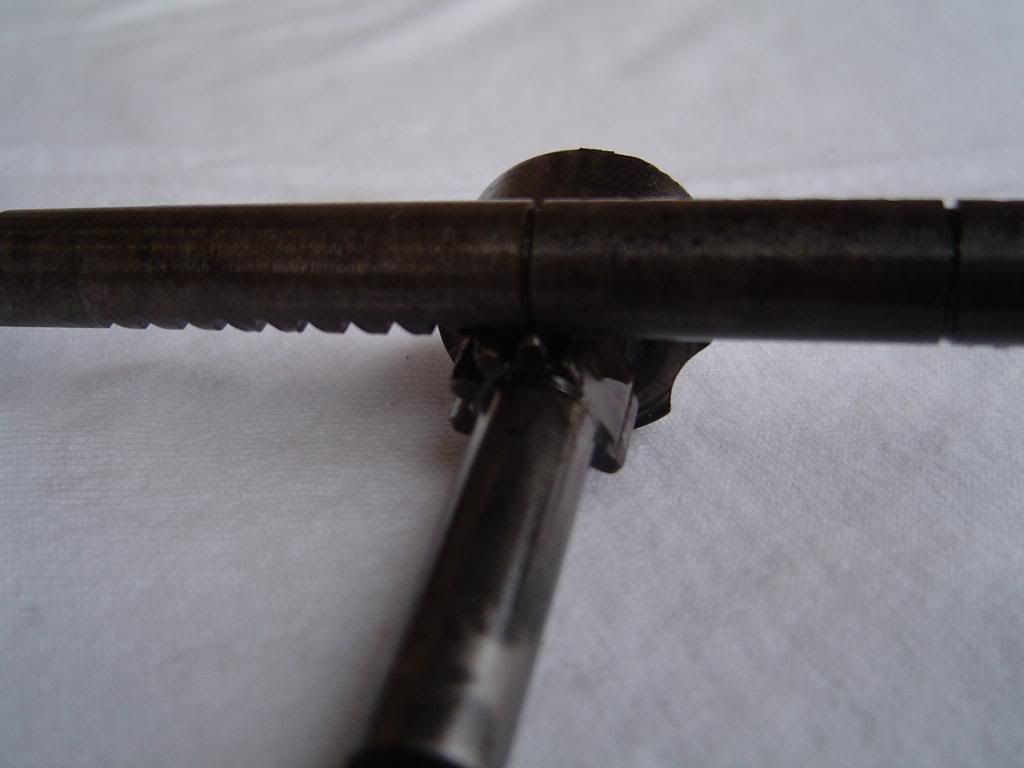

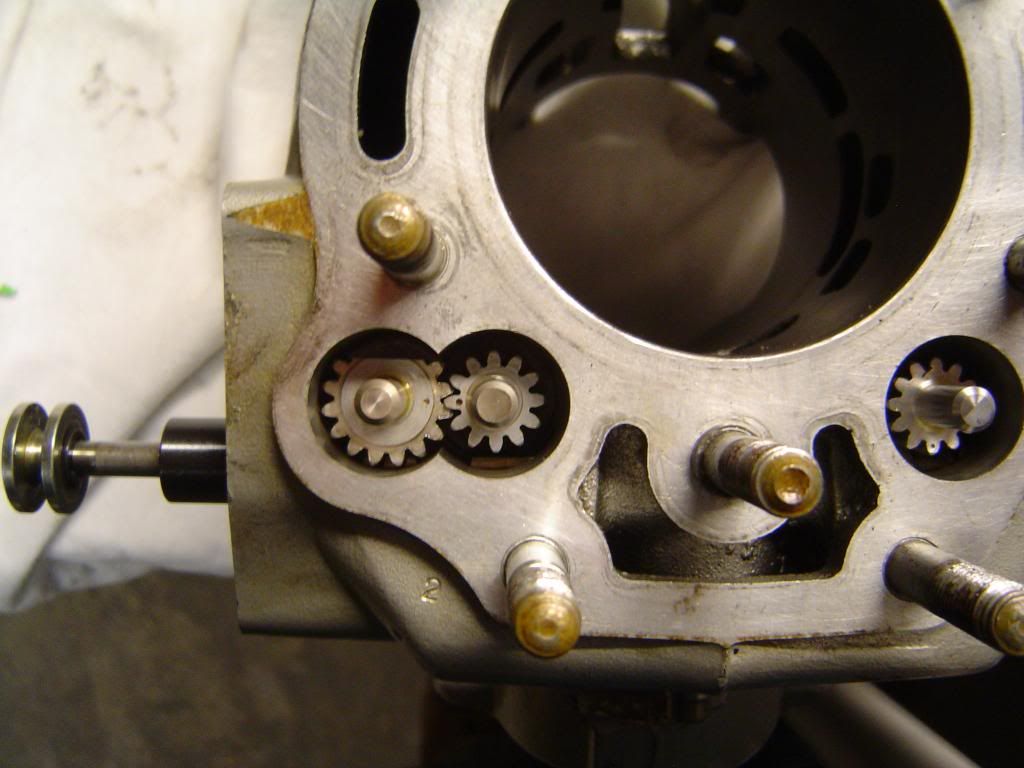
In order for the left, right and main exhaust valves all to open at the same time, they must all be aligned with the operating rod in sync. the service manual explains how to sync the left and right valves with a detailed diagram, punch marks and machined grooves but says nothing about how to align the main valve. - IMPORTANT- In these photos I show how the main exhaust valve and the operating rod will
initially be meshed (first tooth next to the flat spot on the main exhaust valve meshed with machined groove in operating rod). I could only mesh them properly by removing the cylinder head from the bike and peering into the exhaust valve port as I lined up the gears. I don't believe the main exhaust valve can be properly aligned while cylinder is still on the bike.
First thing I did was drop in the left and right exhaust valves. aligning these valves at this point is not important, I did that last step.

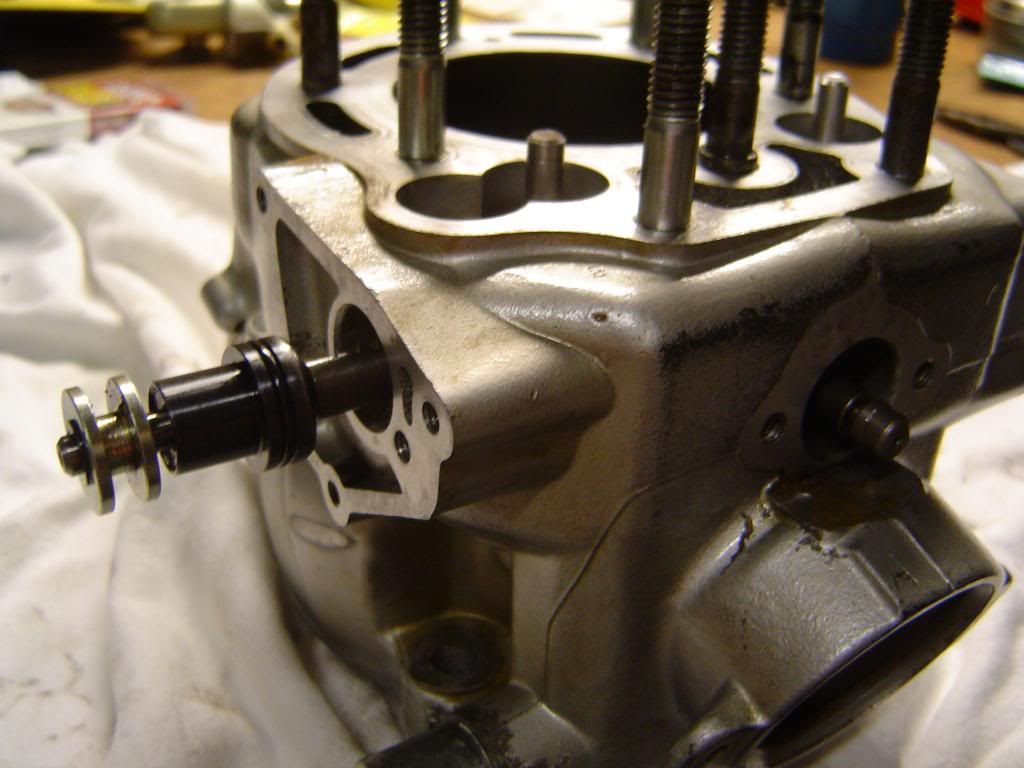
Next, I inserted the operating rod just about 1/4 of the way in. I had the two sets of teeth facing torward the cylinder where they will mesh with the right and left subvalves and the lower set of teeth that will mesh with the main exhaust valve facing down. I had to wiggle it around some and lift up on the right exhaust valve to get it in.
Then, I FULLY inserted the main exhaust valve without the outside cylinder sleeve. I had to make sure the operating rod was BACKED OUT enough or the main exhaust valve would bump into it and not go fully in. Flat spot on the gear wheel was facing UP, this is so I could get the operating rod to clear it just to the right spot where I wanted them to mesh. For now, I didnt worry about aligning the top left and right valves- did that as last step.
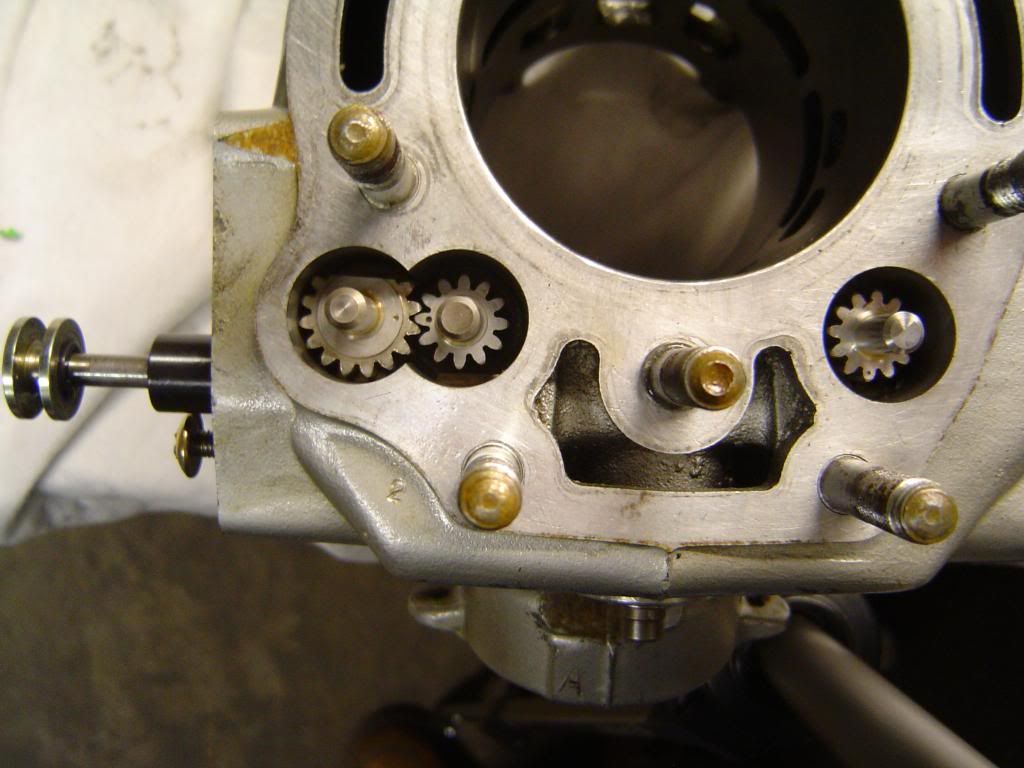
I carefully inserted the operating rod over the main exhaust valve until I met my predetermined mesh point -IMPORTANT-(see above photo #2 and #3). You have to be looking into the main exhaust valve in order to get this aligned right and this is why I think the cylinder HAS to be off the bike, otherwise, it's just blindly inserting the gear and hoping it lines up. This way, you know. When I had these teeth meshed exacly how I wanted them, the hard part was over. I double checked that the main exhaust valve was still fully inserted, then made sure the double set of teeth on the operating rod where still facing the right and left subvalve gears and the lower set of teeth on the operating rod I just meshed were still be facing DOWN.
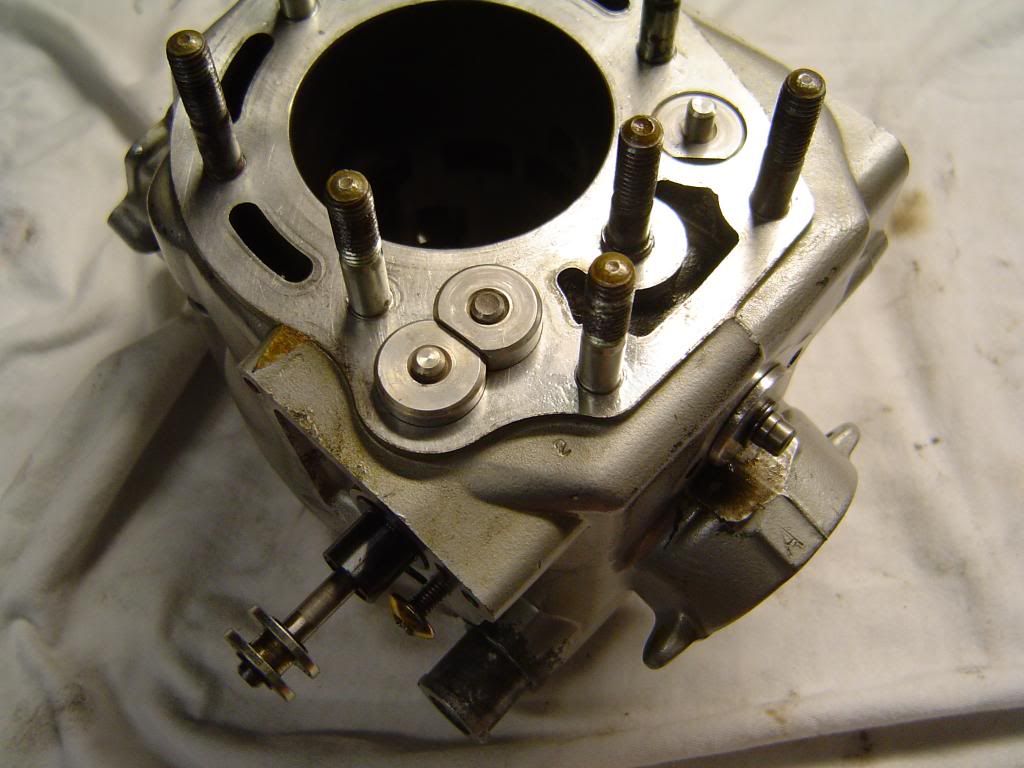
Then I finished inserting the operating rod until the rubber o ring clicked and seated into the cylinder. I had to wiggle it a little but made SURE all the teeth and gears remained meshed as I inserted it. I installed the idle gear at this point also. Next I installed the sleeve that fits over the main exhaust valve and pushed it in all the way - theres a ciclip that goes on, dont forget it, it's very small and easy to miss.
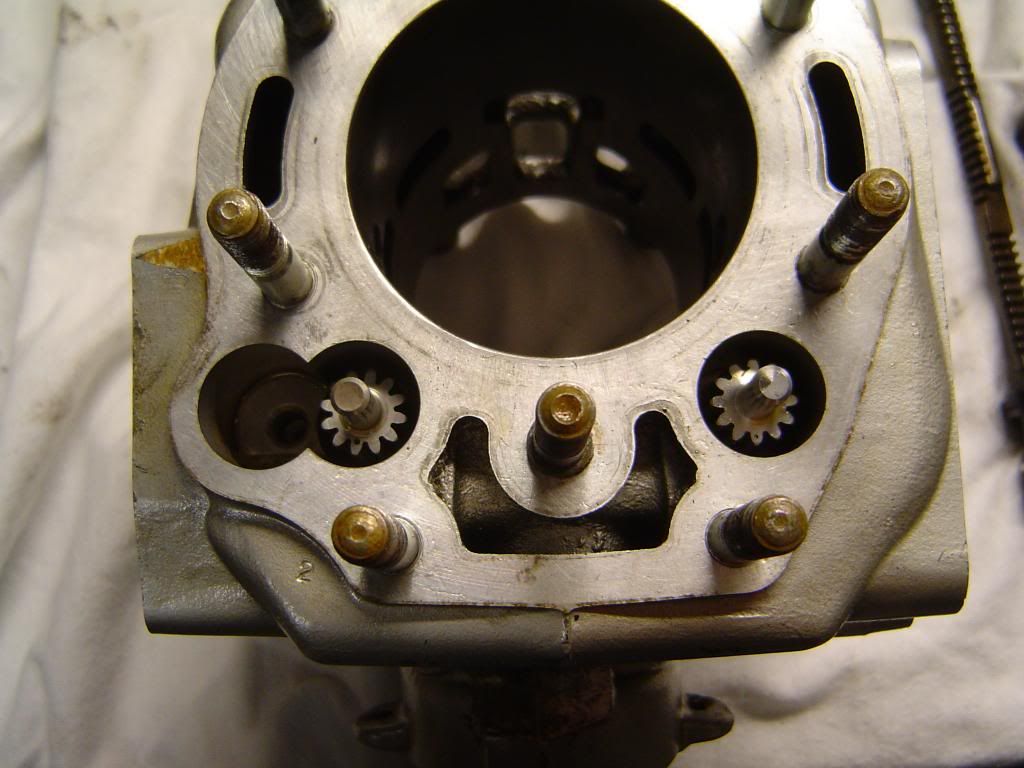
Then I lined up the top left and right exhaust valves with punch marks just like the diagram in the manual.

This is the '89 kdx200 servive manual that shows proper left and right subvalve alignment.
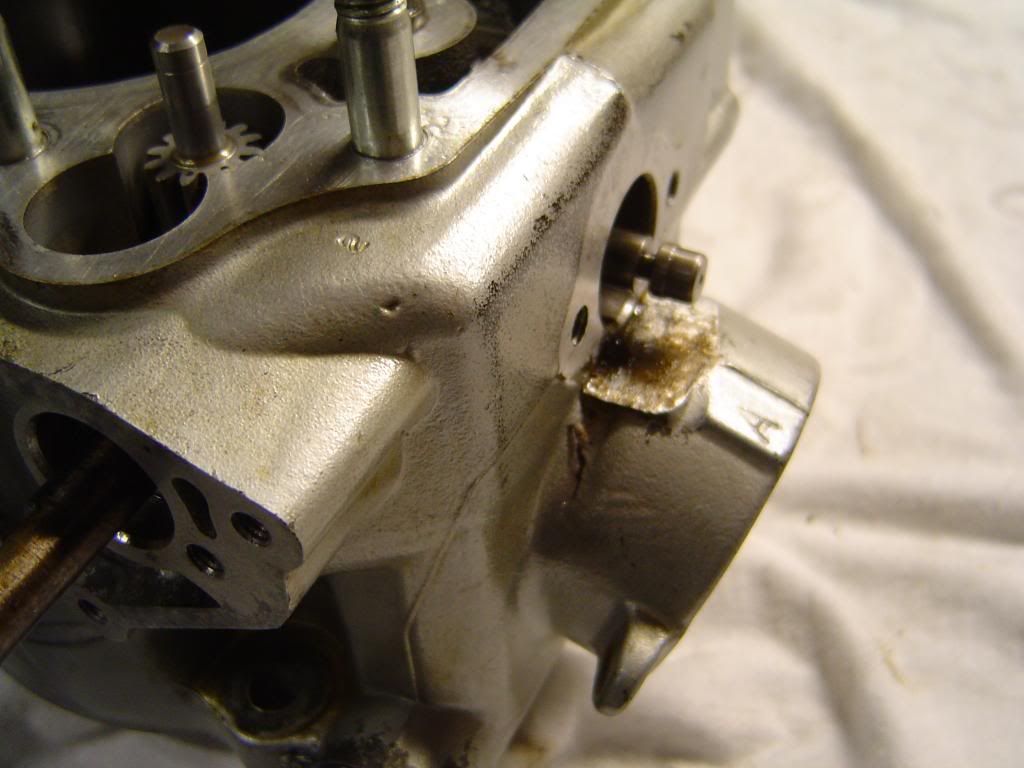
I started to put in the phillips head retaining screw but left it out a bit just for the photo. Now, in this position and with the operating rod slid out, all ports are OPEN. With the operating rod slid to "open" position, I calibrated my left and right subvalveles to the service manual diagram. I installed the top collars in the correct position. After I installed the collars, main exhaust valve sleeve and circlip - the thing slid in and out like butter.
This photo shows the operating rod slid to "closed" position. All valves were closed. Top of gear on the main exhaust valve is cleanly facing UP and flat spot is on BOTTOM when in "open" or "closed" position, Rolls a little bit each way.
And final product. Hope this helps someone who was frustrated like me.