Page 4 of 10
Re: 2004 KDX 200 Rebuild
Posted: 07:12 pm Feb 22 2019
by Vossman
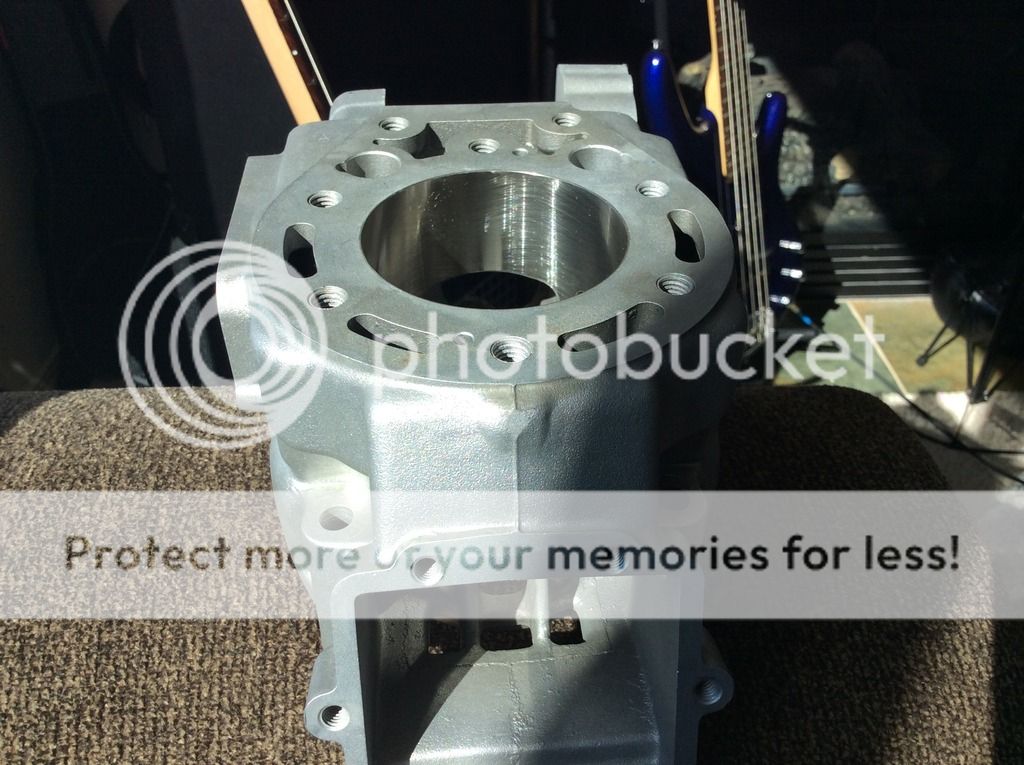
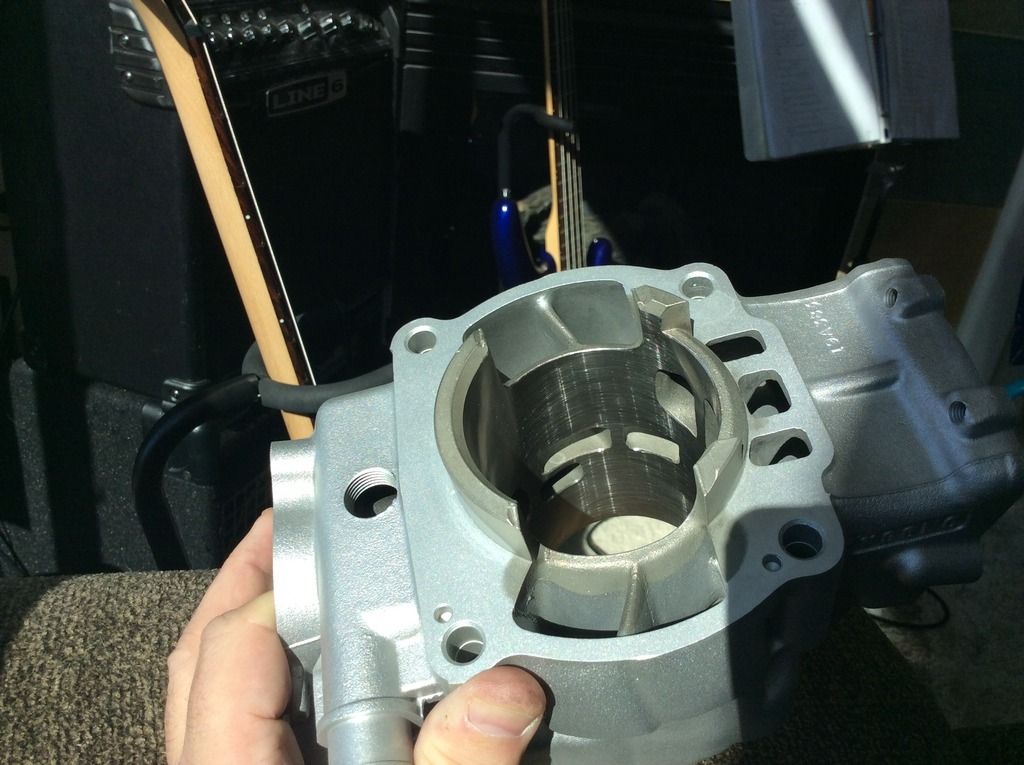
Got my cylinder back from Powerseal today. Looks great and it’s nice and clean. Now I have to try to get the cases and head close to the same color.
Boxed up my crank and parts and sent off to Ken OConnor Racing in Ct. USPS wanted $44 to ship it vs $21 for UPS or FedEx. What the heck are they smoking?
Re: 2004 KDX 200 Rebuild
Posted: 08:11 pm Feb 22 2019
by KDXGarage
I STRONGLY, STRONGLY encourage you to do the white glove test. A few warm water and detergent cleanings are usually called for.
A USPS Medium Flat Rate Box or Large Flat Rate Box may have worked for you.
Re: 2004 KDX 200 Rebuild
Posted: 08:58 pm Feb 22 2019
by Vossman
They sent good instructions on cleaning and chasing the threads. Pretty impressed. Do I need flatten the top and bottom on a piece of glass and some 1000 grit?
You’re right, flat rate box would be $20. Just looked it up. Why the difference?
Re: 2004 KDX 200 Rebuild
Posted: 02:04 am Feb 23 2019
by KDXGarage
I would not think it needs to be touched as far as straightness.
Same sized boxes stack more easily in the truck and allow more to actually fit in one load, so it helps the customer and USPS (in my opinion).
When I mail flat rate medium or large, I try to put more cardboard in there to make it stiffer. No extra cost to me, since it is the same price.
For anyone mailing often, look up Regional Rate boxes. (A and B in two sizes each)
Re: 2004 KDX 200 Rebuild
Posted: 02:14 pm Feb 23 2019
by ericr
It may look clean but I also suggest dish soap, hot water and a bottle brush. Follow that up with WD40 and a white cloth on the bore. You'll be surprised at what's embedded in there.
Re: 2004 KDX 200 Rebuild
Posted: 03:11 pm Feb 23 2019
by TwistedRoot
Am really curious to see the job they did. If you could post a pic that would be great. Should get mine back next week.
Re: 2004 KDX 200 Rebuild
Posted: 04:07 pm Feb 23 2019
by Vossman
As requested. Mine was three weeks on the nose.
Re: 2004 KDX 200 Rebuild
Posted: 04:58 pm Feb 23 2019
by KDXGarage
Re: 2004 KDX 200 Rebuild
Posted: 05:09 pm Feb 23 2019
by Vossman
Here is the suspension part. I was hoping to be able to explain how it all worked in detail but I just can’t figure out the dampers and how they meter oil flow. KDXGarage and I had a couple of good conversations on the workings of the forks so thanks to him.
There are plenty of disassembly vids on the web so I won’t go to much into that. One thing I found is that you will need a 14mm Allen Key to unscrew the bottom damper and you will either need to make a tool to fit over the damper rod with a hex bolt that is 1 inch or 27mm in diameter or buy a tool either OEM or from Freddette Racing.
I got a set of 12, 14 and 17mm Allen sockets at Autozone for cheap, like $12. I don’t know how to weld so I bought the Freddette fork tool for about $30 shipped.
Disassembly was easy following the manual. Oil goes everywhere and every time you remove something more oil comes out so have rags ready.
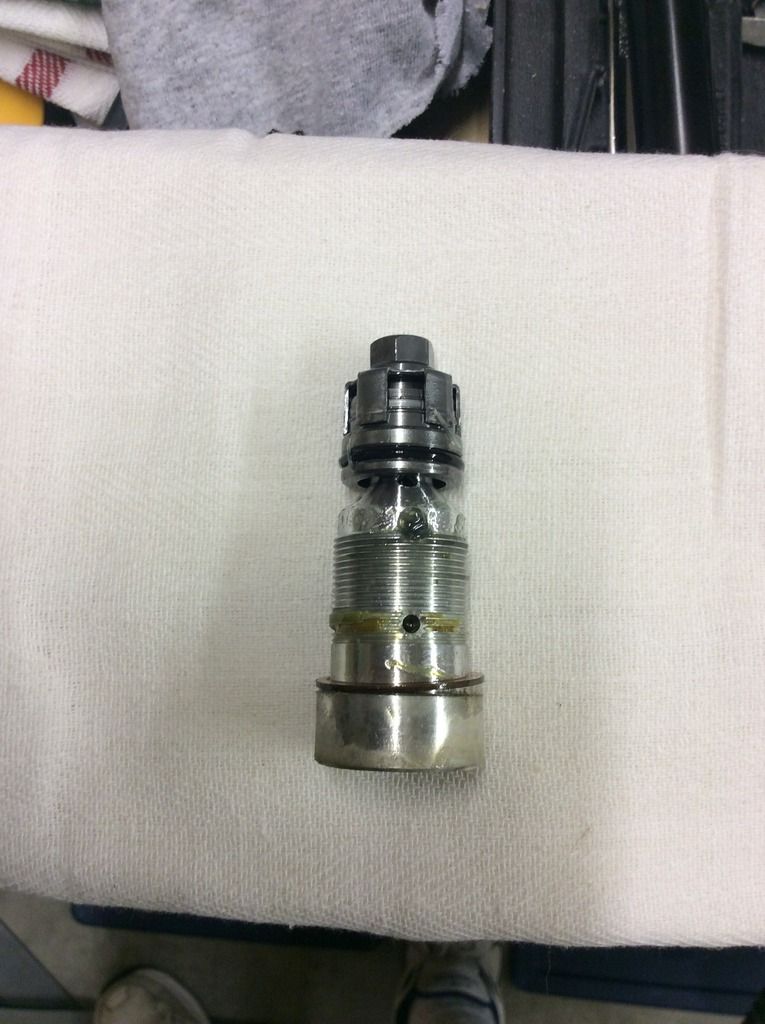
Here is the bottom damper valve. Pretty dirty, there’s even some grass in there.
This gizmo screws into the inner fork tube which is why you need a tool to hold the tube when removing this. After removing this and the oil that will come out with it, if you tip the forks bottom down the damper rod will fall out (and more oil) and then tip them the other way and the fork tube and cylinder base will come out along with more oil.
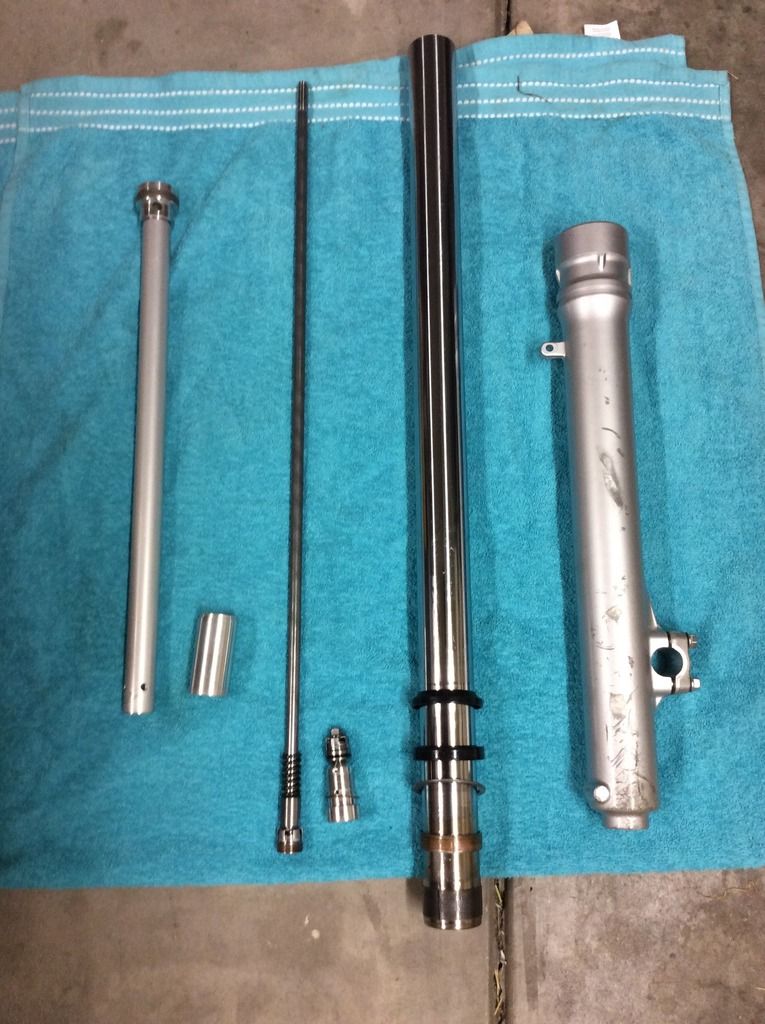
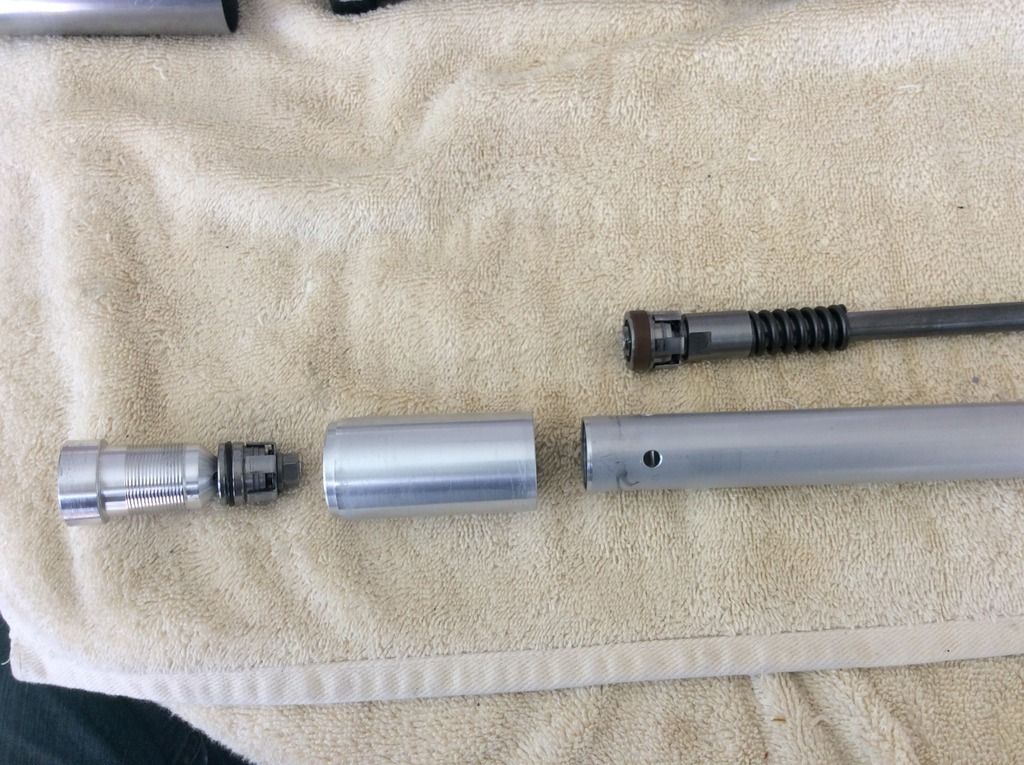
Here’s everything laid out after wiping it down. Oh, the manual is incorrect. It says the dust wiper should be above the retaining ring. Nope. Retaining ring is the first off, last on.
So just a few pics on the internals. In this one you can see the lower valve and the valve on the damper rod. Again, how they work to meter the oil flow is above my pay grade. You can see the bushing on the damper valve the prevents oil from sneaking by on the compression stroke.

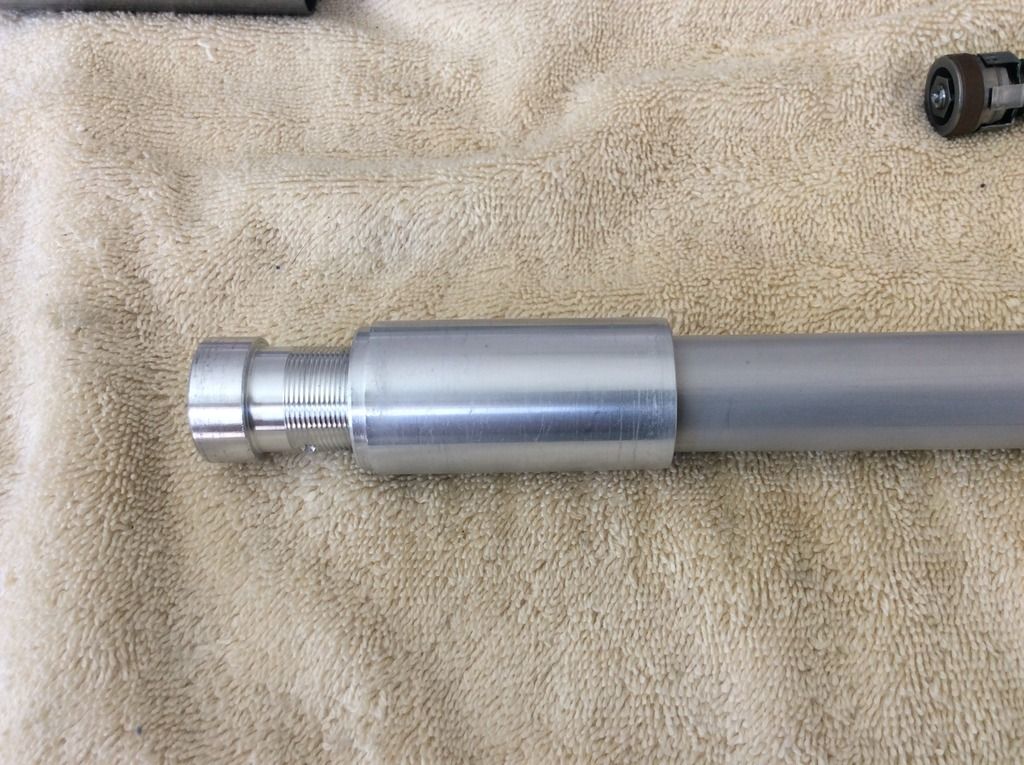
Inner fork tube with damper rod installed and Freddette tool over rod for reference. You can see the bushing and oil flow holes on the inner tube. I assume this is how the inner tube sucks in oil during compression and pushes out oil during rebound.
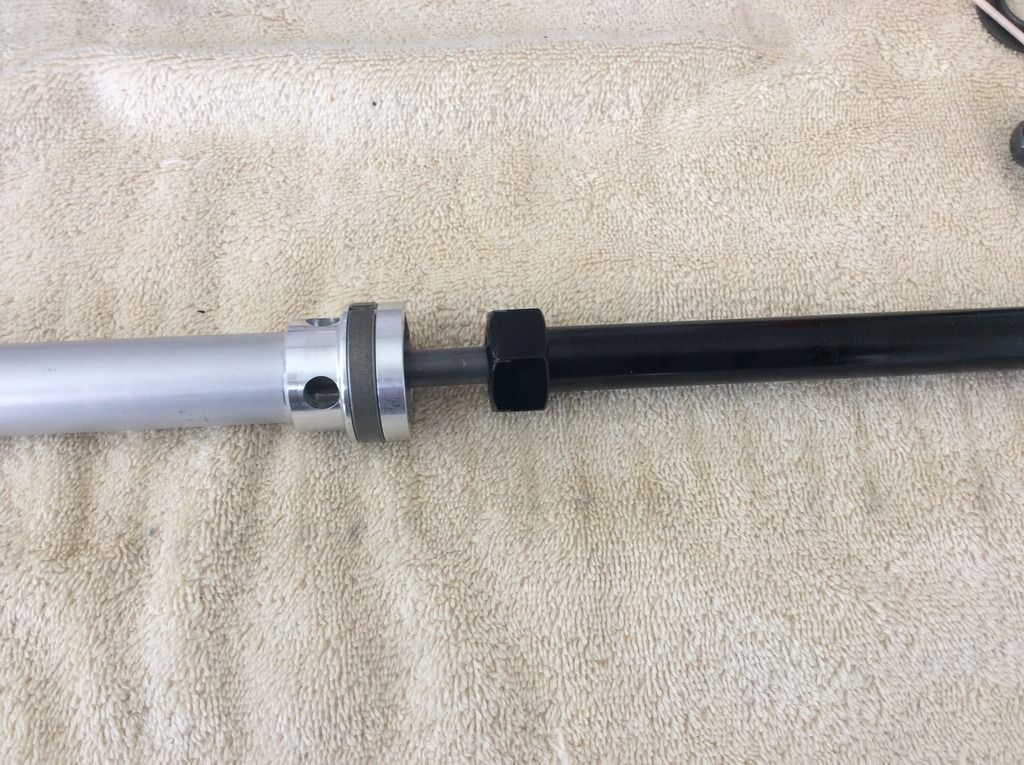
Finally the 4 most important parts put together.
Re: 2004 KDX 200 Rebuild
Posted: 09:50 am Feb 24 2019
by firsthere
That Looks great, are you planning to paint or seal the outside of the cylinder?
Re: 2004 KDX 200 Rebuild
Posted: 11:15 am Feb 24 2019
by KDXGarage
Some add on info:
The tube on the left is known as the "cartridge". When you read about "cartridge forks on the 1991 - 1994 KDX250, 1993 - 1994 KDX200 and 1995+ KDX200 / KDX220R, that is the "cartridge".
At the top of the cartridge is a seal head. There is a bushing inside there that the "cartridge rod" slides against. One can buy the bushing at Race Tech. The cartridge rod is the 10 mm diameter steel rod tp the right of the cartridge.
Outside of the seal head is a bushing which the inside of the inner tube slides against. I never could find a supplier for this bushing. If anyone finds someone selling it, let me know.
The spring on the cartridge rod is the top out spring. When the forks completely "top out", it is this spring that keeps it form CLANKING into metal.
At the bottom of the cartridge rod is where the rebound valving is. The brown ring is referred to the rebound piston band.
The small piece to the right is usually referred to as the "base valve". It might also be called a foot valve or "compression adjuster assembly", etc. This is where the compression valving is.
KDX forks didn't come with a midvalve.
The inner tube has the circlip, dust seal, oil seal, washer, outer bushing and inner bushing. The outer bushing goes on the outer tube (rightmost part). The inner bushing goes on the chrome inner tube. We are concerned with the opposite surface of the bushings. For example, the inner surface of the outer bushing and the outer surface of the inner bushing.
The yellow-ish hard substance on the base valve in the first picture above is the factory Loctite.
The FRP tool is 27 mm on one side and 30 mm on the other. I have one. It works great. 27 mm is for 1995+. 30 mm is for 1986 - 1992 KDX200. The USD forks have a different cartridge holding tool. Proper service of a 1988 - 2004 KX250 / KX500 and 1988 - 2008 KX125 fork will require a cartridge holding tool.
Re: 2004 KDX 200 Rebuild
Posted: 12:16 pm Feb 24 2019
by TwistedRoot
That cylinder looks awesome! Thanks for posting.
Re: 2004 KDX 200 Rebuild
Posted: 12:48 pm Feb 24 2019
by Vossman
Thanks for the additional info KDXGarage.
Firsthere, I’m just gonna leave it natural and try to clean the cases to match.
Re: 2004 KDX 200 Rebuild
Posted: 10:00 am Feb 25 2019
by TwistedRoot
What kind of sealant did you use for your coolant plug?
Re: 2004 KDX 200 Rebuild
Posted: 07:37 pm Feb 25 2019
by Vossman
Haven’t got to that point. I was thinking a generous amount of blue loctite. Maybe I need to do a little research on it. What are you thinking?
Re: 2004 KDX 200 Rebuild
Posted: 10:17 pm Feb 25 2019
by ericr
I ended up just using blue locktite and it's held fine. I had used a ptfe pipe joint compound that was appropriate for that application and it leaked.
Re: 2004 KDX 200 Rebuild
Posted: 07:41 am Feb 26 2019
by spl383
I have new .38 fork springs for sale for $75 if your interested. Also race tech gold valves work great
Re: 2004 KDX 200 Rebuild
Posted: 03:33 pm Feb 26 2019
by TwistedRoot
Vossman wrote: ↑07:37 pm Feb 25 2019
Haven’t got to that point. I was thinking a generous amount of blue loctite. Maybe I need to do a little research on it. What are you thinking?
I found this stuff in Home Depot for $2.71. Got some Blue Loctite for the studs too. I figure I wont have to deal with the plug for a while so might as well snug it up tight.
ericr: I ran out of blue and was going to use that until I found this stuff.
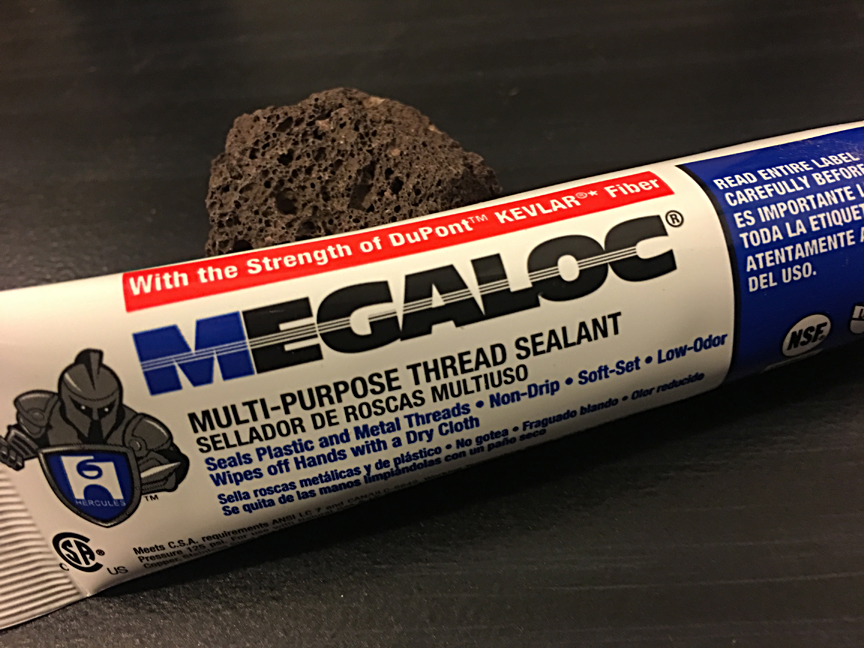
- MEGALOC57PM.jpg (471.34 KiB) Viewed 8217 times
Re: 2004 KDX 200 Rebuild
Posted: 02:03 pm Feb 28 2019
by Dan 250sr
My frame has been powder coated, not a good match and dull . Swinging arm looks good. Not my doing. But it does seem hard wearing.
Re: 2004 KDX 200 Rebuild
Posted: 06:06 pm Feb 28 2019
by Vossman
Thanks for that. I thought a little about PC.
Just ordered primer and clear coat for the frame and swingarm. I’m all in on this one. Just need a few more small parts for the motor the I will start putting it back together. Last thing I’m wanting is a new carb from RB Designs. He’s still not taking orders yet or at least not answering emails for orders.