Page 5 of 8
Re: HopFrog's 1980 KDX175 Build Log
Posted: 06:35 am Apr 14 2021
by KDXGarage
Any reason you went with that instead of Kawabond 5 or other ThreeBond equivalents (Permatex MotoSeal, etc.)?
Keep up the good work.
Re: HopFrog's 1980 KDX175 Build Log
Posted: 12:33 am Apr 15 2021
by HopFrog175
Any reason you went with that instead of Kawabond 5 or other ThreeBond equivalents (Permatex MotoSeal, etc.)?
Actually, I am not familiar with Kawabond or ThreeBond - I am happy to learn tho  I have used Yamabond years ago and it seemed fine. I have a leaning towards Loctite products and like to use them when possible. This seemed like a good application of 518, I had some on the shelf and couldn't resist. I think it will work well and, if not, I will be investigating Kawabond (hopefully nice and green :-)
Re: HopFrog's 1980 KDX175 Build Log
Posted: 01:57 am Apr 15 2021
by KDXGarage
I think Kawabond and Yamabond are the same thing.
Nice etching of the dates on the inside!
Re: HopFrog's 1980 KDX175 Build Log
Posted: 01:08 pm Apr 15 2021
by HopFrog175
Nice etching of the dates on the inside!
I figure I have room for another 30-60 years - and I think parts are hard to find now!
Re: HopFrog's 1980 KDX175 Build Log
Posted: 01:39 am Apr 23 2021
by HopFrog175
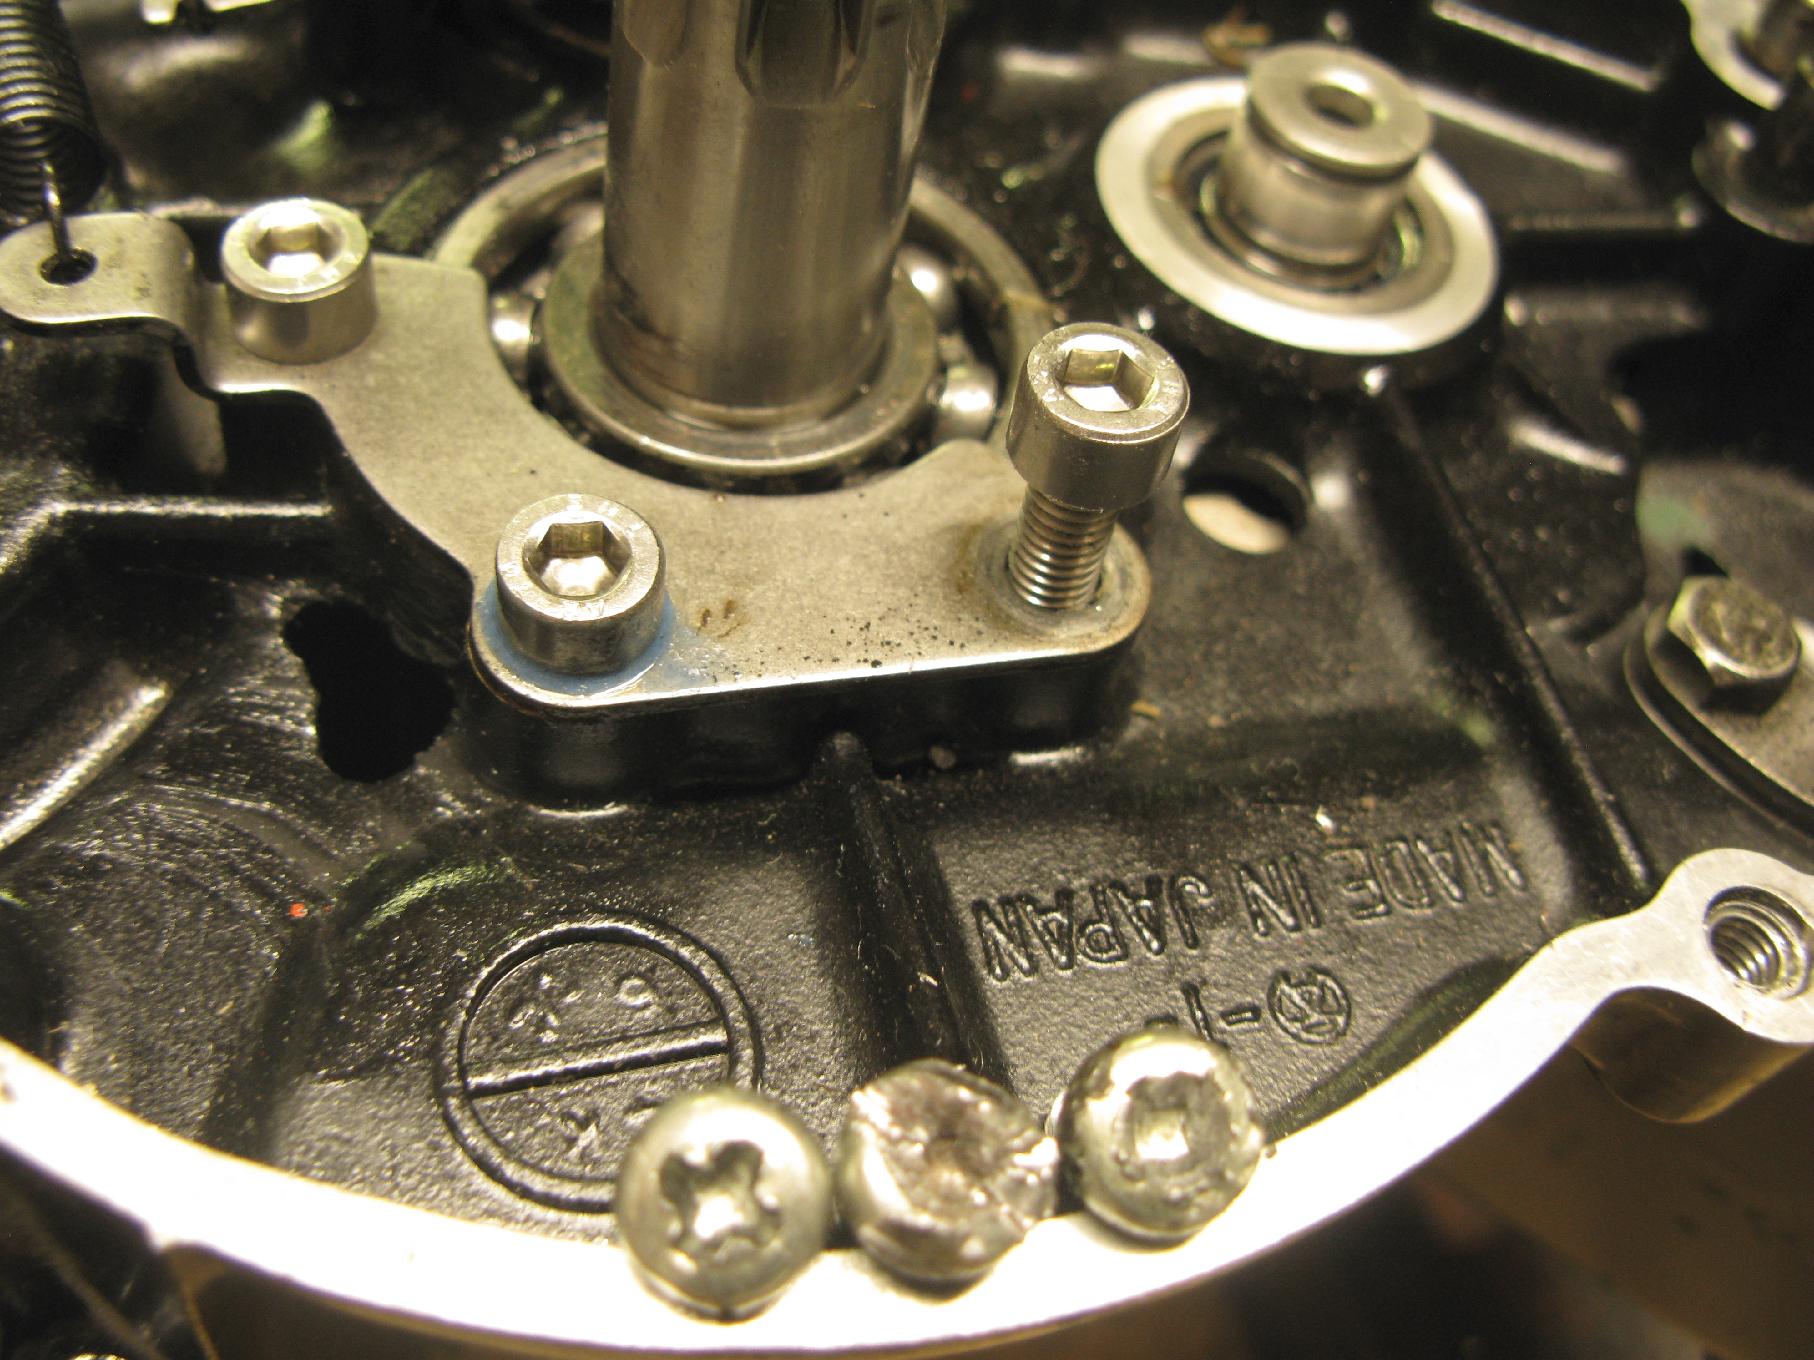
The last few hex-headed screws came in so I did some more engine assembly. Some of the old screws look like they have been in and out one time to many.
New screws!
_click image to zoom_
- 20210422_00_case_screws.jpg (289.06 KiB) Viewed 22037 times
A couple of the screws in the kick-start and shifter components have shoulders that replacements would not have - the originals were in good shape so I re-used them.
Shifter assembly

- 20210422_01_case_screws.jpg (281.97 KiB) Viewed 22037 times
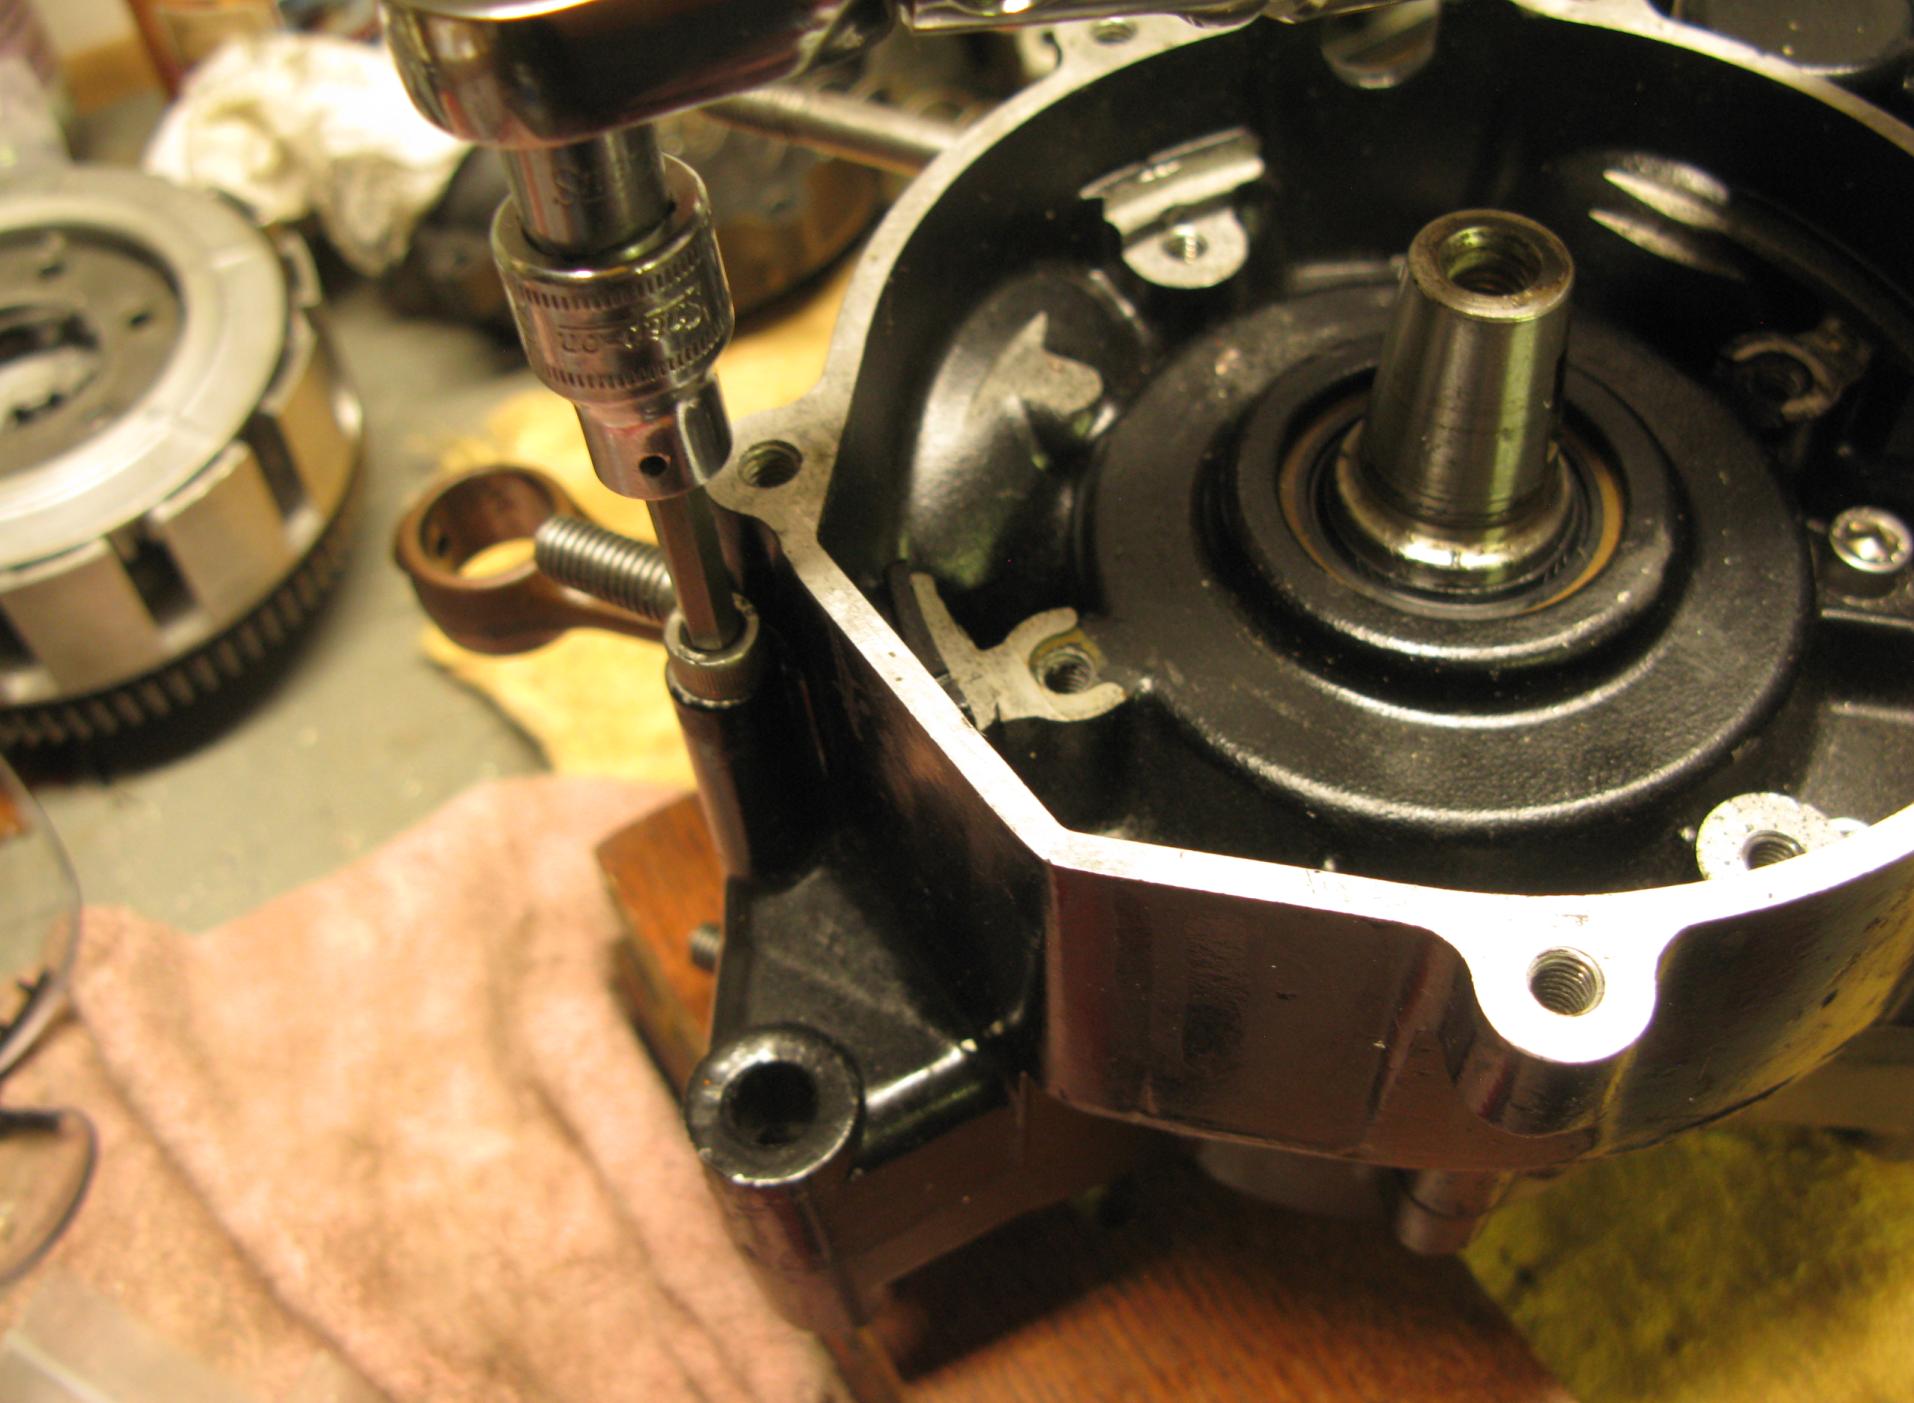
Using a torque wrench (instead of an impact driver) is really nice
Screws were torqued to 6.3 lb-ft
- 20210422_02_case_screws.jpg (219.46 KiB) Viewed 22037 times
The generator side has a total of 21 screws
Generator side

- 20210422_03_case_screws.jpg (326.28 KiB) Viewed 22037 times
The clutch side has a total of 15 screws.

- 20210422_04_case_screws.jpg (348.43 KiB) Viewed 22037 times
I will make a chart of the screws on the next post. I am trying to think of anything else for the engine while it is on the bench. So far, I have new seals, o-rings, gaskets, piston circlips, kick-start spring, reeds, clutch friction plates and most screws. Work performed last century, but never run, includes new Nikasil and piston/rings, bearings as needed and studs as needed. I will do a leak-down test once everything is buttoned up. Hopefully, no leaks, and then a little bit of safety wire should do it.
Re: HopFrog's 1980 KDX175 Build Log
Posted: 10:43 am Apr 23 2021
by Goofaroo
Looking good but if any of those internal hex bolts stand more proud than the original bolt make sure they don’t cause any interference. A bit of test fitting during assembly may prevent a lot of grief. I’m sure you’ve considered this but just thought I would mention it.
You’re gonna have a fine running 175 when you get this done!
Re: HopFrog's 1980 KDX175 Build Log
Posted: 03:30 pm Apr 24 2021
by HopFrog175
Thanks! Good advice on the screw interference - one more item added to the double-check list
Re: HopFrog's 1980 KDX175 Build Log
Posted: 04:06 pm Apr 24 2021
by KDXGarage
Were those JIS or Phillips?
Re: HopFrog's 1980 KDX175 Build Log
Posted: 12:29 am May 05 2021
by HopFrog175
Whew, finally got some kdx time in the shop :-)
Were those JIS or Phillips?
JIS, I think (the blunt nosed bits fit best).
Next up, a screw chart for the KDX175.
Re: HopFrog's 1980 KDX175 Build Log
Posted: 01:36 am May 11 2021
by HopFrog175
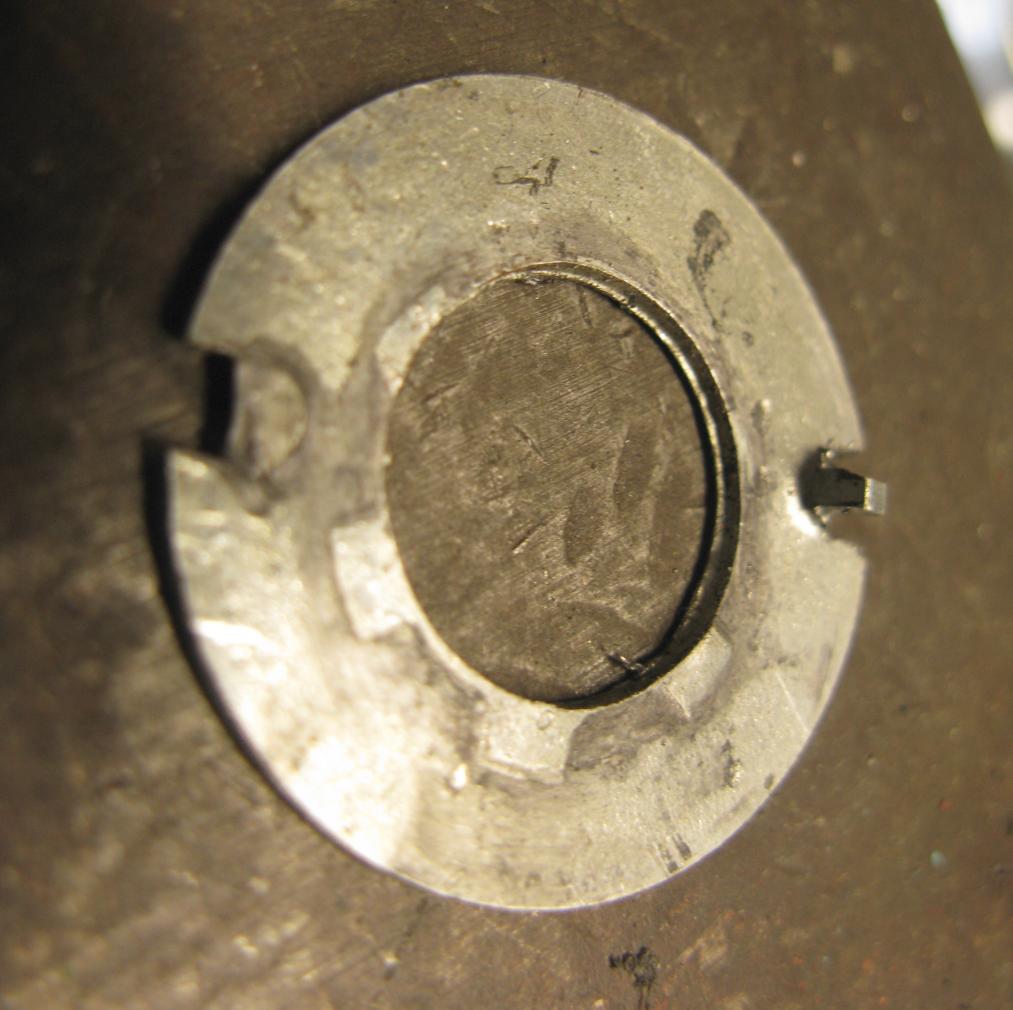
Starting on clutch re-assembly, I noticed a tab was missing on the washer (left side).
Made a new tab
_click image to zoom_
- kdx175_00_clutch.jpg (89.9 KiB) Viewed 21795 times
A couple of cuts and a little hammering produced a new tab. All set, time to pack the disks. The outer disks (friction) were binding slightly in the slots until I used the wire wheel to remove some kind of conformal coating (anti-rust?) from the edges of the tabs. Assembly proceeded but, then, while tightening the clutch hub nut to 35 lbs-ft - snap! - and nut and shaft were turning freely 
Torquing the clutch hub nut
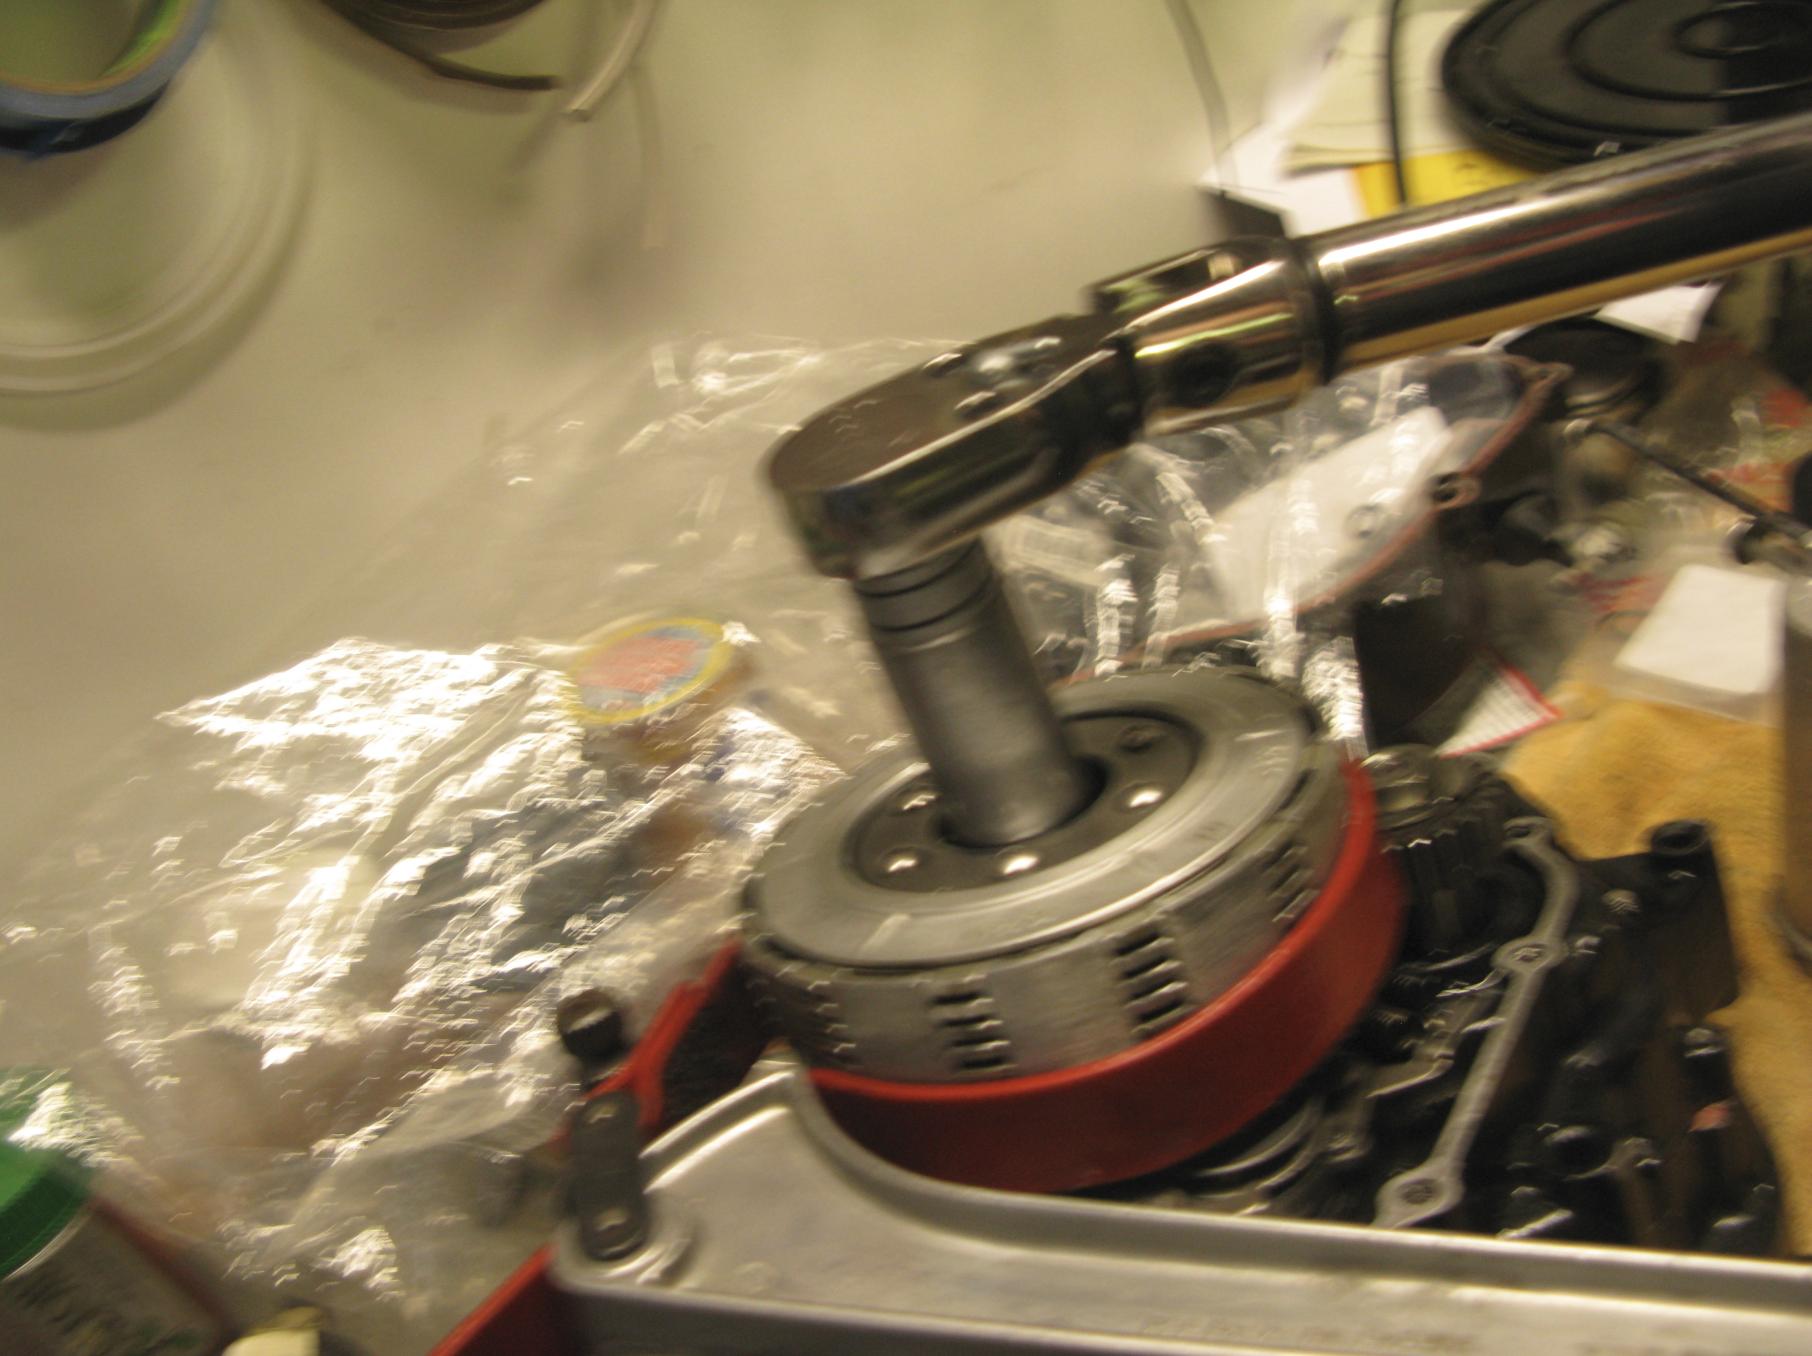
- kdx175_01_clutch.jpg (193.26 KiB) Viewed 21795 times
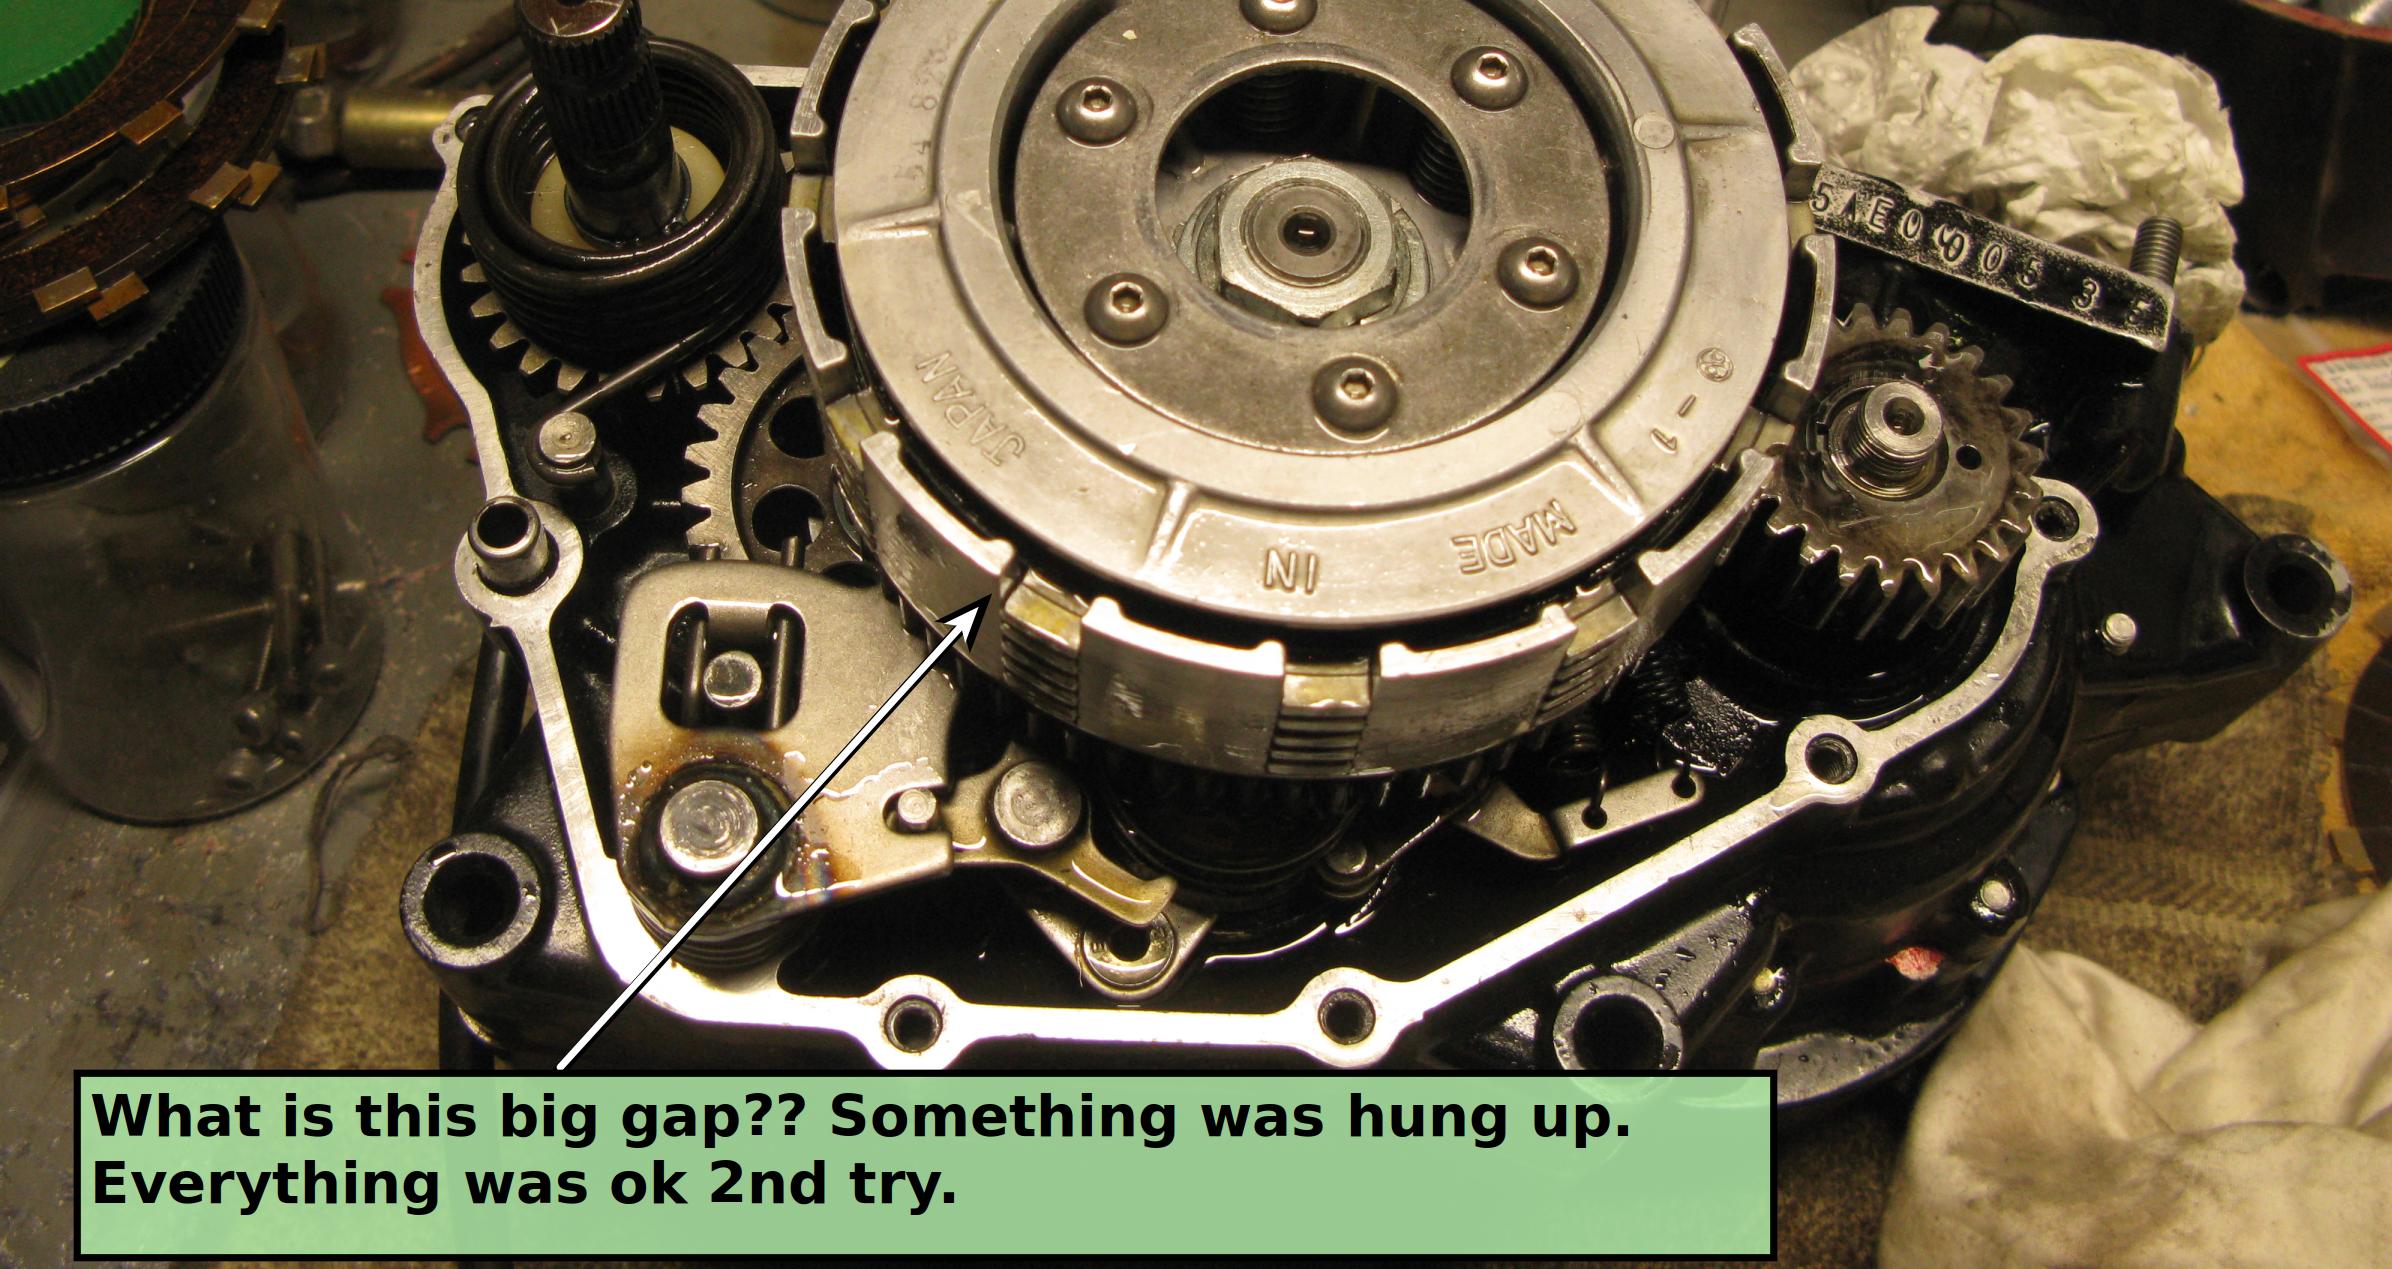
I got lucky with this before pic I happened to take - it shows that I did something wrong and there is a big gap between the top friction disks and the top hat.
Clutch disks were not seated
- kdx175_03_clutch.jpg (396.58 KiB) Viewed 21795 times
After un-doing everything, I could see that my new tab was sheared off from the washer - that must have been the snap (much relief :-)
I cut a (another) new, slightly larger, tab in the washer and assembly try number two was normal.
In retrospect, is seems like I did two things wrong. 1) I cut the first tab too small (narrow) and it sheared off, and, 2) I failed to notice that something was hanging up and the clutch pack was not fully compressing. There was enough friction to hold but only up to about 10-15 lbs-ft at which point there was nothing to keep the shaft from rotating.
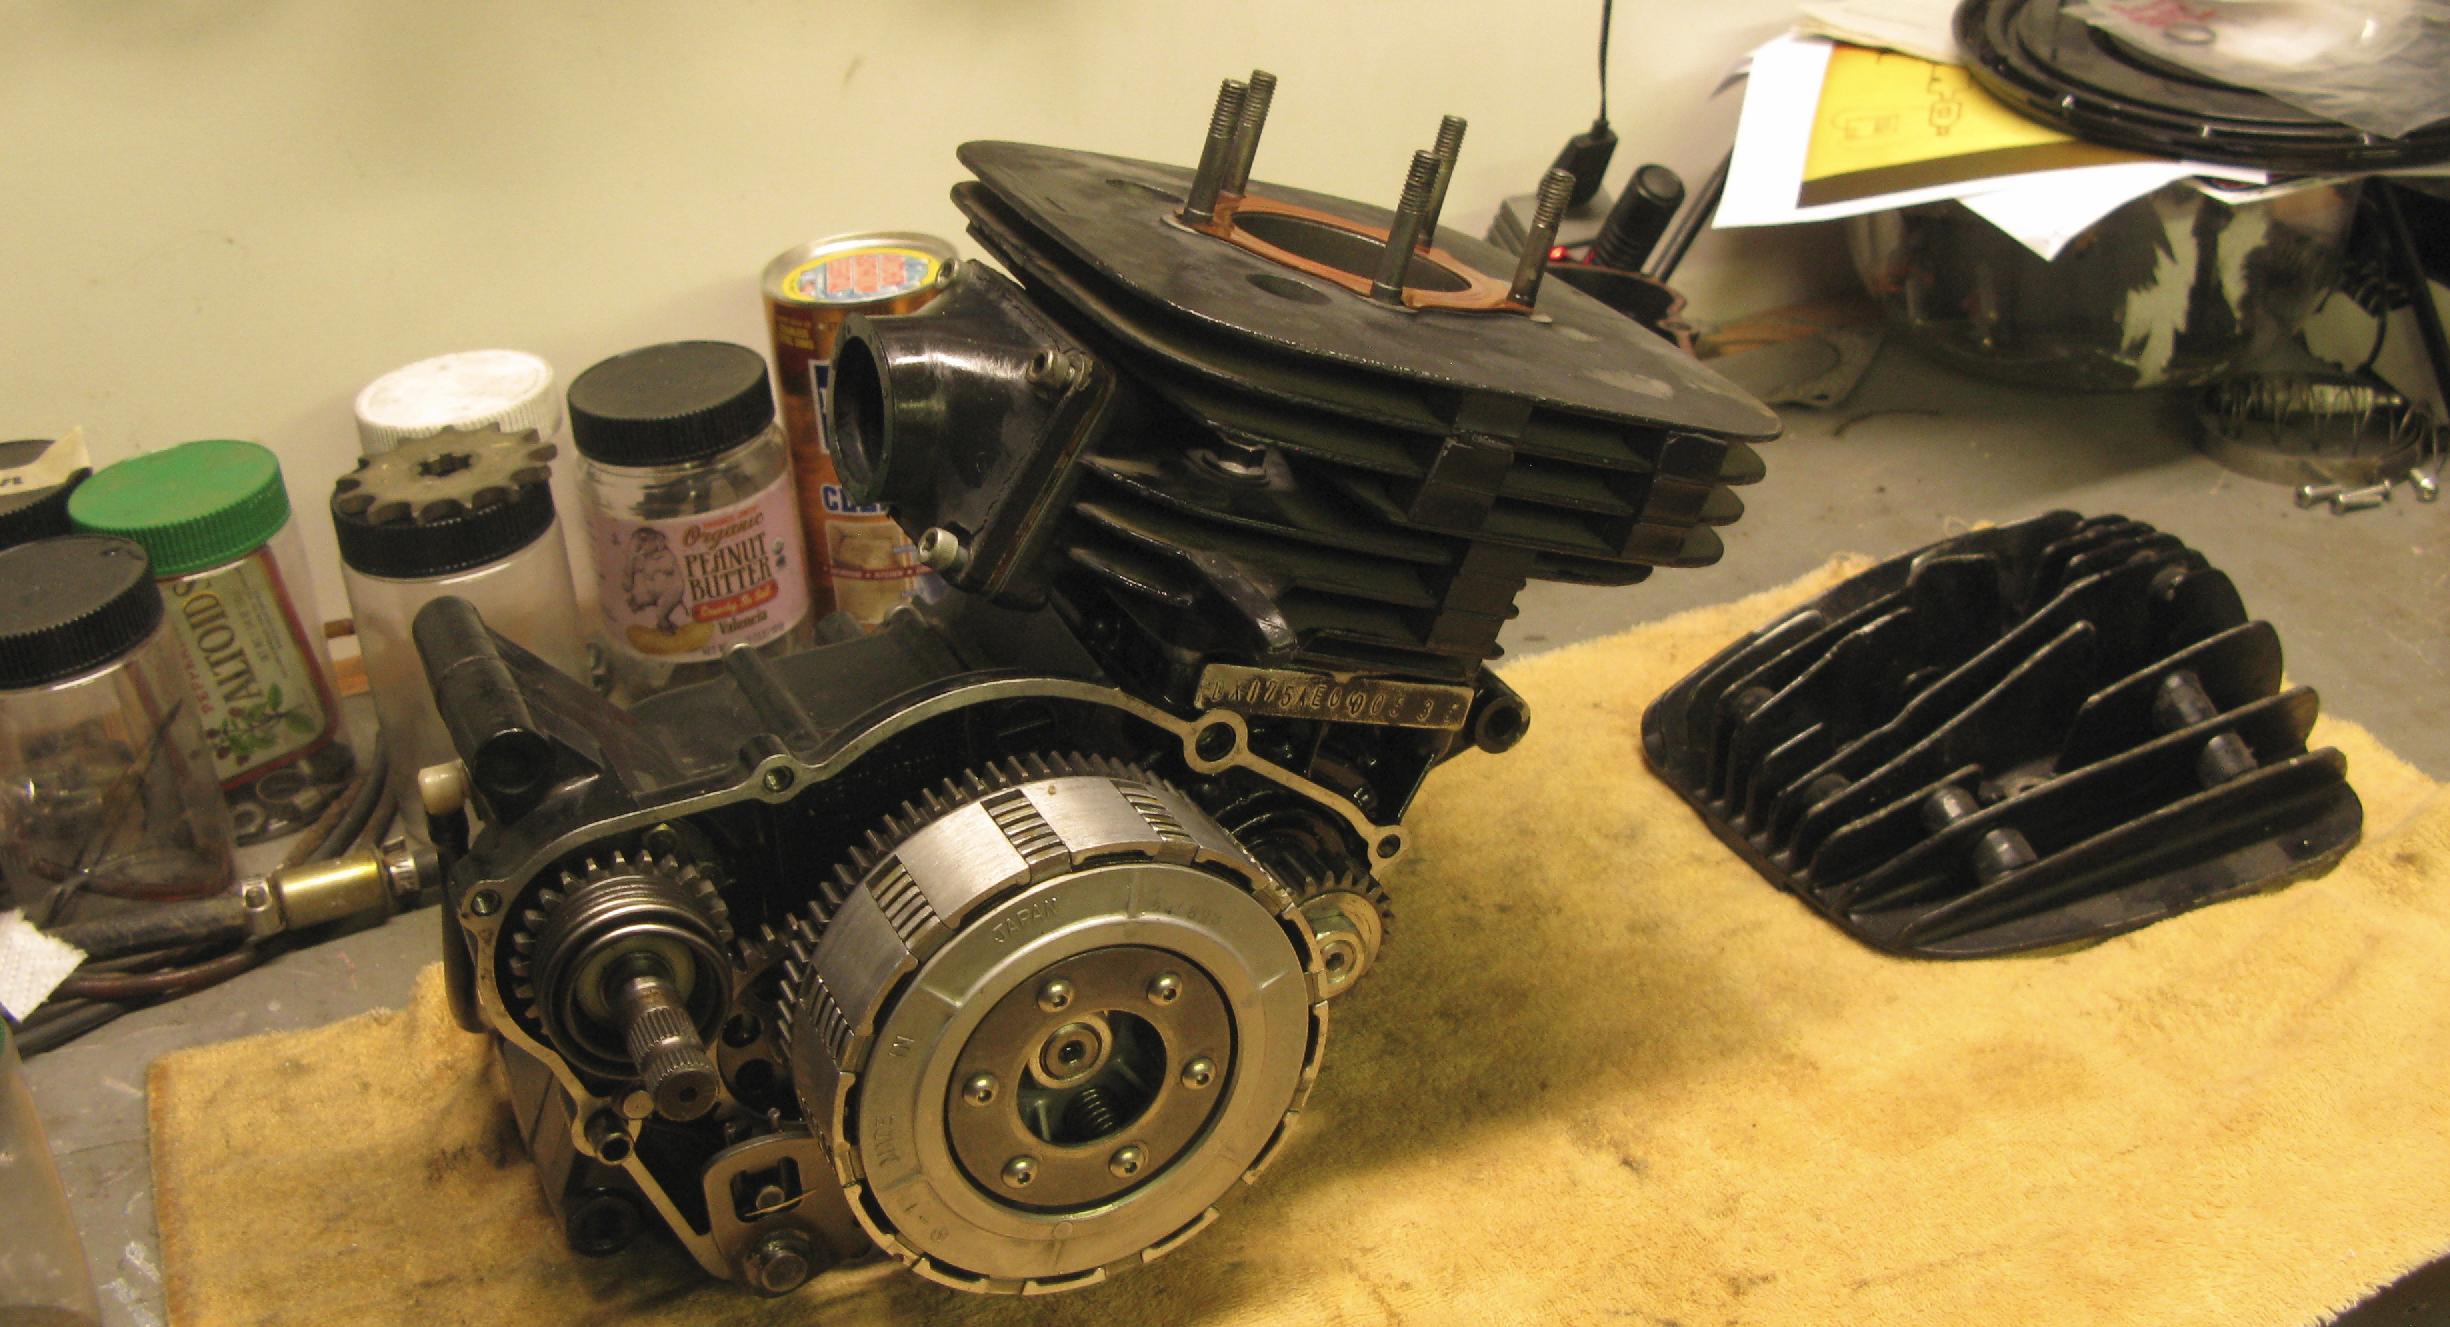
All seems well now and the shifting into each gear feels fine.
Clutch is on.
- kdx175_04_clutch.jpg (328.17 KiB) Viewed 21795 times
I followed up with putting on the piston on and torquing down the cylinder. The way things went today, I figure I had better do that leakdown check next

- hf175w.jpg (5.94 KiB) Viewed 21795 times
Re: HopFrog's 1980 KDX175 Build Log
Posted: 02:09 am May 11 2021
by KDXGarage
Man! That was a lot less costly SNAP than I feared, thankfully.
As always, thanks for taking us along for the ride on your VERY well documented rebuild.
Re: HopFrog's 1980 KDX175 Build Log
Posted: 02:07 am May 12 2021
by KDXGarage
Pretty please tell me some jackass did not drill them and use them to push out the bearing.
Re: HopFrog's 1980 KDX175 Build Log
Posted: 06:58 am May 12 2021
by Goofaroo
It appears that KDXGarage is correct and someone drilled it to remove the bearing and used RTV to seal it back up.
Ideally it would have been addressed before reassembly but you should be able to get a good seal with your JB Weld strategy.
It’s always gotta be something. You’re doing a great job bringing this bike back to life and your ability and patience to document this build are very much appreciated. I’ve photographed and explained step by step repairs on other forums and I know how much time it takes. You’ve made me feel like a slacker. lol
Re: HopFrog's 1980 KDX175 Build Log
Posted: 01:57 pm May 12 2021
by HopFrog175
Thanks KDXGarage and Goofaroo! Documentation seems to be my second nature And, with the usual numerous projects lined up in the wings, I am working on fine tuning how to create usable docs with minimal effort. Right now, I am rolling around in my mind ideas on how to make docs better organized, portable and searchable. A taxonomy for projects may be in order (just a fancy way of saying: a hierarchical list of main topics :-)
On those holes, I think you are right; a previous owner must have drilled the holes for bearing removal. JB Weld coming up!

- hf175w.jpg (5.94 KiB) Viewed 21765 times
Re: HopFrog's 1980 KDX175 Build Log
Posted: 12:22 am May 13 2021
by HopFrog175
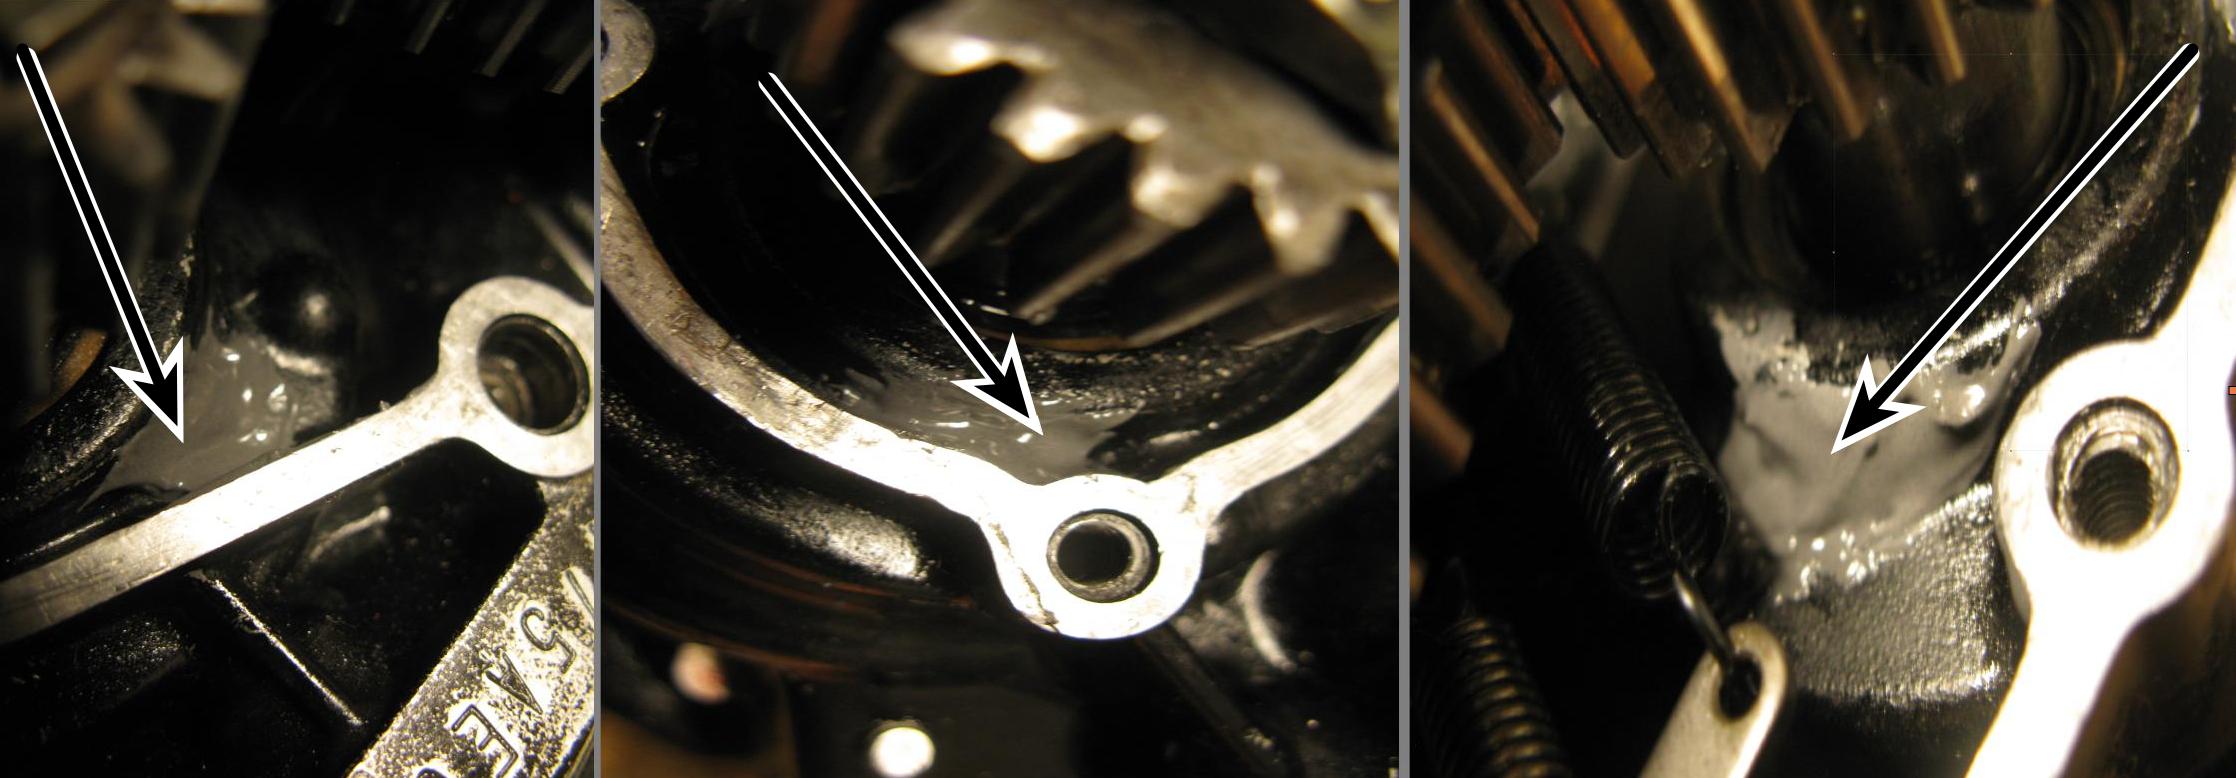
JB Weld applied in three places:
Mystery holes plugged
_click image to zoom_
- kdx175_00_3_jb_welds.jpg (173.39 KiB) Viewed 21750 times
A quick check indicates that the force on the JB Weld plugs is under 1/4 lb.
Worst case force estimation
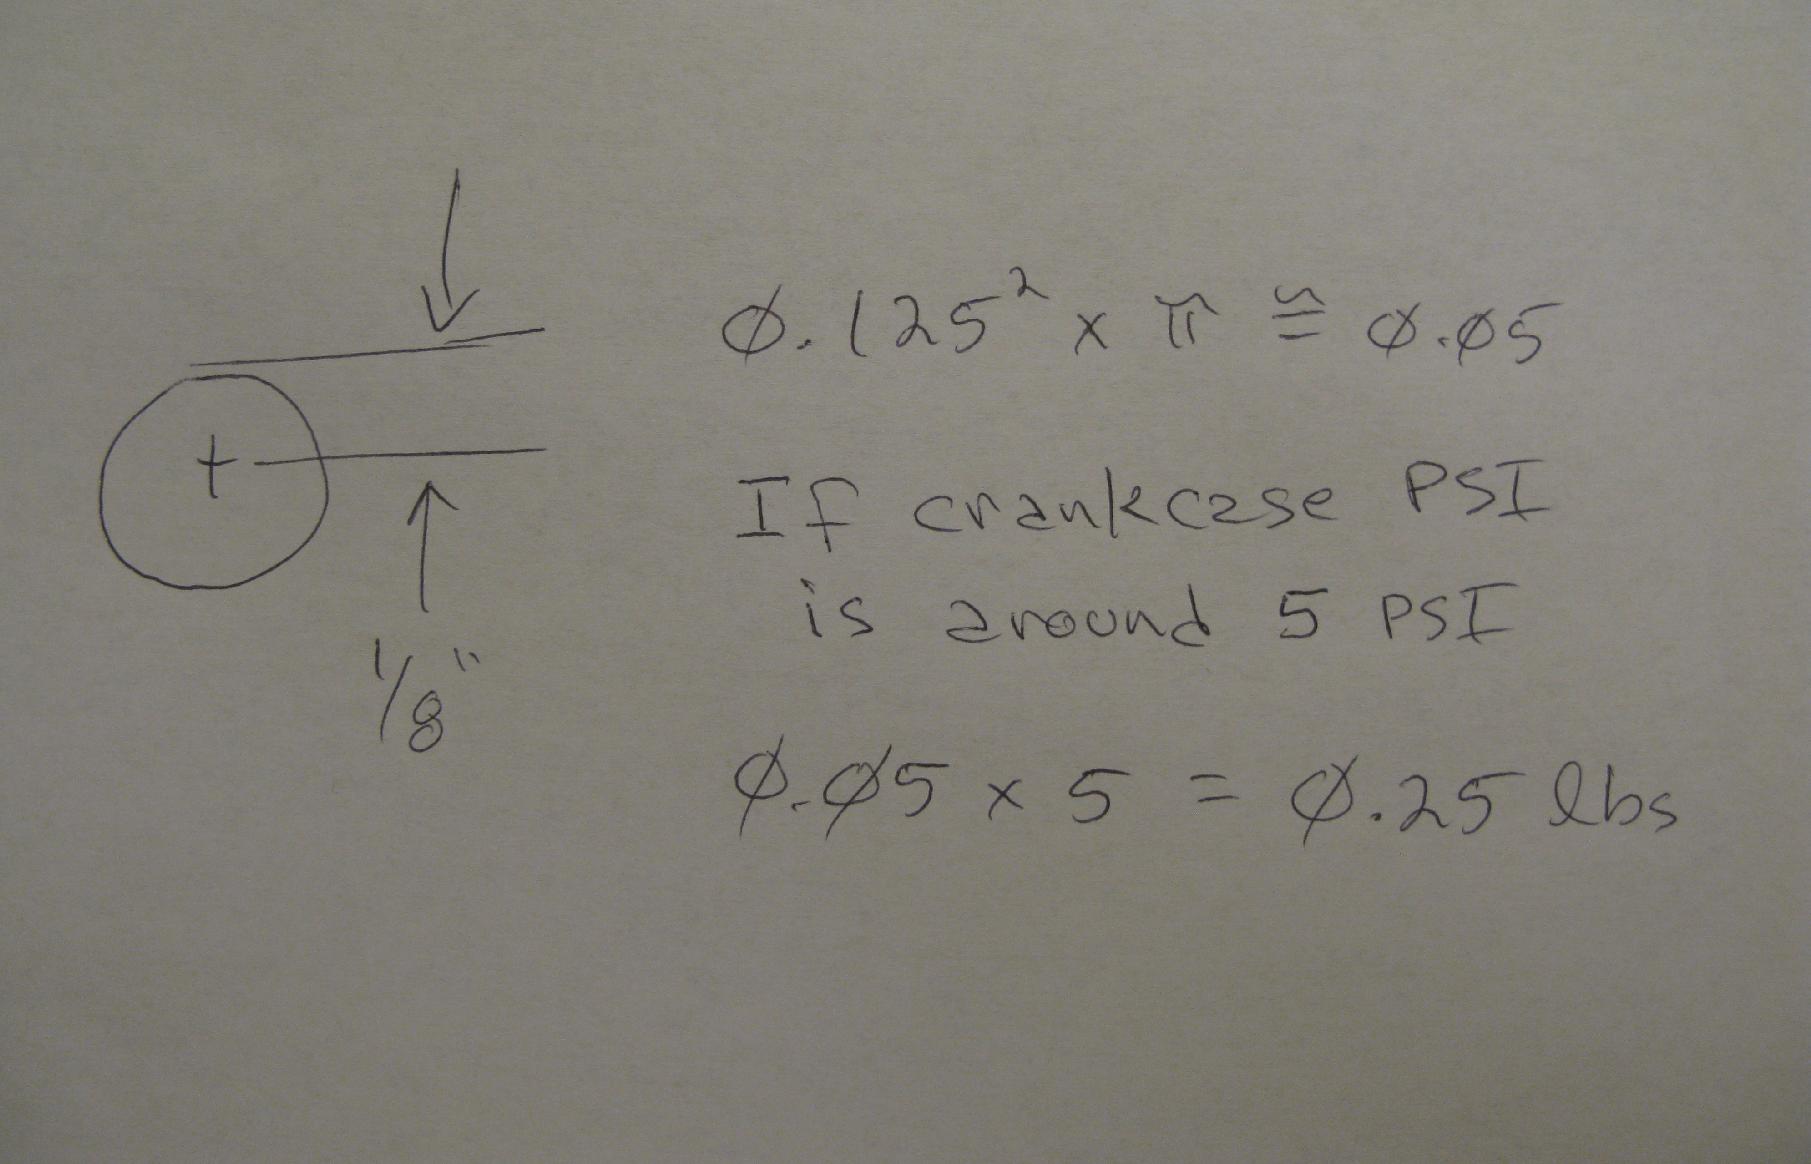
- kdx175_01_3_jb_welds.jpg (134.99 KiB) Viewed 21750 times
I think it will hold!

- hf175w.jpg (5.94 KiB) Viewed 21750 times
Re: HopFrog's 1980 KDX175 Build Log
Posted: 12:25 am May 13 2021
by KDXGarage
Don't come up on here doing no math now. :-)
You are welcome on all previous suggestions.
Re: HopFrog's 1980 KDX175 Build Log
Posted: 12:48 am May 13 2021
by HopFrog175
Heh, I had to do something while waiting for the epoxy to harden 