Page 3 of 8
Re: HopFrog's 1980 KDX175 Build Log
Posted: 09:10 am Mar 11 2021
by KDXGarage
Same as always, good job!
Be sure to get the old bearing races out of the frame and install the new ones. I doubt that is something you were planning at this level of a rebuild, but just throwing it out there since I have seen several people do it.
Re: HopFrog's 1980 KDX175 Build Log
Posted: 04:09 pm Mar 11 2021
by Goofaroo
It looks like he already has them out.
Nice job on the build and the patience to document it so well. It’s coming along nicely!
Re: HopFrog's 1980 KDX175 Build Log
Posted: 08:19 am Mar 13 2021
by Goofaroo
It always seems like the simple jobs can be the most difficult.
You can use pvc for the spacers and you’ll probably want to make them a bit longer than the factory ones. If your plan is to use the stock springs they would benefit from some additional preload.
Re: HopFrog's 1980 KDX175 Build Log
Posted: 10:42 am Mar 13 2021
by KDXGarage
Wow. That's odd that they were stuck, but I guess forks setting straight up for years has all the oil drain down. Next time, spray some penetrating oil and go take a break. Let it do its thing. It might help.
PVC will work fine as spacers if they have a size that will fit. Measure the stock amount of preload and go from there.
If the springs are too soft, buy the correct rate springs or just ride it slowly.

Re: HopFrog's 1980 KDX175 Build Log
Posted: 04:48 pm Mar 13 2021
by HopFrog175
Hmm, I have not really thought through springs yet. On the front, each side can be aired up. Is this to help avoid bottoming? I am guessing this is the case as the force from the spring is fairly linear whereas the force from the psi seems like it would be exponential. That is, the spring force would be about the same from start to finish but the psi increase would start slowly then go up quickly at the end (full compression).
I think my approach will be to go with factory settings to start with and add if/when needed. By add, I am thinking adding more preload, psi and/or up the oil viscosity if my speed/abilities get to the point where the forks are bottoming a lot.
On the rear, I did read a little somewhere and I figured to just set the sag and try it. The stock shock has no adjustments. It still has pressure and I can feel damping if I work it by hand but it it starts to leak, or if the damping is to slight, I will have to figure out what to do at that point. Probably check around a find a shock that is a dimensional match and try to dial it in to work (or check with one of the shock outfits but they are likely too $$$ to really consider).
Does this sound like a reasonable approach? I weigh in at 155lbs and figure about 20lbs for gear, tools, water plus extra gas on occasion.
Re: HopFrog's 1980 KDX175 Build Log
Posted: 08:23 pm Mar 13 2021
by Goofaroo
That’ll work. You can modify it later if you want to.
You can pretty much assume the fork springs are somewhat fatigued by now. I’d add about an inch of preload with a longer spacer. It’ll put you in the ballpark and certainly good enough to go hit the trails. You don’t want to add air. You control the amount of compression of the captured air in the forks with the oil level. More oil equals faster compression of the lesser amount of air. Use the highest volume of oil recommended. I don’t know what viscosity is recommend but I would start with 10 or 15wt.
Even in stock form your bike will run a brisk pace if it has the right person on it. It’ll be a really fun bike when you get it done.
Re: HopFrog's 1980 KDX175 Build Log
Posted: 09:15 pm Mar 13 2021
by KDXGarage
Skip adding air if you can. It does ramp up as you stated. More oil will mean less air volume. If you put too much oil, it will not be a pretty sight when it blows past the seals. :-)
On damping rod forks, heavy oil is used to control rebound. I think Fredette used to say 7.5 weight on the 86 - 88 forks (maybe 1989 - 1992 also? not sure)
Re: HopFrog's 1980 KDX175 Build Log
Posted: 12:48 am Mar 16 2021
by HopFrog175
Re: HopFrog's 1980 KDX175 Build Log
Posted: 12:53 am Mar 16 2021
by KDXGarage
Thanks for the pics. It is pretty wild to see springs with the coils so close together.
Re: HopFrog's 1980 KDX175 Build Log
Posted: 01:38 am Mar 22 2021
by HopFrog175
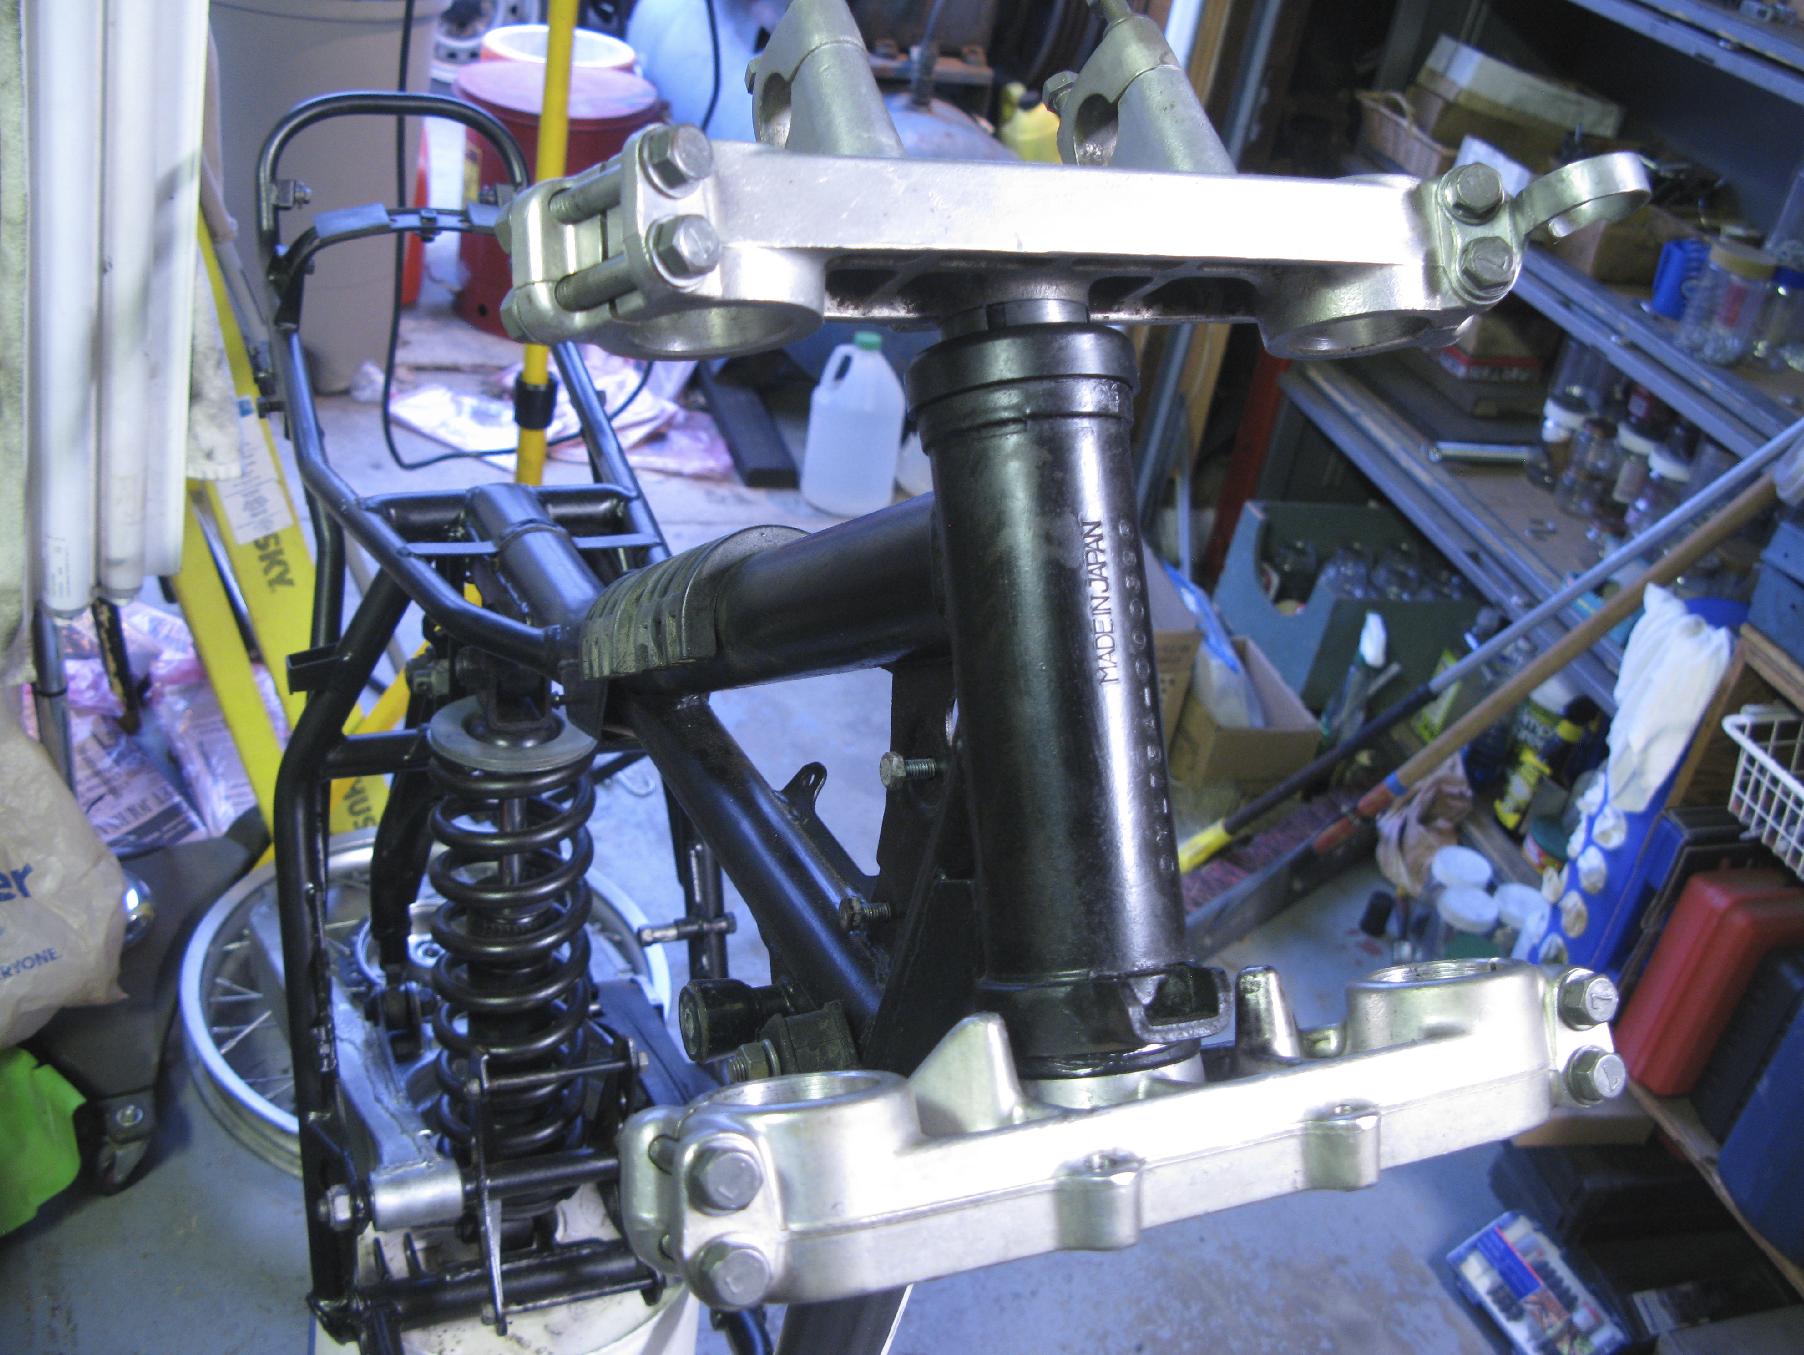
Steering stem, part 2
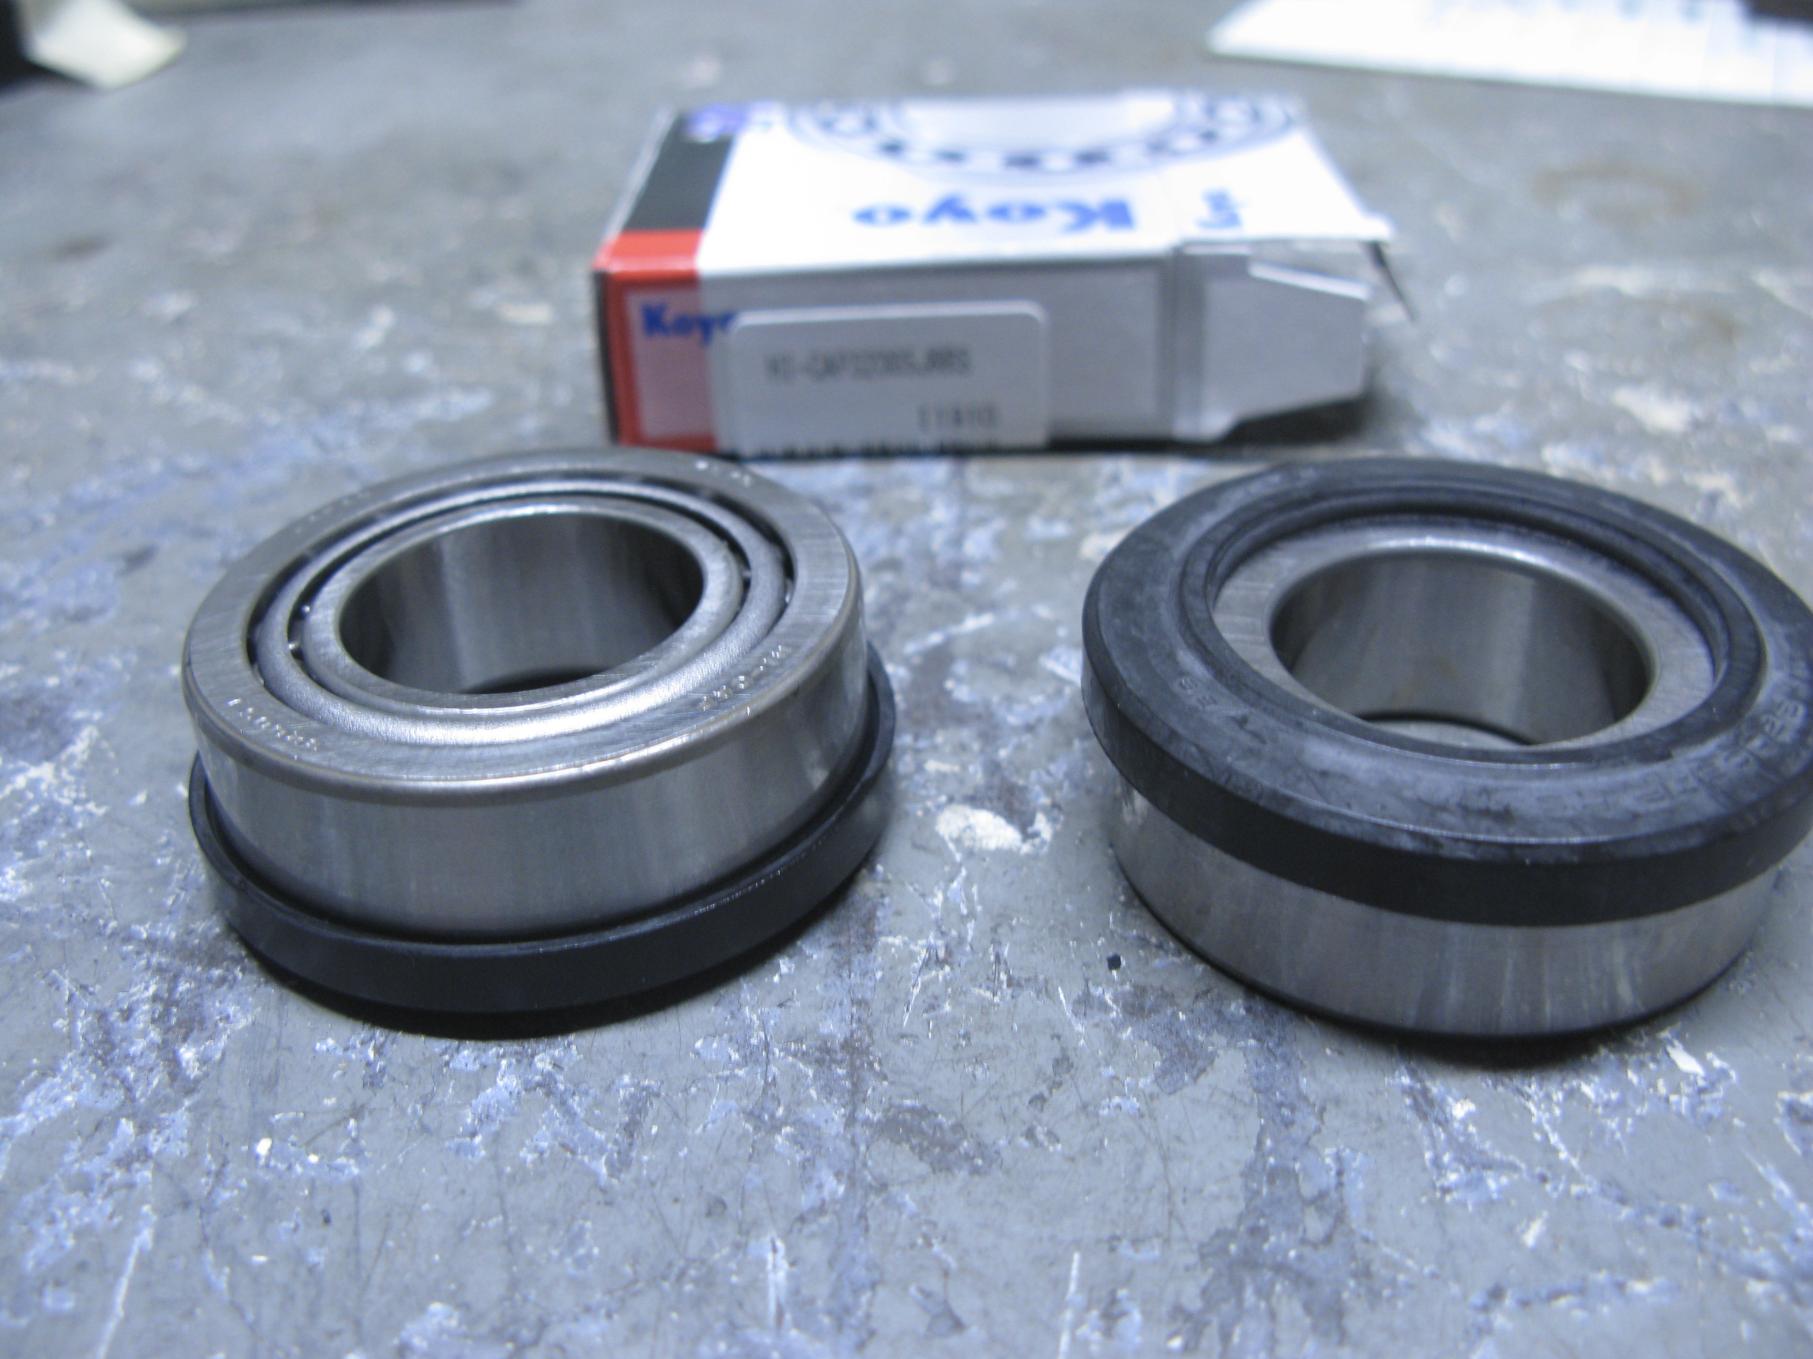
The Koyo bearings came in so I jumped back to the stem in order to finish it up (having too many half-finished sections of a project is a sure way to throw me off stride!). The bearings looked great with the rubber seals nicely attached.
New Koyo bearings
_click image to zoom_
- kdx175_00_steering_stem2.jpg (194.68 KiB) Viewed 11102 times
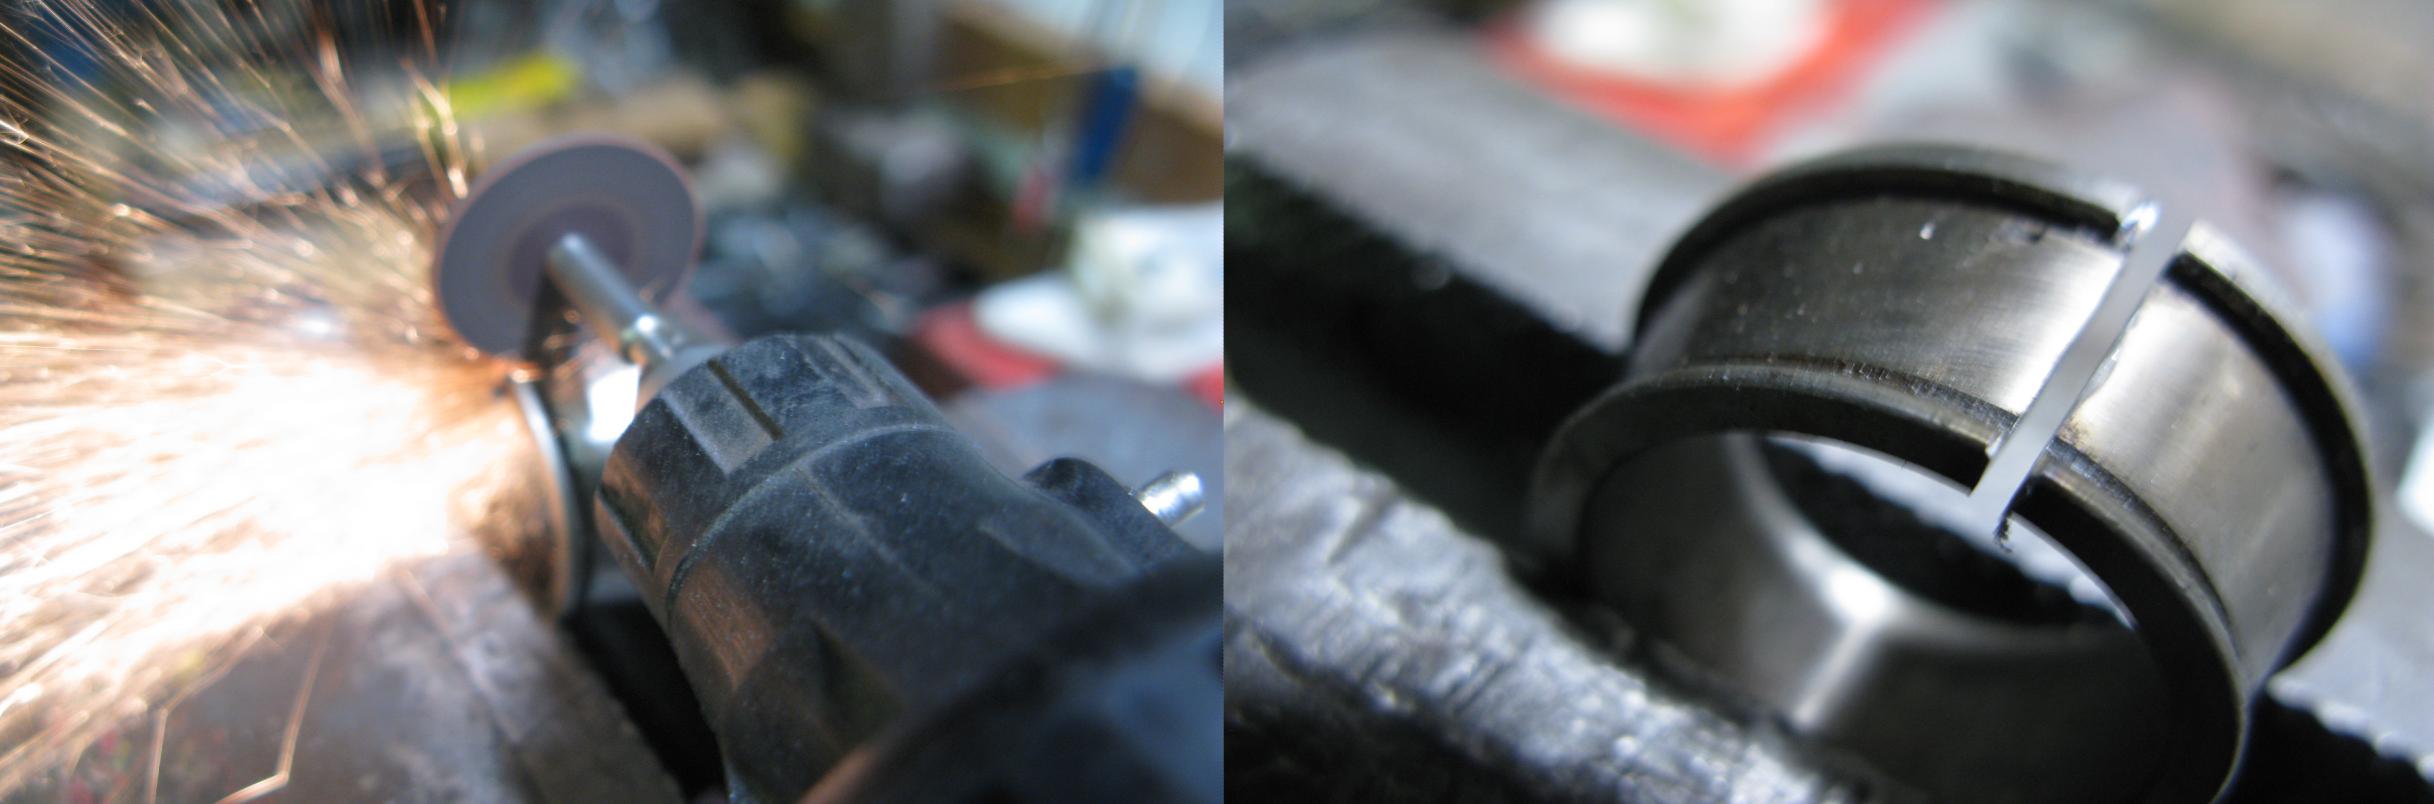
The bearing races got recycled as installation tools for the new bearings by cutting a slot in one old inner race and one old outer race (the KDX175 has the same bearing size for top and bottom). The slotted race can be use to drive the new race and then be removed - the slot makes the removal easier.
Slotting the races
- kdx175_01_steering_stem2.jpg (134.75 KiB) Viewed 11102 times
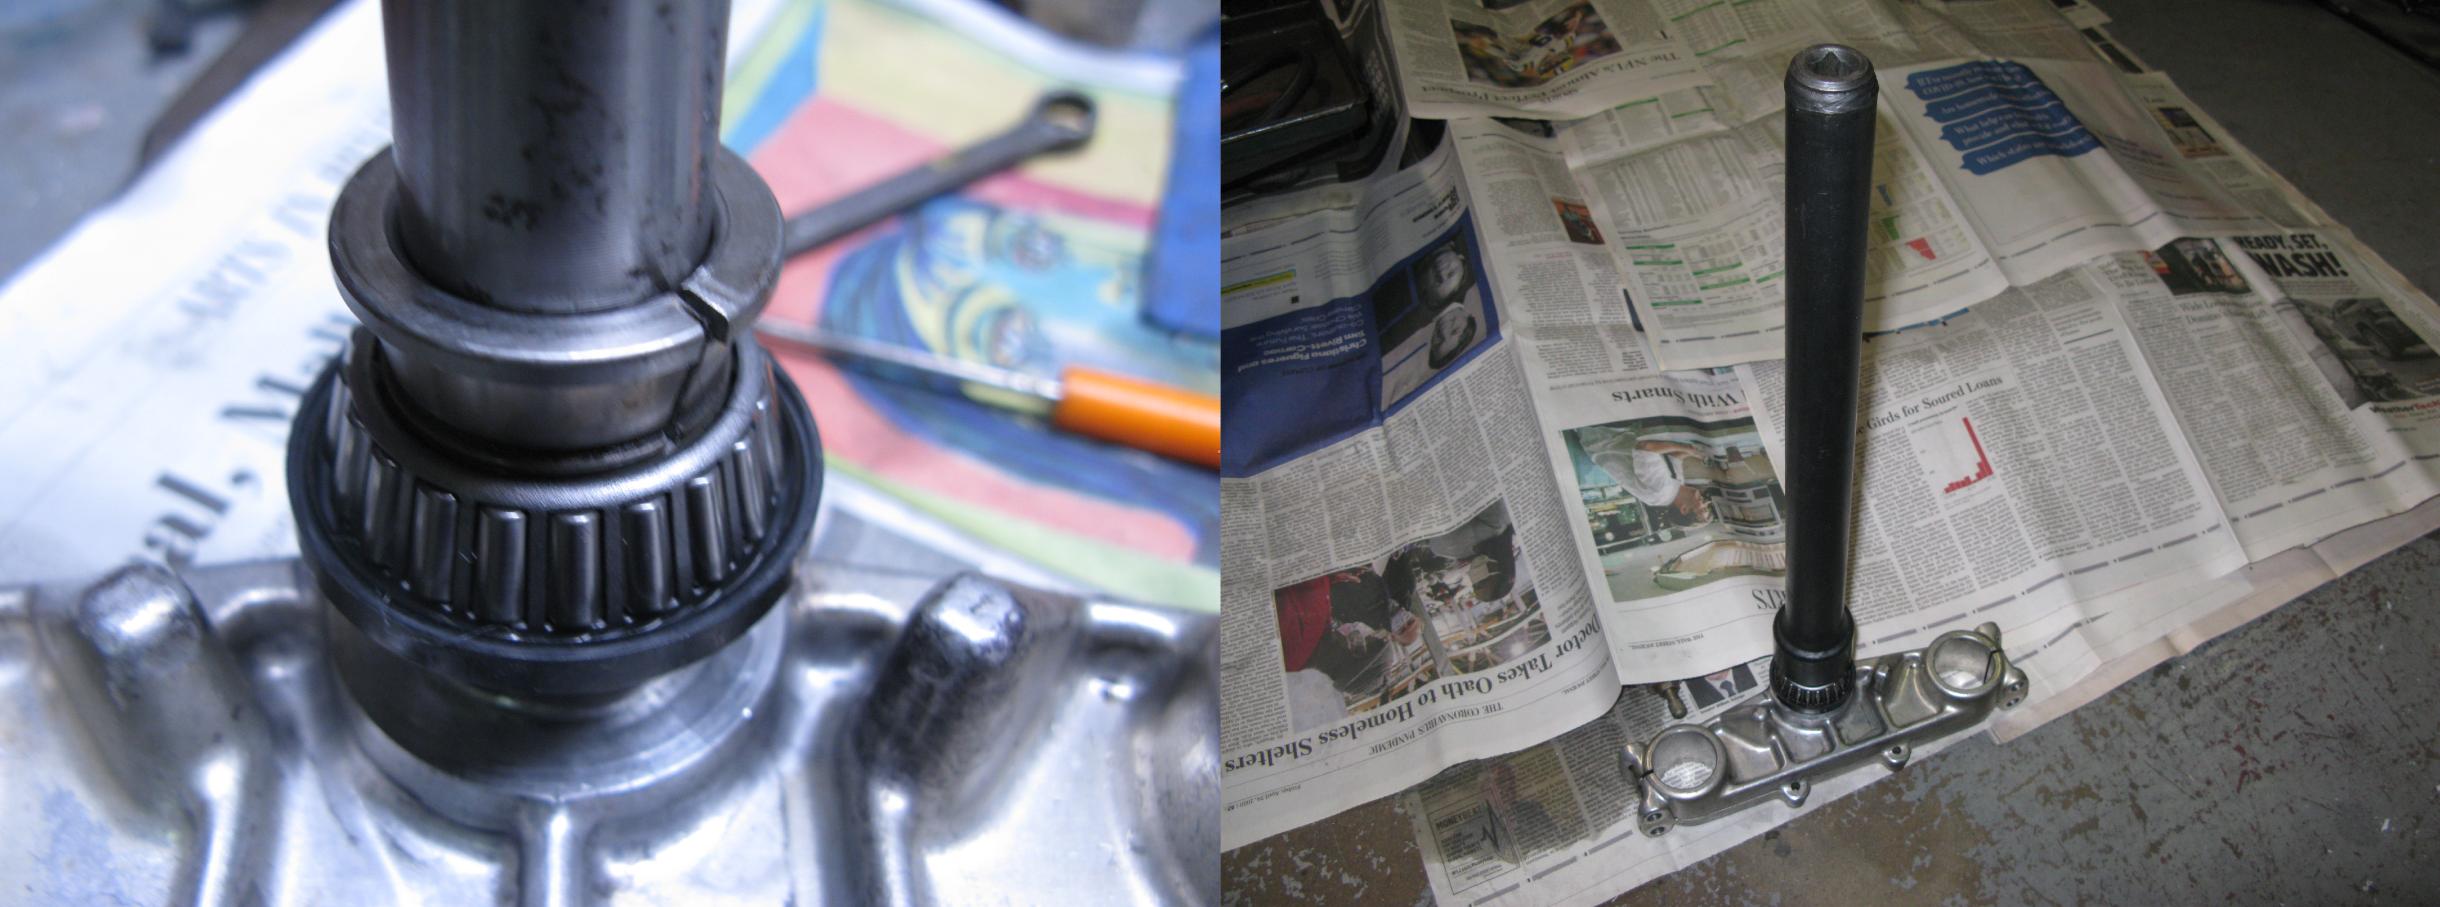
After a little deburring, the slots were ready. The bottom bearing was slid down the stem as far as it would go followed by the slotted race. Then a handy pipe/tube was slid over the stem to drive the new bearing into place. Worked like a charm :-)
Driving the lower stem bearing
- kdx175_02_steering_stem2.jpg (216.08 KiB) Viewed 11102 times
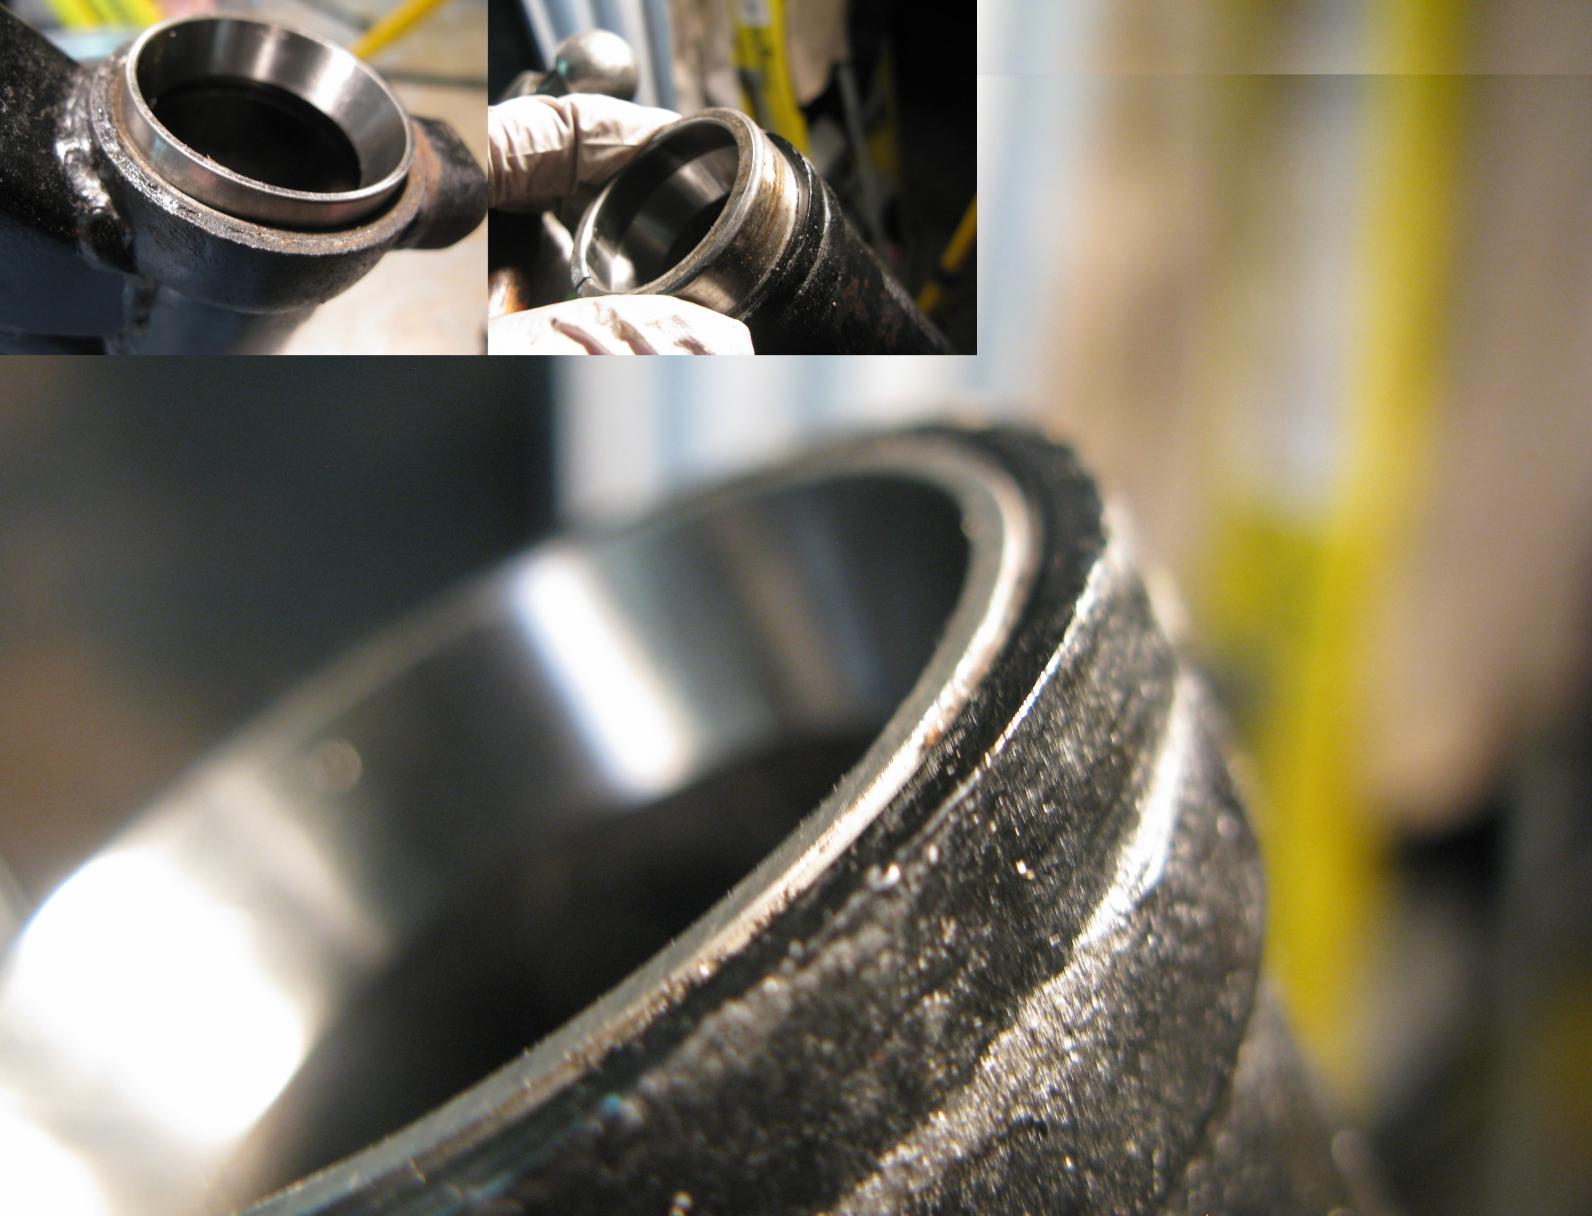
Next up: the outer races. I seemed to recall reading the the outer races are countersunk, that they go in farther than the lip of the tube. I neglected to notice on disassembly hence the slotted race to be used as a driver.
Driving in the steering stem outer races
- kdx175_03_steering_stem2.jpg (145.29 KiB) Viewed 11102 times
Well, it turns out that on the kdx175, the outer races are flush - no slotted race required. No problem, you can't have too many slotted races in your slotted race box
I will do final adjustment after the forks are back on.
Stem - greased, installed and ready
- kdx175_04_steering_stem2.jpg (275.77 KiB) Viewed 11102 times
Now, back to the forks. They are already apart so, hopefully, it will be straight forward.
Re: HopFrog's 1980 KDX175 Build Log
Posted: 02:26 am Mar 22 2021
by KDXGarage
Good work!
Cool to see one without a VIN
Re: HopFrog's 1980 KDX175 Build Log
Posted: 09:55 pm Mar 23 2021
by KDXGarage
Great job on the spacer. That's going all out.
Some used to suggest a safety wire to keep the ring in place.
Re: HopFrog's 1980 KDX175 Build Log
Posted: 12:44 am Mar 25 2021
by HopFrog175
Re: HopFrog's 1980 KDX175 Build Log
Posted: 01:16 am Mar 25 2021
by KDXGarage
Good job! Don't forget to grease the pivots and spring ends.
Thanks as before for taking us along on the rebuild ride.
Re: HopFrog's 1980 KDX175 Build Log
Posted: 01:09 am Mar 29 2021
by HopFrog175
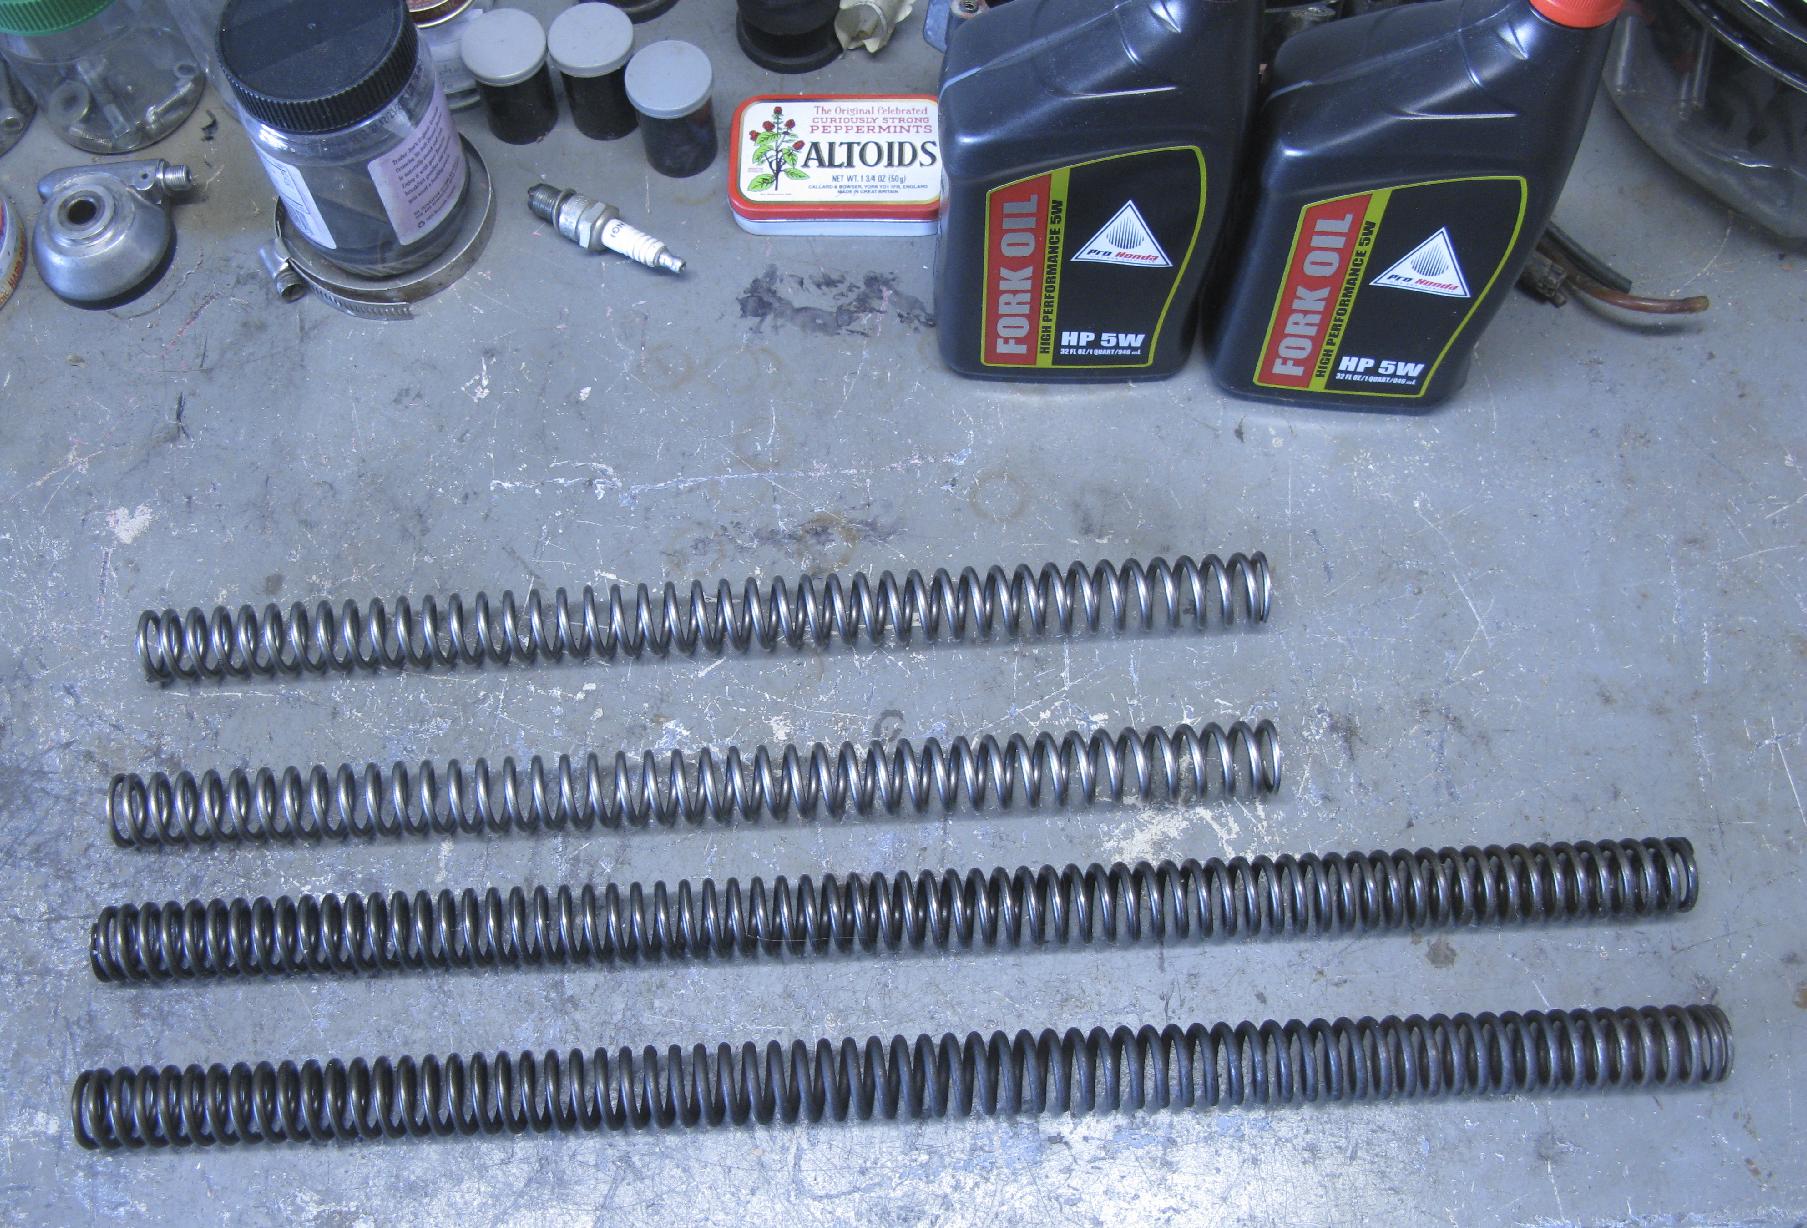
Progress on the forks, I left off after discovering springs sagged out of tolerance. Some of the older KDX's are listed as having 30mm dia fork springs so when mine measured a little under 30mm I figured I was set. Still, I wanted to talk to someone to make sure I was on the right path so I called RaceTech and ended up talking to Matt.
I told him that I thought the springs were 30mm even though they measured a little under. Nope, he said, they are 29's which nobody uses. He put me on hold to "dig around" and came up with some 28mm springs with an acceptable rate of 0.40 kg/mm and a length of 490mm. It turns out that they have similar travel as the old springs even though they are shorter - evidentially, newer springs are made from metal with superior properties when compared to springs from 40-years ago. The wire is thinner so you get more travel per unit length. You just have to replace the original preload tube with a longer one,
The springs came in a day and looked fine.
RaceTech FRSP 284340
_click image to zoom_
- kdx175_00_racetech_FRSP-284340_springs.jpg (369.83 KiB) Viewed 11018 times
I also got the fork oil (5wt) and was ready to go but then looked at the new spring preload spacers: a couple of pieces of 3/4" PVC. My immediate task was to figure out what length to cut them to. This led to checking around and sifting through stuff to get a grasp on which way to go. Everyone reports that the KDX front is too soft for anyone over 120lbs. I am 155 but am in the novice category for dirt so I figure to start softish and build up as needed. To this end, I am thinking using the 0.4 springs with light preload (4mm) and 5wt fork oil. When I get to the point of checking fork sag, hopefully, I can adjust the preload to get it close. And, if damping is to little, I can always move up to a heavier fork oil.
I will do a write up on all of the details of the springs and setting the preload.
The forks - they are half way assembled, hoping to have the front end back together in a day or two.

- hf175w.jpg (5.94 KiB) Viewed 11018 times
Re: HopFrog's 1980 KDX175 Build Log
Posted: 01:41 am Mar 29 2021
by HopFrog175
KDX175 Front Fork Spring Details
Mar 28, 2021
KDX175 - New Fork Springs
RaceTech FRSP 284340
                                                      My              My
                                    New            original         KDX175
                                   KDX175           KDX175      with new springs
--------------------------------------------------------------------------------

Fork tubes ......................   36mm              36mm           36mm

Fork Spring condition ...........   spec       41 yrs-old - sagged   new
Fork spring length .............. 600-625mm          573mm          430mm
Fork springs minimum length .....  597mm            under min      unknown
Fork springs outer diameter .....   29mm              29mm           28mm
Spring rate ..................... .35-.38 kg/mm      sagged       .40 kg/mm

Spring spacer length ............   80mm              80mm          214mm
                  OD ............  27.5mm            27.5mm     28.7mm (3/4" PVC)
                  ID ............  20.3mm            20.3mm           ---
Fork cap protrusion into tube ...  27.8mm            27.8mm         27.8mm
Preload .........................  unknown           unknown         4mm

Fork oil ........................    10wt            unknown        7.5wt
Fork oil height (forks extended).   531mm             531mm         531mm


Notes:

 - the manual states: forks extended with springs removed when measuring fork oil height
 - the original fork springs have a 29mm diameter (unusual, hard to find)
 - replacement fork springs can be 28mm
 - original springs were much longer than today's replacements - 600mm vs 430mm
 - KDX175 fork bushings are integral with the lower fork casting (not replaceable short of machine work)
For the spring preload, I settled on starting with 4mm and then moving up later if/when needed. The fork cap protruded into the fork tube a little over 27mm so the top of the spacer needed to be 4mm higher.
Preload calculations
_click image to zoom_

- kdx175_preload_calc.jpg (231.41 KiB) Viewed 11018 times
The steps were to insert the spring, washer and the overly-long PVC. Then, mark the PVC at the top of the fork tube. Remove the PVC and measure down from the mark by the calculated amount (23.8mm in my case) plus the thickness of the top washer and make a second mark. This is where to cut. I forgot to add in the thickness of the top washer but it still came in close enough and it is easy to add additional washers for fine tuning.

- hf175w.jpg (5.94 KiB) Viewed 11018 times
Re: HopFrog's 1980 KDX175 Build Log
Posted: 02:53 am Mar 29 2021
by KDXGarage
While reading about the springs, my burst out loud comment was, "Please tell me you bought them!" :-)
Good going.
A couple of considerations, I would suggest 7.5 weight (mix of 10 and 5).
Also, the original oil quantity is based on those springs and a different spacer. You have less spring metal taking up space, but more spacer volume, so it may be OK with the stock oil quantity. You might have to play around with that.
You are going to be world's better than what was stock. A source for KDX175 new fork springs, AWESOME!
Some of the KDX's had stiffer springs than other models and years. A 1995+ is 0.35 Kg / mm rate, but 1989 - 1992 is just 0.30 Kg / mm. Ridiculous!
Are you 155 in full gear or is that 155 plus the weight of gear, water backpack, tools, spare partss, etc. ?
As always, thank you very much for posting all this. It could help people for years to come.