Page 5 of 6

Re: '86 - Down the Rabbit Hole

Posted: 09:01 am Nov 11 2019
by Pressingonward
Lookin good!

Re: '86 - Down the Rabbit Hole

Posted: 02:40 pm Nov 15 2019
by Clatter
Thanks for the kind words fellas, and the help.
Takes a village...

"Danger seldom approaches without exciting a nerve ending someplace"
-James Bond

Couldn't sleep, so back apart..


Image
Image


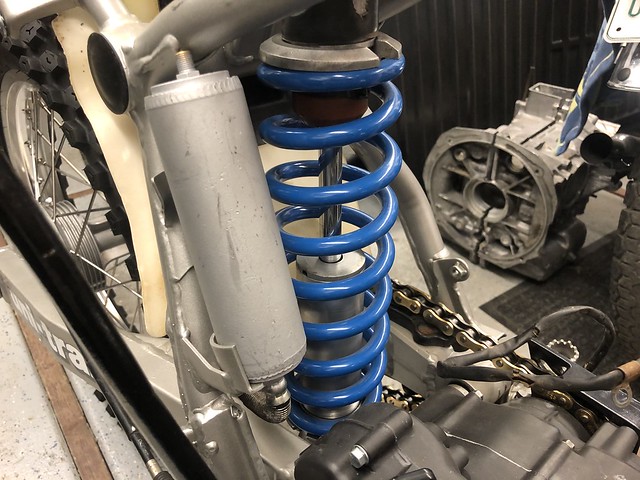
One thing that was kind of itching, not really a problem, but an annoyance,
is that the earlier ('84-'85?) shock has a taller reservoir than the later '86-'88 shock.
It was paining me that I'd be cutting the lower shelf off of the holder bracket,
To allow room for the air valve at the top.
The whole thing is just too tall to fit in like it's sposeta.
Thought of getting a correct shock,
But,
At this point!?!? :doh:
We'll just have to trim and clamp well;
Fresh powder or not.
Had to ruminate on this one for a few weeks before commitment..
Image


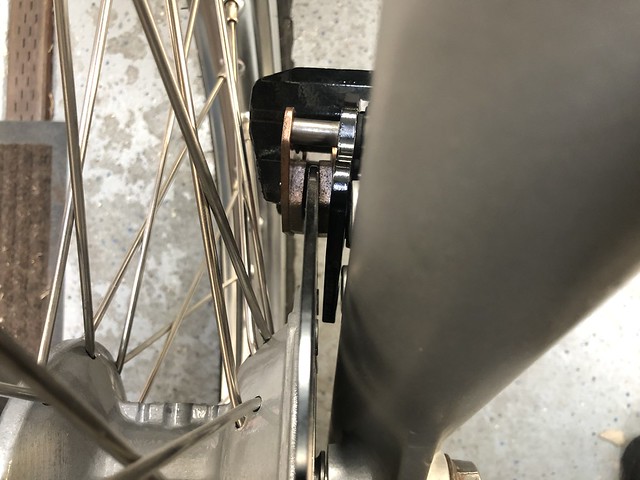
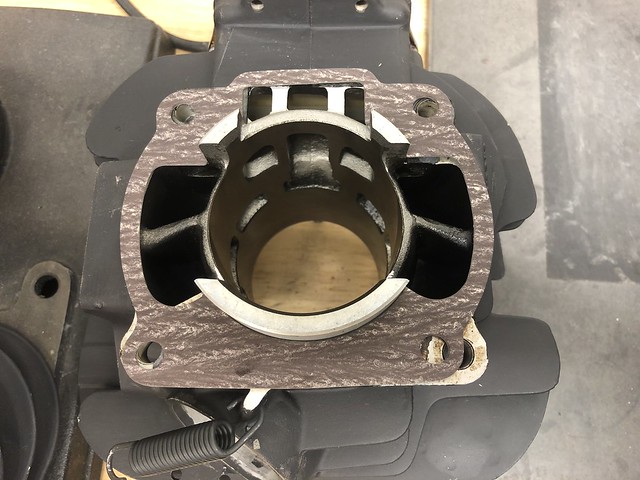
Here's the main reason this thing came clear back apart; see how that wrist-pin retainer ring doesn't seat right?
It's not sitting clear down into the groove, all the way around..
With a $500 NOS cylinder, this just won't stand, man.
Image

So,
I go to put everything back together,
And it looks like some stroke on ebay sold me the wrong gasket set.
Big surprise there, huh? :roll:
Didja know the '84-'85 cylinder base has a different bolt pattern?
Image

Hopefully, the right gasket set will show,
and we'll get the thing together..


Last question..
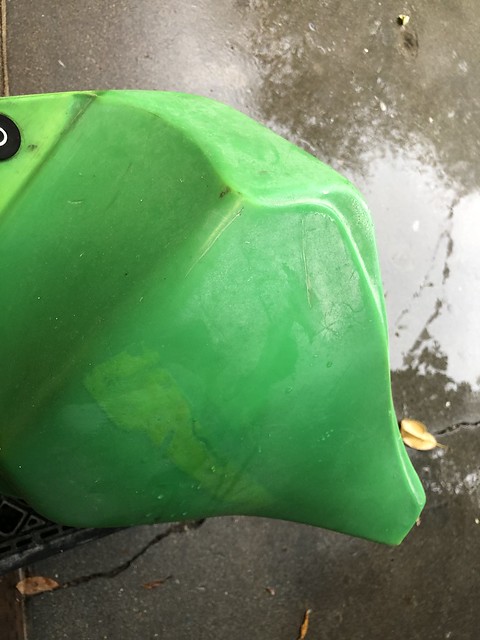
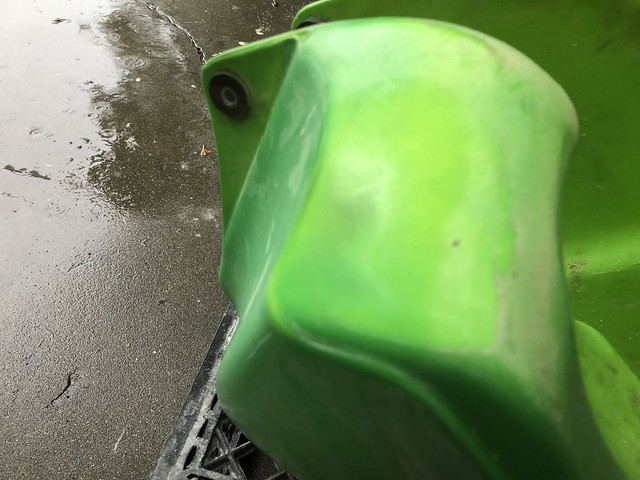
How to get this chalky, dried-out ugly fuel tank looking better?
Tried sanding it down,
But,
Dag,
It's getting pretty thin before it's looking much better..!

Worried I'm going to sand clear thru to leakage.. :blink:

Anybody know where to get some Kawi green vinyl dye,
or..?

It's the LAST remaining ugly piece on the bike,
But it's a BIG one..

Re: '86 - Down the Rabbit Hole

Posted: 03:50 pm Nov 15 2019
by KDXGarage
Look on youtube for the video of the guy with the red tank. Multiple finer and finer passes until buffing

Why is the piston pin circlip odd??

Re: '86 - Down the Rabbit Hole

Posted: 07:19 am Nov 16 2019
by kdxsully
I have the same problem with my tank. One suggestion I saw is to use a heat gun to melt the plastic on the surface slightly, then even it out and polish.

Re: '86 - Down the Rabbit Hole

Posted: 09:00 pm Nov 26 2019
by pkenney
My tank was really bad when i got it and was covered in an almost white oxidation.
I tried sanding it but got impatient took the drastic step of scraping most of it off with a razor blade held backwards.
I hesitate to recommend it but it worked for me and brought the color back but you still need to sand to get the smoothness.

I wish the tank stickers weren't so expensive!

Front Brake Finished

Posted: 12:52 pm Dec 02 2019
by Clatter
A big thanks to 'pkenney' for the lighting coil and stator!

The legalization effort will be made just that bit easier. :mrgreen:
Legalize it!


With Mr. KDX200 here, this front brake caliper wasn't making any sense.
Trying the inner clip and parts different ways 'round - none seemed right.
Always this caddy-wompusness...
Image


Slept on it a few weeks, then took it apart with a fresh head and another look at the manual.
Finally made sense how it went together even though it doesn't really make sense.
(If that makes any sense..) :blink:


Bleeding these things is always interesting.
Takes me several ways stacked on top of each other no matter what vehicle.
I love my pressure bleeder,
But got away with gravity on this one..
Image


Using a one-way valve, -and- the hose end submerged made it -finally- happen.
Why this ends up being so difficult I'll never know.
in the end. I won! :lol:
Image

Tank Resto

Posted: 01:07 pm Dec 02 2019
by Clatter
Here's what we did about the chalky white fuel tank..


First thing I did was get out a few sanding tools - Rolocs and a DA.
Image


It was raining out, so it gave me a chance to spend some quality time wrangling this thing..
Image
Image

My first go at it started off through the grits.
Up underneath where it wouldn't show.
The color started coming back easy enough,
But the chalky haze wouldn't go away.
It always loaded the paper right up and smeared it all around, not going away.
It ruined paper, then smeared the chalky residue around, all the while making deep scratches..
Image


So I tried the heat gun trick.
Worked in a chop shop way back in the day and saw a tank pop once.
The old man taught me that you keep the air moving through them to prevent fumes accumulating.
If you have air flow through, you can weld on a gas tank.
Figured I'd take this precaution using the heat gun..
Image

Didn't work for ****.
Melted a bubble spot, and with even more white chalkiness.
Spot right in the center of pic:
Image


What did work was rubbing compound on a wool buff.
Did a bit of finer-grit DA - like 220 or so,
Followed by some coarse Scotch-Brite,
Then finally the compound.
It didn't get the scratches out,
But at least the tank is green (enough) again.

Pics to follow..

Final Assembly

Posted: 01:14 pm Dec 02 2019
by Clatter
And on to the finish line..

The reason the piston ring circlip was in crooked was my fault.
Built motors with Tru-Arcs and Spiro Locks lately,
And it just made my head wrong.
I tried winding in the retainer like a Spiro Lock, and bent it up so it never seated.

Guys at Wiseco were nice enough to send some gratis, as well as school me on installation.

They use a toothbrush handle (!) to get it all just inside of the hole,
Then a socket that fits the ID of the bin bore pushes it home square.
It clicked into place with a nice reassuring snap. :cool:


Once that was done,
Things just came together.

Image

Image


Fitting plastics and applying stickers is like icing a cake.

Image

Image

Re: '86 - Down the Rabbit Hole

Posted: 06:17 pm Dec 02 2019
by KDXGarage
Look! IT'S A DIRT BIKE!

Great job with all the work and especially sharing the experience.

One day, a ride report is requested!

Re: '86 - Down the Rabbit Hole

Posted: 06:49 pm Dec 02 2019
by Molly's 70
Looks Awesome! I really like it. :bravo:

Re: '86 - Down the Rabbit Hole

Posted: 09:04 pm Dec 02 2019
by Pressingonward
Looking good!

Re: '86 - Down the Rabbit Hole

Posted: 12:05 pm Dec 04 2019
by kdxsully
Looks new

Re: '86 - Down the Rabbit Hole

Posted: 04:53 pm Dec 17 2019
by Slick_Nick
What a great job! Thanks for sharing!

Re: '86 - Down the Rabbit Hole

Posted: 08:43 am Jul 26 2020
by Pressingonward
Just re-read through your thread. Very nice looking KDX. How's it run? :grin:

Re: '86 - Down the Rabbit Hole

Posted: 11:02 am Jul 26 2020
by lucy
I missed how you got the shock reservoir to fit.

Did you grind the frame? Move the bracket down?

Re: '86 - Down the Rabbit Hole

Posted: 01:41 am Aug 07 2020
by Atvjoe
Thanks for a great thread. I going to restore a KDX 87 with bent rod, happy times.

Re: '86 - Down the Rabbit Hole

Posted: 02:32 am Aug 07 2020
by KDXGarage
Atvjoe, welcome! Head over to the "Introductions" section and tell us about yourself and your bike. After that, ask away. Instructions on how to post a picture from a device is in a thread I made. The link is in my signature.

Thanks for joining and participating.

Re: '86 - Down the Rabbit Hole

Posted: 01:46 pm Aug 10 2020
by lucy
lucy wrote: 11:02 am Jul 26 2020 I missed how you got the shock reservoir to fit.

Did you grind the frame? Move the bracket down?

Re: '86 - Down the Rabbit Hole

Posted: 03:27 am Sep 04 2020
by TheGarBrah
Boy this build is reminding me of how I need to just finish up my bike. Great stuff here , thanks for the inspiration

Re: '86 - Down the Rabbit Hole

Posted: 02:38 pm Nov 15 2020
by Clatter
Thanks for the props gentlemen.
Took the bike out (finally) a couple weekends ago.
Pandemic really shut things down for us.
Unfortunately, the area we were supposed to ride didn't have access.
Rode it around some dirt roads and up/dawn a few hills and everything worked well.
Got it good and hot and nothing leaked.

Months later, the petcock wouldn't shut off; kept dripping.
It was a junk/China ebay petcock, so i got a used Kawi one.
Still no love.
Surfaced the face of the internal part to get a flat, but still drips when in the "off" position..

Anyone know the secret to getting the drip stopped?

Promise a real session on the thing here in a couple of weeks for sure.