My '04 KX-KDX hybrid build

Discussion for swapping a KDX motor in a MX frame...
User avatar
Tedh98
Supporting Member II
Posts: 1576
Joined: 01:08 pm Mar 20 2009
Country:
Location: Atlanta, Georgia
Contact:

My '04 KX-KDX hybrid build

Post by Tedh98 »

I'm starting with an '04 roller.
Image

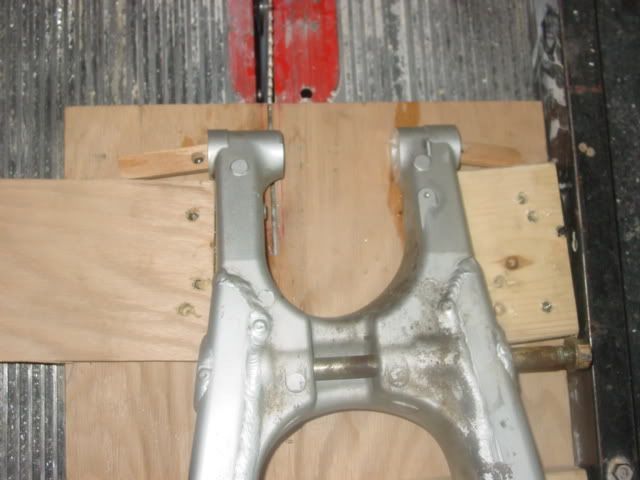
I took a different approach to cutting the swing arm. Since it is more likely that someone will have a table saw over a mill, I thought it may be of interest to share how I used my table saw. A decent carbide tipped blade will cut aluminum with no problem. The aluminum you are cutting on the swing arm isn't that thick, so this cut very easily. Big picture is that you need to build a 'sled' that will allow you to feed the swing arm through the table saw blade.

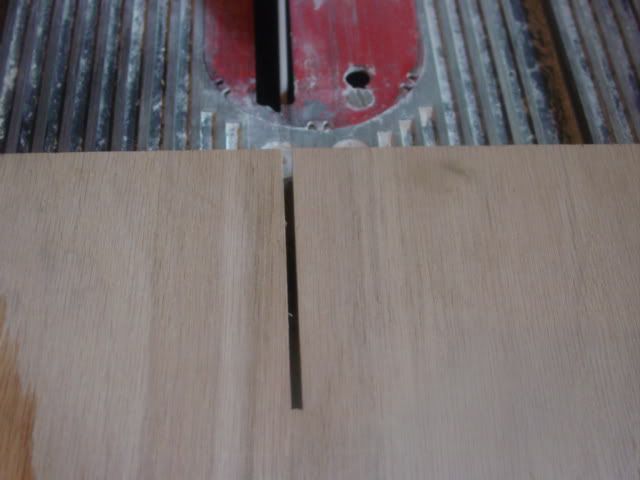
I first set the fence at an arbitrary distance from the blade and made a small cut. I tried to put the cut near the center of the plywood.
Image

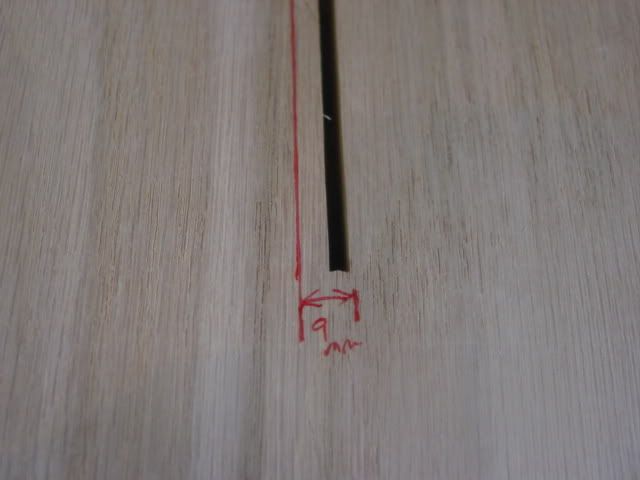
From this point on, you can't move the fence. After determining how much material needs to be removed, you mark a line parallel to the original cut that equals the amount of aluminum that needs to be removed.
Image

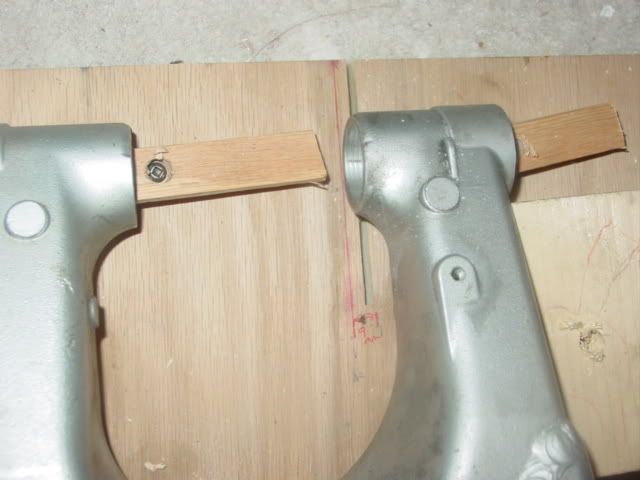
Then you need to do two things with the next step. You need to align the inside edge of the swing arm that you are going to cut so that it is parallel with the line you made. I put a straightedge against the swing arm and aligned the straightedge to the line. That is going to be more accurate than eye balling it. Once you have the swing arm lined up with the cut, you need to use blocks of wood to hold the swing arm in place so it doesn't move during the cut.
Image
Image

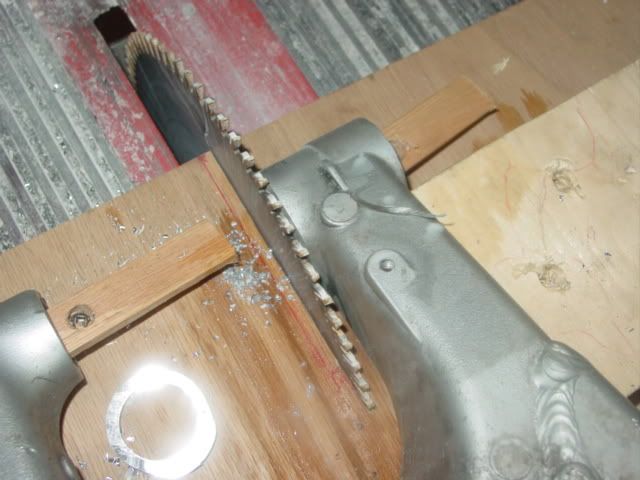
Then it is time to make the cut. You just take your 'sled' and slide the edge of the plywood against the fence to make the cut.
Image
Image

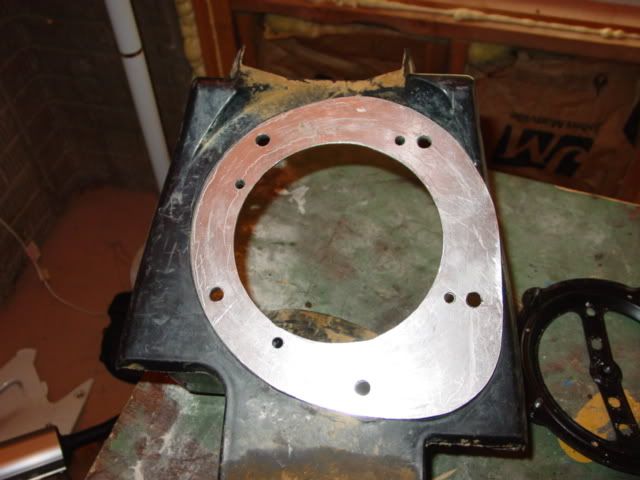
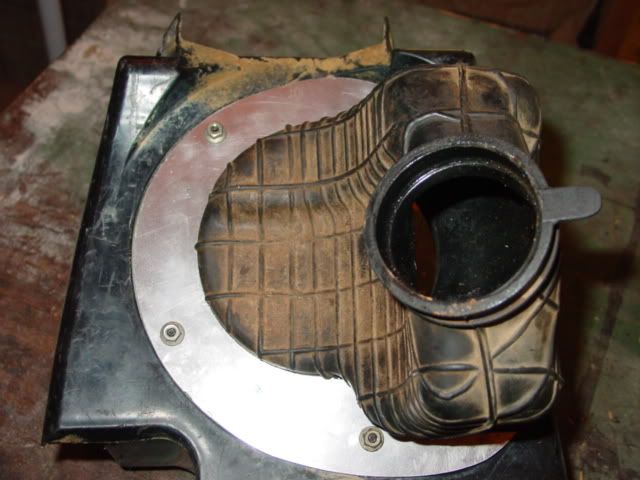
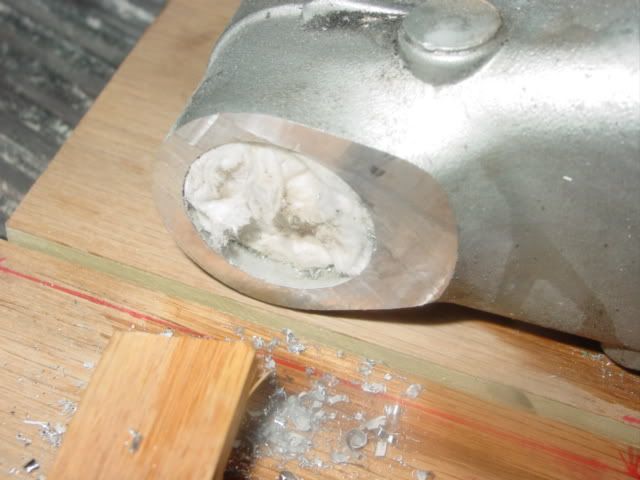
Here is a picture of one of the cuts. I didn't use my best blade (or my best table saw), so this one had some wobble to it and left some teeth marks. It didn't take long to sand them out.
Image

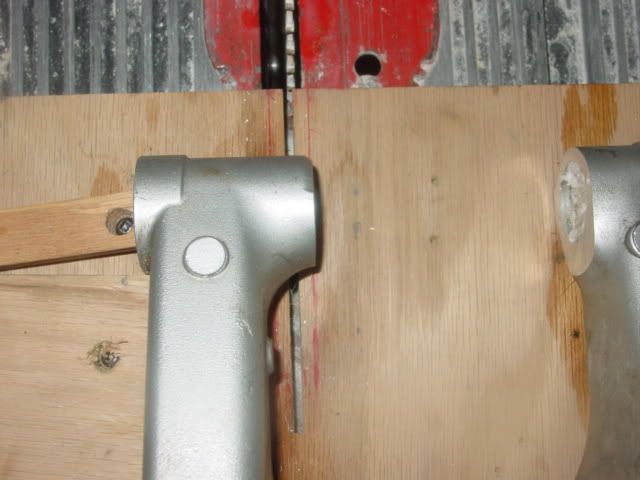
When it is time to cut the other side, you make a new reference line and repeat the process of blocking the swing arm into place.
Image

Cutting the swing arm bushings to the correct length took a lot longer and the amount you cutoff is far more critical than the amount of material you take off the swing arm.

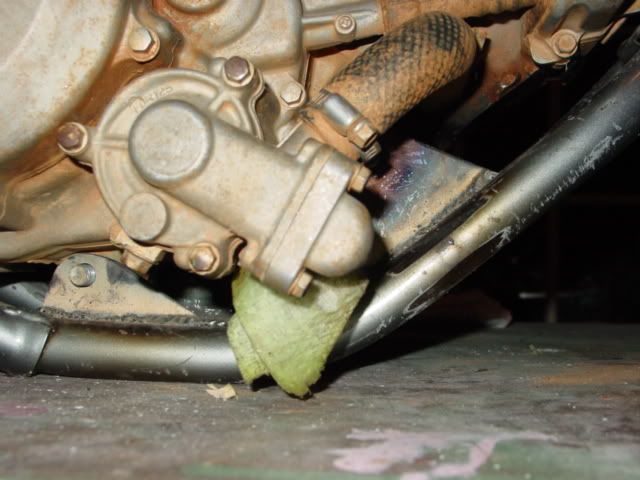
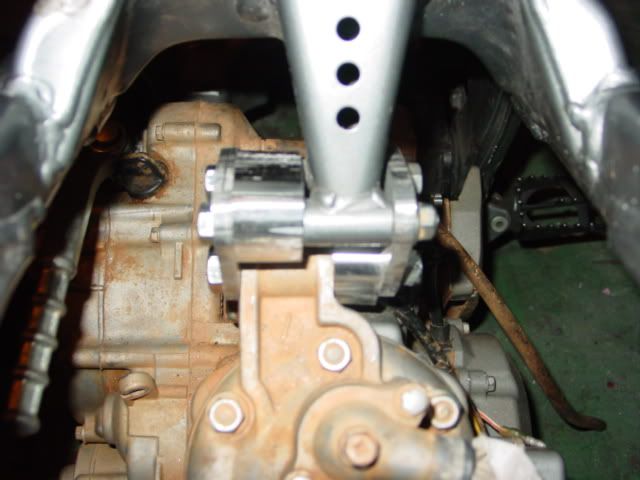
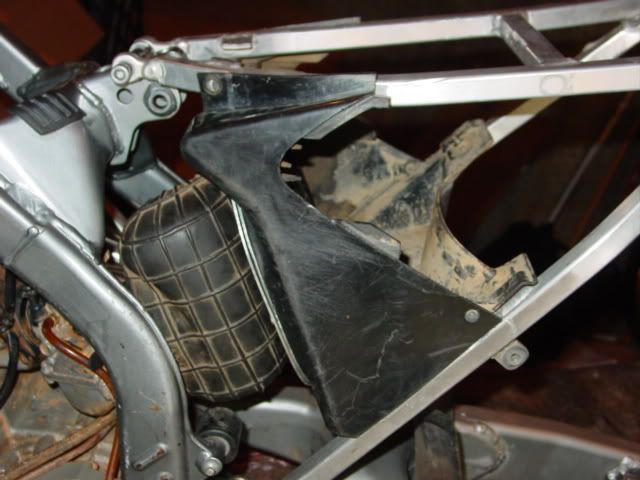
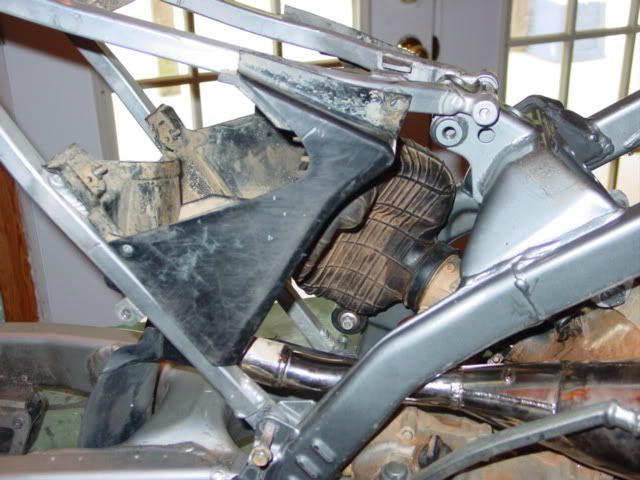
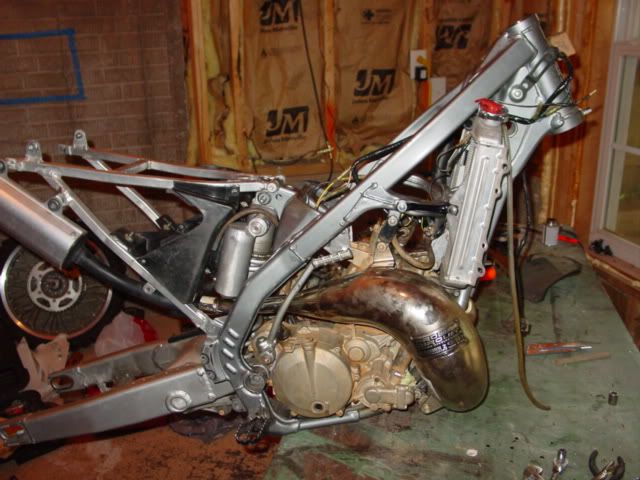
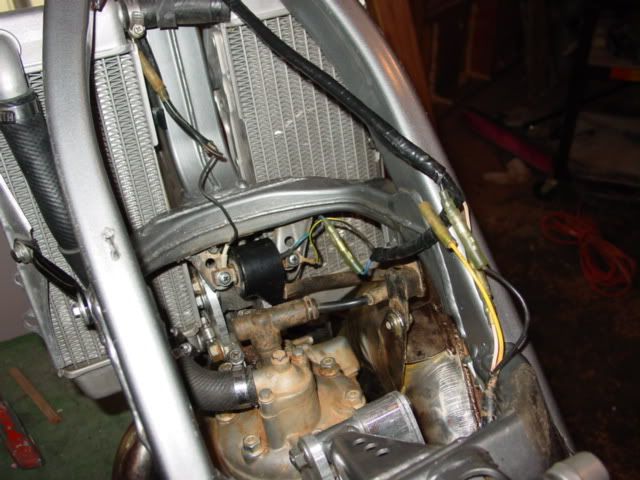
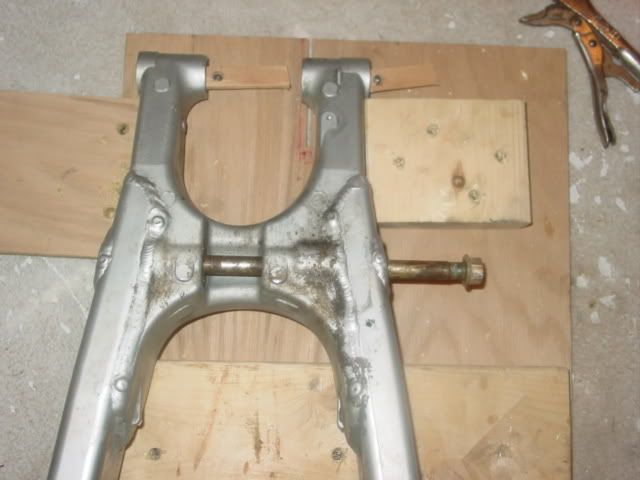
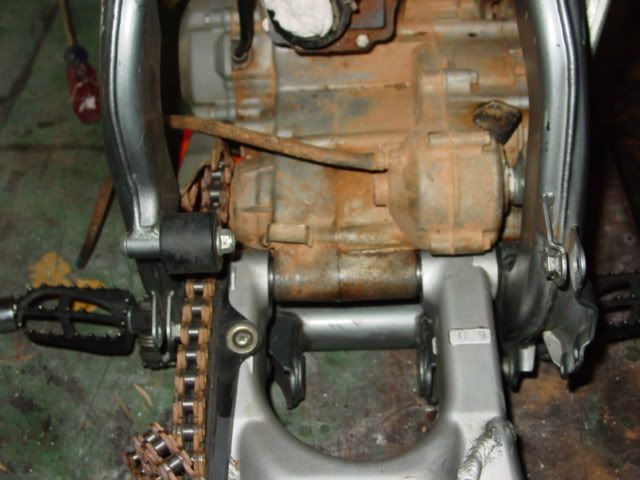
Here is the engine & swing arm in the frame. I've got the engine propped in place to check for clearances, no mounts have been welded in place yet.
Image


Image

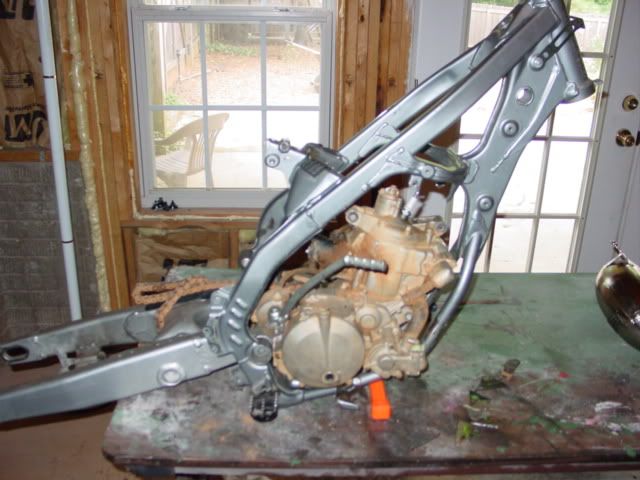
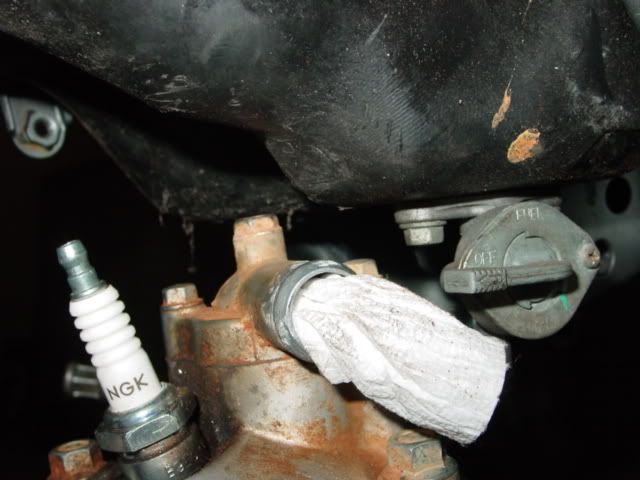
Lots of room between the head and the bottom of the tank.
Image

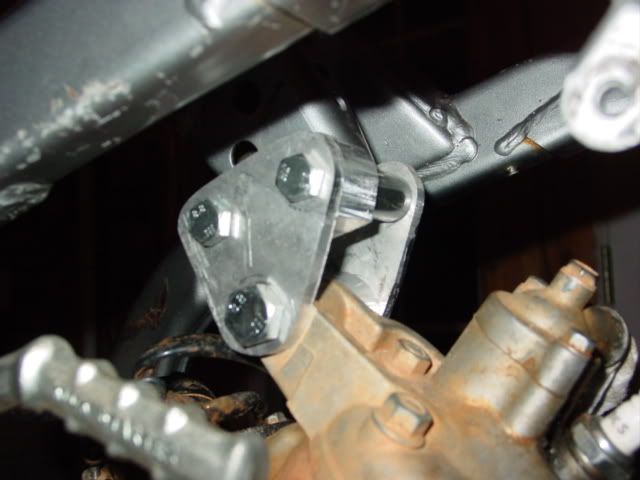
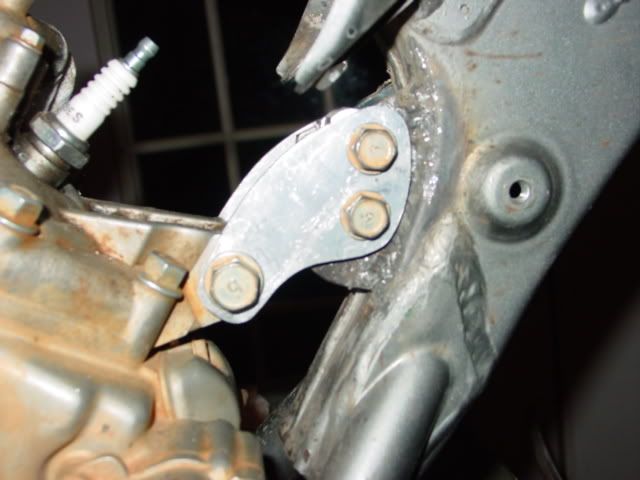
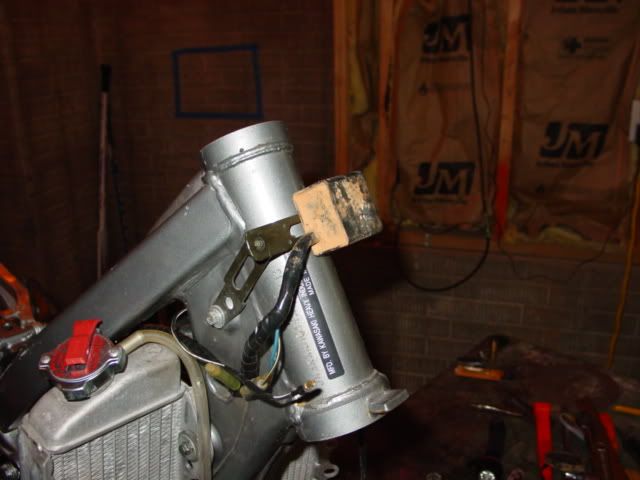
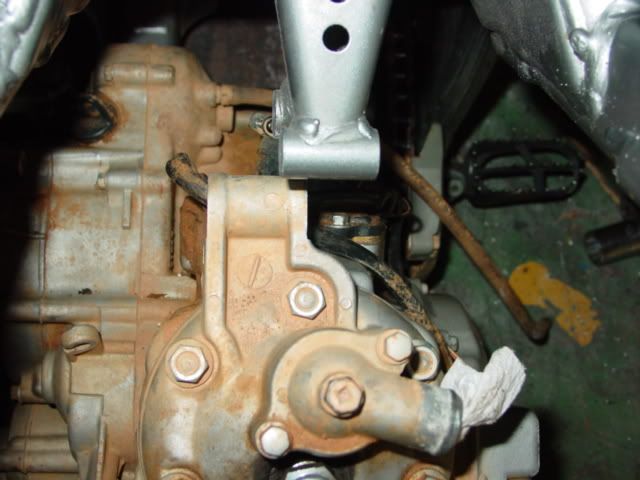
Here is how the frame bracket and head line up. I haven't figured out yet if I want to move the bracket or try to make an offset plate to connect the two.
Image

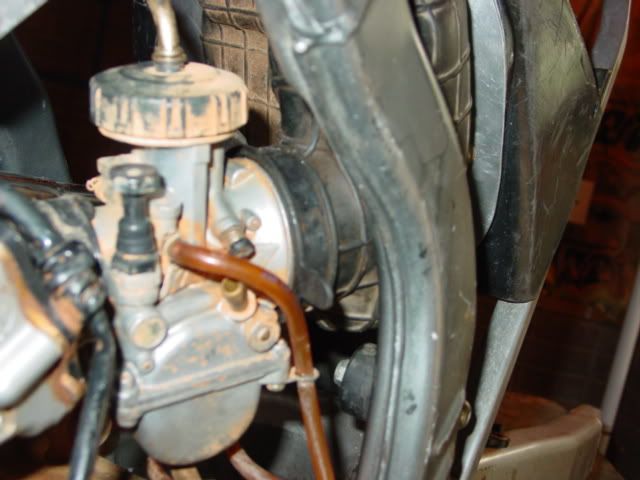
The '97 KDX 200 I bought had an FMF Fatty pipe with it. The Fatty pipe wasn't even close to fitting the KX frame. I bought an PC II pipe and it has more than enough room, no need to dent the pipe.

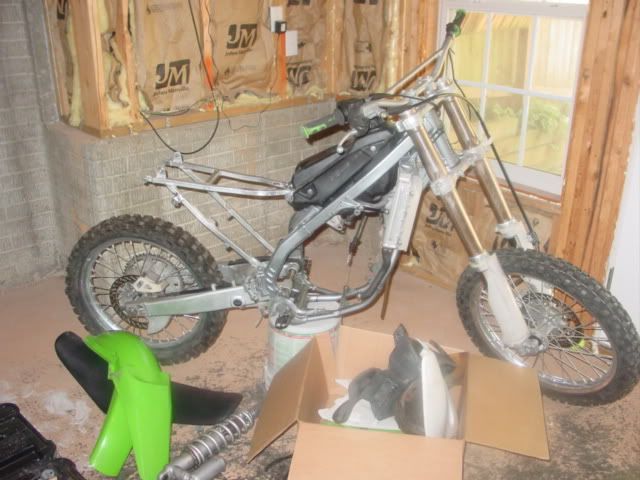
I'll post some more pictures as I get further along.
User avatar
m0rie
Supporting Member I
Supporting Member I
Posts: 2220
Joined: 10:25 pm Nov 29 2004
Country:
Location: Crescent City, CA

Post by m0rie »

Looking good! Keep the pics coming!
1989 KDX 200
2007 TTR-50E
SVandal
Member
Posts: 187
Joined: 08:23 pm Mar 19 2008
Country:

Post by SVandal »

cool idea. Never thought of doing that one. Nice quick mill.
User avatar
Tedh98
Supporting Member II
Posts: 1576
Joined: 01:08 pm Mar 20 2009
Country:
Location: Atlanta, Georgia
Contact:

Post by Tedh98 »

I've finally got the engine bolted into the frame. Here are the lower and upper mounts.
Image

I decided not to move the rear mount because I'd like to get an oversize tank someday and didn't want to risk putting it in a location that would get in the way of the tank. So I made a couple of new brackets and some spacers to match the mount to the rear of the head.
Image

Image

I have plenty of room at the front of the engine, so I kept the front head bracket and added some mounts to the frame. New aluminum brackets bolt things together.
Image

The KX ignition coil is wider than the KDX, so I cut off one of the mounts and moved it over so I could keep the coil in the stock location.
Image

Once I find a silencer, I'll be able to put the pipe in the correct location and weld in the pipe brackets. Hopefully I have some more pictures soon.
User avatar
L8 Apex
Gold Member
Gold Member
Posts: 34
Joined: 08:16 am Apr 08 2009
Country:
Location: Bellbrook, OH

Post by L8 Apex »

Very nice. Keep the pics and updates coming. My build is put on hold as summer house-projects have taken over, so living vicariously will have to do. :cry: :grin:
1987 KDX 200 (one owner (me), surprisingly pristine)
also buying parts for an '05 KX/KDX hybrid
SVandal
Member
Posts: 187
Joined: 08:23 pm Mar 19 2008
Country:

Post by SVandal »

Looking good! Its amazing what you can do with these things and how stock they look. One of my friends figured a hybrid would be some kinda kluge looking bike when I was done and was impressed that it didn't look noticeably different than the stock Honda (other than the Kawasaki engine). Keep us updated!
red_eye_righley
Member
Posts: 31
Joined: 10:23 am Jun 09 2009
Country:

Post by red_eye_righley »

Nice bike TED, You have me subscribed now. Still looking for a YZ125 or KX125 to do this with! I am having a hard time finding a roller for the later generation of either bike!!!! I want to build a HS and enduro bike to be better than my current KTM200 EXC (older model so shouldnt be too hard), the newer 200's IMO are really nice but a well dialled KXD200 with the right stuff and setup is going to be competitive, comeon - someone seize your engine.... KX125 jetting is not supposed to be according to the manual - raise your needle clip all the way, drop 4 jet sizes on the MJ :twisted: :wink:

Oh, before I forget - guys, great forum, great reads (I have been reading and re-reading every thread on here for the last few weeks!!!! :prayer: )
User avatar
Tedh98
Supporting Member II
Posts: 1576
Joined: 01:08 pm Mar 20 2009
Country:
Location: Atlanta, Georgia
Contact:

Post by Tedh98 »

I spent today working on the air box. From everything I've read, it seems most people use the entire KX air box & intake boot. Then they have to deal with the gap that is created from the KDX carb being a smaller diameter than the KX carb where the intake boot hooks up.

I think I’ve come up with something different by using the KX airbox and the KDX intake boot.

I started with the KX air box and the air filter frame.
Image

Then out of some 1/8 inch aluminum, I made a plate that covered the KX air box. I made the diameter of the hole the same as what is in the KDX air box.
Image

The next step was making another aluminum plate that would fit over the KDX air boot. I made both plates at the same time and drilled the holes with the plates stacked together for the air filter frame bolts.
Image

Image

With everything bolted together, this is what my new air box looks like.
Image

The next pictures are of the air box on the bike and one picture of the boot hooked up to the carb.
Image

Image

Image

Once I get the air box cleaned up, I'll put it back together one last time and use some RTV to make sure everything seals up OK.
User avatar
m0rie
Supporting Member I
Supporting Member I
Posts: 2220
Joined: 10:25 pm Nov 29 2004
Country:
Location: Crescent City, CA

Post by m0rie »

A nice clean solution. With some RTV in there it should be perfect!
1989 KDX 200
2007 TTR-50E
rdsrf
Member
Posts: 112
Joined: 04:58 am Dec 03 2007
Country:
Location: Honolulu, HI

Post by rdsrf »

>|<>QBB<
m0rie wrote:A nice clean solution. With some RTV in there it should be perfect!
+1 for that statement!

Very, very nice job! When I build one of these I'll use the same methods.

Did you use a jig saw to cut it out?
User avatar
fuzzy
KDXRider.net
KDXRider.net
Posts: 3437
Joined: 01:29 pm Jun 18 2003
Country:
Location: Fredneck, MD

Post by fuzzy »

Awesome!!
The KX ignition coil is wider than the KDX
I'd like to see someone try the KX coil w/ the rest of the KDX electrics....Me thinks it could be a 'better' coil, and resistance should be the same. The KX coil functions fine of course, but a hotter spark would be nice if it turns out that way. Could mean a 'spoo' solution.
'91 KDX 200 Project $300 KDX
'95 KDX 200 Project $600 KDX
'94 WR 250 Always a project
User avatar
Tedh98
Supporting Member II
Posts: 1576
Joined: 01:08 pm Mar 20 2009
Country:
Location: Atlanta, Georgia
Contact:

Post by Tedh98 »

Did you use a jig saw to cut it out?
I took my time with a jig saw and cut out the 1st plate. I then cleaned it up with the belt sander.

For the 2nd plate, I used the jig saw for the rough cut. I then used the 1st plate as my 'template' and used my router with a bearing bit to make the 2nd plate an exact copy.

I did something similar for the two holes I had to make. I rough cut them with the jig saw and then made wood templates to use with the router for the final openings.

Using the router took a little longer, but I have such a difficult time cutting decent circles with the jig saw.
red_eye_righley
Member
Posts: 31
Joined: 10:23 am Jun 09 2009
Country:

Post by red_eye_righley »

Looking good Ted!!!! :supz: Keep the pics coming.
Wobbly
Member
Posts: 4
Joined: 05:19 pm Jul 06 2009
Country:

Post by Wobbly »

Love your work :)
zz3gmc
Member
Posts: 124
Joined: 09:02 pm Jun 28 2009
Country:
Location: Pemberton NJ

Post by zz3gmc »

The airbox looks great! I was doing the exact same plate adaptors for my 04 KX250/500 hybrid. I have the one plate made already but abandoned it and went with another way. I really like how yours came out and may redo mine.
User avatar
canyncarvr
Gold Member
Gold Member
Posts: 6943
Joined: 01:07 pm Nov 05 2004
Country: US
Location: The Mythical State of Jefferson

Post by canyncarvr »

Impressive fit!!

You have motor mounts pictured first, so I presume they were done first? How did you manage it such that the airbox adapter plates resulted in such a perfect fit to the upstream carb throat?

And, what happens to the KDX plenum lip that gets squeezed between the two aluminum pieces? The plates look to be 'together'. What happened to the lip?


The clamp seat to the carb intake is perfect!

Good job!!!

Consider the source
Using a perceived level of knowledge to boost my self worth.
Non impediti ratione cogitationis

bike profile: !clicky!
User avatar
skipro3
Gold Member
Gold Member
Posts: 4329
Joined: 11:58 pm Nov 04 2004
Country:
Location: BANNED FOR LIFE!!
Contact:

Post by skipro3 »

Also, have you checked the shock clearance to the boot? I'd attach AND swing that swing arm through a full motion to be sure nothing rubs the boot.
Jerry

I'd rather be a smartass like carvr, than a dumbass like.... well, you fill in the blank!
User avatar
Tedh98
Supporting Member II
Posts: 1576
Joined: 01:08 pm Mar 20 2009
Country:
Location: Atlanta, Georgia
Contact:

Post by Tedh98 »

I finished a slightly different approach to mounting the KDX boot to the KX airbox. I'll put that information into a separate post sometime next week.

I was able to use the stock upper pipe hanger and only had to weld on a new bottom mount. With all of the major components bolted up, I believe I'm done with fabrication.

Image

Image

I put the electronics in the KX locations, so I had to unwrap the KDX wiring harness, cut, solder and tape things back up to fit the KX frame.

Image

Image

Unless I'm overlooking something, I think it is time to take everything apart, paint the frame, clean-up the engine and other parts and put it all back together.

I'm sure it will be a few weeks, but I'll post final pictures once I get it all back together.
red_eye_righley
Member
Posts: 31
Joined: 10:23 am Jun 09 2009
Country:

Post by red_eye_righley »

Looking nice Ted
User avatar
Tedh98
Supporting Member II
Posts: 1576
Joined: 01:08 pm Mar 20 2009
Country:
Location: Atlanta, Georgia
Contact:

Post by Tedh98 »

As with all my projects, it has taken me longer than I planned, but I'm almost there. The last thing that is holding me up is the clutch cable. The KDX cable is just a little too short and the KX cable just won't work. I've got a cable for an '04 RM 250 coming in the mail, it should be here Monday.

I did put the exhaust on and the engine started on the 2nd kick! I was a little worried I screwed something up when I re-did the wiring harness.

As long as the new clutch cable works, I should have finished pictures early next week.
Post Reply